3 Best Aquarium-Safe Silicone Sealants for Repairs

Disclosure: Aquarium Hunter may earn a commission from qualifying purchases made through links on this page, at no extra cost to you.

Aquarium silicone has one unusually important job: it must hold a watertight bond without introducing ingredients that could harm aquatic life. For that reason, this guide now recommends only sealants whose manufacturers specifically describe them for aquarium use—not general-purpose bathroom, automotive or marine products.

Short answer: ASI 509 is our best overall choice for substantial glass-aquarium work; Aqueon is the easiest small-tube option for minor repairs; Marineland is a practical alternative for ornaments and small glass repairs. Always follow the label, allow a full cure, and water-test before returning livestock.

Quick comparison

Product Best for Color/format
ASI 509 Aquarium Sealant Larger glass repairs and builds Clear or black; cartridge
Aqueon Silicone Aquarium Sealant Small repairs and first-time users Clear or black; tube/cartridge
Marineland Silicone Sealant Small leaks and ornaments Clear; squeeze tube

The best aquarium-safe silicone sealants

1. ASI 509 Aquarium Sealant — Best overall
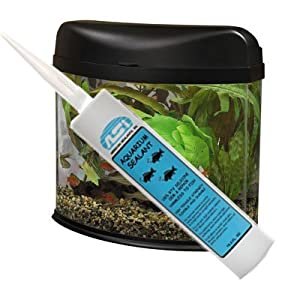
ASI 509 clear aquarium silicone sealant

ASI 509 is the strongest all-round recommendation here because it is made specifically for aquarium manufacture and repair. The manufacturer describes it as a one-part RTV silicone suitable for fresh- and saltwater aquariums, with strong adhesion to glass and a non-slump consistency that helps on vertical seams.

It is available in clear and black. Clear is less visually prominent on an existing tank, while black can suit aquariums already built with black seams. ASI says the material typically skins and cures progressively, but recommends allowing a full seven days before strength testing. That conservative wait is sensible for an aquarium: “dry to the touch” is not the same as fully cured through the bead.

  • Pros: aquarium-specific formulation; suitable for fresh or salt water; clear and black options; useful cartridge size.
  • Cons: longer wait before testing; a caulking gun and careful technique are helpful; not a remedy for cracked glass or uncertain structural damage.

Check price on Amazon


2. Aqueon Silicone Aquarium Sealant — Best for small repairs
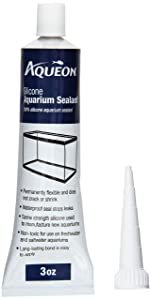
Aqueon silicone aquarium sealant

Aqueon’s sealant is a convenient choice when you need a smaller amount. Aqueon states that it is 100% silicone, waterproof, permanently flexible and non-toxic to freshwater and saltwater fish after proper curing. It is sold in clear and black and in several sizes, so you can match the format to the job.

The squeeze tubes are easier to manage for a short interior bead or an ornament repair than a full cartridge. For a long seam, however, a cartridge provides better flow control. Check the current package instructions for surface preparation and cure time; do not rely on an old online estimate.

  • Pros: aquarium-labelled; accessible tube sizes; clear and black options; permanently flexible.
  • Cons: small tubes are inefficient for long seams; opened tubes may be difficult to store; structural repairs still require expert judgment.

Check price on Amazon


3. Marineland Silicone Sealant — Best compact alternative

Marineland clear silicone aquarium sealant

Marineland describes this as a 100% clear silicone rubber sealant for repairing leaking aquariums and broken ornaments. Its compact squeeze-tube format is useful for modest jobs where buying a large cartridge would create waste.

Because it is a small tube, it is not our first choice for rebuilding a long seam. It is best reserved for repairs that are genuinely minor and non-structural. As with every sealant here, the aquarium must be empty, clean and completely dry before application, then left for the label’s full cure period.

  • Pros: explicitly intended for aquarium repair; compact and convenient; clear finish.
  • Cons: limited quantity; harder to produce a consistent long bead; not a safe fix for damaged glass.

Check price on Amazon

What makes silicone aquarium-safe?

“100% silicone” is not enough by itself. Look for a current manufacturer statement that the exact product is intended for aquariums or safe for aquatic life after curing. Avoid kitchen-and-bath caulks marketed for mold or mildew resistance, products containing biocides, automotive gasket makers, thread lockers, and polyurethane marine adhesives such as 3M 5200 unless the aquarium manufacturer explicitly specifies them.

Product names and formulas can change. Read the exact label and technical data for the tube you receive; do not assume that a similarly named variant has the same suitability.

Can you safely reseal the aquarium yourself?

A cosmetic interior bead and a structural seam are not the same thing. Silicone between the glass panes carries the load. If a bottom seam leaks, glass is chipped or cracked, panes have shifted, or you do not know why the seal failed, move the fish to a safe temporary setup and consult an aquarium professional—or replace the tank. Smearing new silicone over an old or wet bead is not a dependable structural repair.

Safer preparation, curing and leak testing

  1. Relocate livestock. Move fish, invertebrates, plants and filter media to a heated, aerated temporary container as appropriate.
  2. Drain, clean and dry. The repair area must be completely dry. Work with good ventilation and follow the product label.
  3. Remove only the failed interior bead. Use a fresh razor carefully on glass and avoid cutting into the structural silicone between panes. Wear cut-resistant gloves and eye protection.
  4. Remove residue. Follow the sealant manufacturer’s cleaning instructions. Do not sand aquarium glass or use a heat gun on a tank.
  5. Apply one continuous bead. Tool it as directed while fresh, without touching it with bare skin.
  6. Allow the full cure. Cure time changes with bead thickness, humidity and temperature. Use the longest applicable manufacturer instruction; ASI 509 recommends seven days before testing.
  7. Water-test safely. Fill the aquarium in a garage, outdoors or another area where a leak will not cause damage. Leave it full for at least 24 hours while inspecting every seam.
  8. Re-establish the system. Confirm temperature and water parameters before returning livestock. If the filter was offline, protect beneficial bacteria and check the aquarium nitrogen cycle.

Frequently asked questions

Can aquarium silicone cure underwater?

No. These products need clean, dry surfaces and adequate air exposure to cure. Never attempt an underwater emergency patch.

Is silicone safe as soon as it feels dry?

No. A surface skin can form well before the centre of the bead has cured. Wait for the full label-specified cure period before water testing.

Can silicone repair cracked aquarium glass?

Silicone does not restore the strength of cracked glass. Empty the tank and seek professional advice or replace the aquarium.

Will new silicone stick to old silicone?

Not reliably enough for a leak repair. New silicone bonds best to properly prepared glass, not to cured silicone residue.

Verdict

ASI 509 is the best overall choice when you need an aquarium-specific cartridge and can allow a conservative cure. Aqueon is the most convenient for small jobs, while Marineland is a useful compact alternative. Whichever you choose, correct diagnosis and preparation matter more than brand: never gamble with a compromised structural seam.

4 Best HOB Protein Skimmers for Saltwater Aquariums

4 Best HOB Protein Skimmers for Saltwater Aquariums

A hang-on-back protein skimmer is useful when a saltwater aquarium has no sump or cabinet space for an in-sump model. It mixes air and water to create foam that carries dissolved organic compounds into a collection cup before some of that material breaks down. A skimmer supports filtration, but it does not replace water changes, biological filtration or sensible feeding.

Our top pick is the AquaMaxx HOB-1.5 for its narrow profile, current manufacturer support and realistic bioload-based ratings. The Reef Octopus Classic 100-HOB suits aquarists who want a larger external-pump design, while the Coralife Super Skimmer offers flexible hang-on or in-sump installation.

Disclosure: As an Amazon Associate, Aquarium Hunter earns from qualifying purchases.

Quick comparison

Skimmer Best for Important fit detail
AquaMaxx HOB-1.5 Best overall HOB skimmer About 3.5 inches front-to-back; 4 inches needed above the cup
Reef Octopus Classic 100-HOB Larger systems and external pump layout Check rear clearance and the wet pump section
Coralife Super Skimmer 65 Flexible HOB or in-sump use Visible pump and bubble diffuser require tank space
Bubble Magus QQ1 Nano saltwater aquariums Compact capacity; do not size from tank volume alone

Best HOB protein skimmers reviewed

1. AquaMaxx HOB-1.5 — Best overall

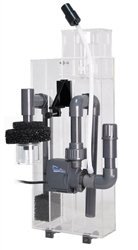
AquaMaxx HOB-1.5 hang-on-back protein skimmer

The HOB-1.5 is a slim external skimmer driven by an upgraded Sicce-based AquaMaxx SHARK 1.0 pump. AquaMaxx lists the unit at 7.5 × 3.5 × 17 inches, with 11-watt power consumption. It fits rims up to 3/4 inch thick and needs about 4 inches of clearance above the collection cup for removal.

Most useful is the manufacturer’s split rating: up to 75 gallons with a light bioload or 40 gallons with a heavy bioload. That is more informative than a single maximum-volume claim. A heavily stocked reef, frequent feeding and nutrient-sensitive corals all justify sizing conservatively.

Advantages: narrow body, realistic bioload guidance, replaceable supported pump and responsive cup adjustment.

Limitations: premium price, substantial height and mandatory rear/upper clearance. As with any external skimmer, careful assembly and leak checks are essential.

Check price on Amazon

See manufacturer specifications

2. Reef Octopus Classic 100-HOB — Best external-pump option

Reef Octopus Classic 100-HOB protein skimmer

The Classic 100-HOB uses an Aquatrance AQ-1000S pinwheel pump and an acrylic skimmer body. Reef Octopus lists 8 to 9 watts depending on mains frequency, about 92 GPH maximum water flow and a broad 13- to 105-gallon tank-volume range.

That upper number should not be treated as a promise for every 105-gallon reef. Actual performance depends on bioload, feeding, air draw, salinity, tuning and maintenance. For a heavily stocked aquarium, leave a generous margin rather than selecting solely by the largest number on the box.

Advantages: current manufacturer documentation, efficient purpose-built pump, external HOB format and accessible replacement information.

Limitations: larger and more visually prominent than nano units; installation still places a wet pump section in the aquarium. Measure the complete footprint before ordering.

Check price on Amazon

See manufacturer specifications

3. Coralife Super Skimmer 65 — Best flexible installation

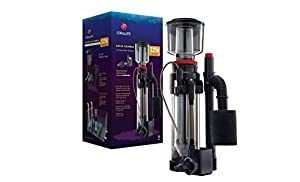
Coralife Super Skimmer 65 with pump

Coralife’s Super Skimmer can be mounted on the aquarium or used in a sump, which makes it useful if the system may later be upgraded. The current Coralife catalogue lists 65-, 125- and 220-gallon models; this review and Amazon link refer specifically to the 65-gallon version.

The design uses a needle-wheel system, wide collection-cup neck and large air intake. The included pump and bubble diffuser occupy visible space when used as a HOB, so measure inside and behind the aquarium. Treat the 65-gallon label as a nominal model designation and size down for a demanding reef.

Advantages: two mounting options and an established product line.

Limitations: more equipment is visible inside the display than with a fully external body; water level, diffuser position and adjustment affect microbubbles and consistency.

Check price on Amazon

4. Bubble Magus QQ1 — Best for nano tanks

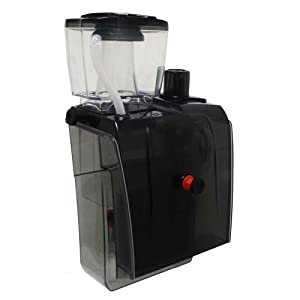
Bubble Magus QQ1 nano HOB protein skimmer

The QQ1 is the compact option in this comparison. Its small body is easier to accommodate on a nano marine aquarium, but small tanks change quickly and leave less room for tuning errors. Confirm the seller’s current dimensions and rating against your rim, lid and water level before ordering.

Advantages: compact HOB format and a lower-capacity choice for systems where larger skimmers will not fit.

Limitations: less headroom for heavy feeding or future stocking, and nano tanks can make fluctuating water levels more obvious. An automatic top-off can improve consistency.

Check price on Amazon

How to choose a HOB protein skimmer

Size for bioload, not just water volume

Manufacturers do not all calculate capacity the same way. A lightly stocked fish-only tank produces a different organic load from a crowded reef fed several times a day. Use the heavy-bioload rating when supplied, or choose below the advertised maximum. Oversizing excessively can also make a skimmer cycle between producing foam and doing very little, so bigger is not automatically better.

Measure the complete installation

Check body height, rear clearance, rim thickness, lid cut-outs and the space needed to lift the cup straight up. Allow room for hoses, the power cord and maintenance access. Make sure the mounting surface is sound and level; a HOB unit full of water is heavier than its dry specification suggests.

Consider water-level stability

Protein skimmers respond to water depth and salinity. Evaporation changes both in a small aquarium. Keep the water level stable, ideally with an automatic top-off, and tune the unit only after salinity and water height are correct.

Noise and microbubbles

Air intake, vibration and splashing all create noise. A silencer helps, but a clean venturi, correctly seated pump and level installation matter too. New skimmers may release microbubbles during break-in. Check assembly, water depth and outlet sponges rather than assuming weeks of bubbles are always normal.

Setup and tuning

  1. Rinse the skimmer components with fresh water. Do not use soap or household cleaners.
  2. Follow the model-specific manual, fit every O-ring and hose correctly, and confirm that the aquarium rim is within the stated limit.
  3. Position a drip loop below the electrical outlet and use a protected aquarium circuit. Keep plugs and connections dry.
  4. Start with the collection cup relatively high so the skimmer produces drier foam and is less likely to overflow.
  5. Watch the system closely after startup, feeding, additives, water changes or placing hands in the tank. These can temporarily collapse or increase foam.
  6. Adjust in small steps and allow time between changes. Darker, drier skimmate usually means a higher cup; paler, wetter skimmate means a lower cup.

A new skimmer often needs a break-in period while manufacturing residues and surface films clear, but there is no universal three-week waiting rule. If it continually overflows, unplug it, check water depth and assembly, clean the cup and air intake, and review the manual.

Maintenance and safety

Empty and rinse the collection cup before waste reaches the air path or drain fitting. Wipe the cup neck regularly because buildup reduces foam rise. Inspect the air line and venturi for salt creep, and clean the pump and impeller on the manufacturer’s schedule.

HOB skimmers carry water outside the aquarium, so leaks deserve immediate attention. Check O-rings, unions, brackets and hoses after every service. Never run a damaged cord or pump. Unplug equipment before putting hands in the water, and arrange cords with drip loops.

A skimmer removes some dissolved organics, but it does not remove every pollutant and cannot replace testing. Continue regular water changes and monitor salinity, temperature, ammonia, nitrate, phosphate and alkalinity as appropriate for the system.

Frequently asked questions

Does every saltwater aquarium need a protein skimmer?

No. Some lightly stocked nano tanks succeed with careful feeding, biological filtration and frequent water changes. A skimmer becomes more valuable as bioload and feeding increase, and it can improve gas exchange and provide a useful margin for reef systems.

Can a protein skimmer be too large?

Yes. A greatly oversized unit may struggle to maintain a stable foam head when there are not enough organics, leading to inconsistent operation. Choose for the real bioload and follow the manufacturer’s light- or heavy-load guidance when available.

Why did my skimmer suddenly overflow?

Common triggers include a changed water level, additives, epoxy, conditioners, oily foods, a blocked air intake or incorrect cup setting. Switch the unit off if overflow threatens the floor or aquarium, identify the cause and restart with the cup raised.

Should I run a protein skimmer all day?

Continuous operation is common and helps maintain aeration. Some aquarists schedule it around feeding or supplements, but frequent on-off cycling can reduce consistency. Follow livestock needs and the instructions for any medication or additive that specifically requires the skimmer to be paused.

Our verdict

The AquaMaxx HOB-1.5 is our best overall recommendation because its current documentation gives clear dimensions, rim clearance and separate light- and heavy-bioload ratings. The Reef Octopus Classic 100-HOB is a strong alternative for a larger external-pump format, while the Coralife Super Skimmer 65 provides flexible mounting. Measure carefully and choose conservatively: fit, maintenance access and actual bioload matter more than the largest advertised gallon number.