How to Breed Betta Fish Responsibly: Complete Guide

How to Breed Betta Fish Step by Step Guide

Breeding bettas is not an easy beginner project. A single spawn can produce dozens or hundreds of fry, and juvenile males may need separate housing as they mature. Before pairing fish, prepare a heated spawning tank, cycled grow-out space, live first foods, multiple backup containers, time for frequent maintenance, and confirmed homes for the offspring.

This guide applies to domestic Betta splendens, a bubble-nesting species. Do not use it for mouthbrooding bettas or assume that two fish sold as bettas belong to the same species.

Before You Breed: Welfare Checklist

  • You can house the male and female separately before and after spawning.
  • You have a cycled grow-out system large enough for the expected fry.
  • You can separate aggressive juvenile males when fighting begins.
  • You have cultures or reliable supplies of suitably small live food before the eggs hatch.
  • You have a humane plan for every healthy offspring, not just the most colorful fish.
  • You will not pair fish with deformity, chronic disease, severe fin damage, or known hereditary problems.
  • An aquatic veterinarian or experienced breeder is available if either adult is injured.

If any point is unresolved, postpone breeding. Producing fish first and searching for space or buyers later creates a serious welfare problem.

Selecting a Healthy Pair

Healthy male and female betta fish selected for breeding

Choose unrelated, vigorous adults with normal body shape, clear eyes, intact scales, good appetite, and no signs of parasites or infection. Quarantine new fish before bringing them near a breeding system. Appearance alone does not prove genetic quality, and purebred is not automatically healthier.

UF/IFAS describes modern domestic bettas as a product of long selective breeding, with male aggression still present. Never keep the pair together unsupervised outside a controlled spawning attempt. The female must have a safe retreat and the keeper must be ready to separate them immediately.

Prepare the Breeding and Grow-Out Systems

Spawning tank

A bare-bottom 5- to 10-gallon aquarium makes eggs and waste easier to see. Use shallow conditioned water, a reliable adjustable heater, a lid to keep the air above the water warm and humid, and a mature air-driven sponge filter set to very gentle flow. Strong surface disturbance can break the bubble nest.

Shallow heated betta breeding tank with gentle sponge filtration and cover

Add floating cover where the male can anchor a nest. Provide dense soft plants or a smooth cave for the female. Avoid sharp plastic, jagged rock, uncovered intakes, and gaps where a fish can become trapped. Test ammonia, nitrite, nitrate, pH, hardness, and temperature before introducing either adult.

Grow-out space

Do not wait for free-swimming fry to arrange grow-out housing. Prepare cycled tanks, gentle filtration, heaters, lids, siphon tubing protected against sucking up fry, and separate equipment for hygiene. UF/IFAS reports that commercial spawns can contain about 300 eggs; home results vary widely, but even a smaller brood quickly outgrows a spawning tank.

Condition the Adults Separately

Feed each adult a varied, high-quality diet for roughly one to two weeks while they remain in separate heated aquariums. A complete betta pellet can be supplemented with small amounts of reputable frozen or cultured live food. Wild-collected live food can introduce pathogens. Do not overfeed in an attempt to force spawning.

A receptive female may develop a rounded abdomen, visible ovipositor, and vertical breeding bars, although coloration varies and these signs are not guarantees. A male may build a bubble nest without a female present. Both fish must still be active and healthy.

Controlled Introduction

  1. Place the male in the prepared spawning tank and allow him to settle.
  2. Place the female behind a secure transparent divider or in a floating clear container with good water exchange.
  3. Observe both fish. Frantic escape attempts, repeated charging, clamped fins, or exhaustion mean the attempt should stop.
  4. Release the female only when the keeper can supervise continuously and separation equipment is ready.
  5. Remove either fish immediately if aggression becomes sustained or injury occurs.

There is no fixed three-day timetable for nest building or spawning. If the pair is incompatible, separate them and reassess rather than leaving the female exposed.

Spawning and Egg Care

Betta pair spawning beneath a bubble nest

During successful courtship, the pair embraces beneath the nest and the female releases eggs. The male collects fallen eggs and places them into the bubbles. Once spawning is complete, remove the female carefully because the male normally guards the nest and may attack her.

Do not automatically medicate the female. Place her in clean, warm, cycled recovery water and monitor appetite, breathing, wounds, and fins. Seek aquatic veterinary advice for significant injury or infection. Methylene blue and antibiotics are not routine preventive tonics.

The male tends the nest and retrieves fallen eggs. OATA notes that eggs commonly hatch within about one day and young may become free-swimming after another two to three days; temperature and conditions affect timing. Remove the male once the fry are free-swimming and no longer dependent on the nest. Do not try to hand-collect and store eggs unless you have specialized experience.

Feeding Betta Fry
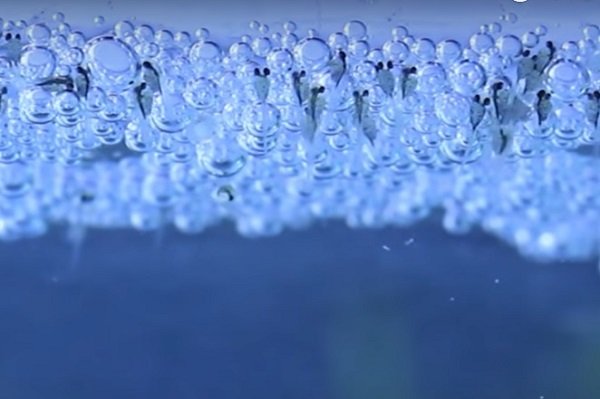
Newly hatched betta fry emerging from a bubble nest

Newly hatched larvae initially use their yolk sacs. Once free-swimming, they need food small enough to swallow. UF/IFAS describes initial live feeds such as infusoria and newly hatched brine shrimp, followed by a transition to suitable commercial flakes or pellets as the fish grow.

Culture first foods before spawning so there is no gap. Feed tiny portions several times daily while preventing uneaten food from fouling the water. A fry that cannot fit a food particle into its mouth cannot benefit from it, regardless of the label.

Water Quality and Growth

Fry need stable warm water, gentle aeration, and zero detectable ammonia and nitrite. Use small, frequent water changes with temperature-matched conditioned water. Siphon through fine airline tubing and check the waste container for fry before discarding water. Do not scrub or replace all mature sponge media.

Increase water depth and space gradually as the fry become stronger. Sort only when necessary to prevent predation, severe size competition, or fighting. UF/IFAS reports that males become distinguishable and require separation at roughly three to four months in commercial culture, but behavior matters more than a calendar. Separate any juvenile that is injuring others.

Health, Biosecurity, and Ethical Rehoming

  • Keep equipment for fry and quarantine systems separate where possible.
  • Do not sell or give away fish that are sick, deformed in a way that compromises welfare, or too young to thrive independently.
  • Do not release unwanted bettas into waterways.
  • Be honest with new keepers about adult care, heating, filtration, aggression, and expected costs.
  • Never kill healthy fry merely because their color or fin shape is commercially undesirable. If population control is necessary, consult an aquatic veterinarian about humane options.

Breeding for profit is unpredictable. Food, power, water, medication, housing, and time usually cost more than beginners expect. Secure prospective homes before spawning and be prepared to keep unsold adults indefinitely.

Common Reasons a Spawn Fails

  • The adults are immature, unhealthy, stressed, or incompatible.
  • Water is unstable or the temperature changes abruptly.
  • Strong flow breaks the bubble nest.
  • The female has no safe retreat or is released too early.
  • First foods are not ready when fry become free-swimming.
  • Overfeeding causes ammonia or bacterial problems.
  • Grow-out space is inadequate and juveniles become crowded.

Frequently Asked Questions

How long do betta eggs take to hatch?

Often about 24 to 48 hours, followed by a short period hanging in the nest before free swimming. Temperature and development vary, so observe rather than relying on an exact deadline.

When should the female be removed?

Remove her after spawning is complete or sooner if aggression is causing injury. The male normally guards the nest.

When should the male be removed?

Remove him when the fry are free-swimming and no longer being returned to the nest. Watch his behavior closely because timing varies.

Can a beginner breed bettas?

A beginner can learn, but should first master cycling, water testing, live-food culture, quarantine, and adult betta care. The project should wait until space and homes for a large brood are secured.

Final Advice

Successful betta breeding begins with responsibility, not pairing the adults. Prepare every tank, food culture, backup container, and rehoming plan first. Supervise introductions, separate the female after spawning, remove the male at the free-swimming stage, and maintain exceptionally stable fry water.

Continue with our guides to betta tank setup, safe betta feeding, and gentle filtration.

How Fast Do Koi Grow? Growth Rate and Healthy Development

How Fast do Koi Grow

Koi grow fastest when they are young, but there is no reliable inches-per-month rule. Genetics, age, water temperature, nutrition, stocking density, water quality, health, and the length of the growing season all affect the result. A healthy juvenile may add several inches during a favorable first growing season, while an older koi may grow slowly even in an excellent pond.

The goal should not be to force rapid growth. It should be to provide enough space, clean oxygen-rich water, appropriate food, and steady seasonal care so each koi can reach its natural potential without compromising its health.

Young koi swimming together in a spacious outdoor pond
Young koi can grow quickly when water quality, nutrition, oxygen, and swimming space are appropriate.

How Fast Do Koi Grow?

Koi growth is uneven rather than linear. Juveniles generally devote more energy to body growth, while growth slows as the fish matures. Warm seasons usually bring more feeding and growth; cool seasons bring reduced appetite and activity. Two koi bought at the same size can therefore end a year at very different lengths.

For planning purposes, expect a small koi to become a large, heavy-bodied pond fish. Many well-kept adult koi reach roughly 20–30 inches, although genetics and conditions produce substantial variation. Exceptional common carp records are much larger, but they are not a sensible expectation for the average ornamental koi. FishBase reports a maximum published total length of 120 cm for Cyprinus carpio, the species from which koi were developed.

Life stage Typical growth pattern What matters most
Fry and small juveniles Fastest relative growth, but highly variable Frequent appropriate meals, stable water, oxygen, and protection from competition
Larger juveniles Often strong seasonal growth Pond capacity, filtration, diet, temperature, and genetics
Mature koi Growth usually slows; body condition may continue changing Long-term water quality, balanced nutrition, health, and adequate swimming room

These stages describe a pattern, not a promise. Avoid charts that claim every koi should reach an exact length at a specific age. Breeding line, sex, early nutrition, climate, and prior care can all shift the result.

What Determines a Koi’s Growth Rate?

1. Genetics

Genetics set much of the fish’s potential adult size, body shape, and growth pattern. Good husbandry cannot turn every koi into a jumbo specimen. It can only help the fish express its inherited potential. Butterfly or longfin koi are not reliably miniature koi; their extended fins can make their overall profile look larger.

2. Age

Young koi usually grow faster than mature fish. A slowdown in an older koi can be normal. A sudden halt in a juvenile, especially with weight loss, clamped fins, isolation, sores, or abnormal breathing, deserves closer investigation.

3. Water Temperature and Season

Koi are ectothermic, so water temperature affects metabolism, appetite, digestion, and oxygen demand. Growth commonly increases during a suitable warm season and slows in cold water. Do not heat a pond merely to chase a growth target. Warmer water holds less dissolved oxygen, speeds waste production, and can magnify the consequences of overfeeding or weak filtration.

Match feeding to the actual water temperature, fish behavior, and food manufacturer’s directions. Reduce or stop feeding when the fish are not digesting normally. Avoid abrupt temperature changes.

4. Water Quality and Oxygen

Water quality is more important than any growth supplement. Test ammonia, nitrite, nitrate, pH, and alkalinity, and observe temperature and fish behavior. In an established system, ammonia and nitrite should remain at zero on a hobbyist test kit. Any detectable result requires prompt action: reduce feeding, check filtration and circulation, increase aeration when appropriate, and perform a correctly conditioned water change.

Warm weather, heavy feeding, algae die-offs, medication, crowding, and nighttime plant respiration can all reduce oxygen. Gasping at the surface, gathering near a waterfall, lethargy, or sudden loss of appetite can indicate an urgent water-quality or oxygen problem.

5. Pond Space, Stocking, and Filtration

Koi do not simply “grow to the size of the container.” Inadequate housing can suppress growth through chronic stress, competition, poor water quality, limited swimming room, and disease—not through a harmless built-in size limit.

No single gallons-per-koi rule works for every pond. Usable swimming dimensions, depth, adult fish size, total biomass, filter capacity, turnover, oxygenation, climate, maintenance, and emergency backup all matter. Plan for adult koi from the beginning, not the size displayed at the store. Ordinary home aquariums are temporary housing for juveniles, not an appropriate permanent destination for adult koi. See Can Koi Live in a Fish Tank? for a fuller explanation.

6. Nutrition

Use a reputable food formulated for koi and suitable for the current season and fish size. The diet should be nutritionally complete, fresh, stored dry, and offered in pieces the fish can swallow easily. Several controlled meals may suit growing juveniles during an appropriate warm season, but the total amount must not leave uneaten food or overwhelm filtration.

More food does not automatically mean more healthy growth. Overfeeding increases feces, dissolved waste, oxygen demand, and the risk of poor body condition. Remove uneaten food and adjust the ration when appetite changes.

7. Health, Parasites, and Competition

Disease, parasites, injury, chronic stress, and bullying can all reduce growth. Watch each fish at feeding time. A koi that repeatedly misses meals may be ill, visually impaired, intimidated, or unable to compete. Quarantine new fish before introduction and seek an aquatic veterinarian when disease is suspected rather than treating blindly.

How to Measure Koi Growth Safely

Measure progress over months, not days. Frequent netting and handling can injure fish and create unnecessary stress.

  1. Use photographs when possible. Photograph the koi beside a known reference in a viewing bowl designed for fish.
  2. Wet all equipment. A wet koi sock or soft fish-safe net helps protect the mucus coat.
  3. Support the fish. Never lift a large koi by the fins, mouth, or tail.
  4. Measure total length consistently. Use the same method from the snout to the end of the tail each time.
  5. Record context. Note the date, water temperature, weight if safely available, appetite, and any health issue.

If you are inexperienced with handling large koi, ask a knowledgeable koi keeper or aquatic veterinarian for help. Body condition, behavior, and health are more important than reaching a target number.

Adult koi showing the large body size these pond fish can reach
Plan the pond and filtration for adult koi before purchasing juveniles.

Why Is My Koi Not Growing?

A small adult may simply have modest genetic potential. However, poor growth combined with other changes can signal a problem. Review:

  • ammonia, nitrite, nitrate, pH, alkalinity, temperature, and oxygen;
  • filter maintenance, flow, aeration, and recent power failures;
  • stocking density and whether all fish can reach food;
  • food age, storage, pellet size, and total ration;
  • parasites, ulcers, fin damage, abnormal feces, or weight loss;
  • recent additions and whether they were quarantined;
  • seasonal temperature changes and sudden weather events.

Do not use rapid chemical corrections or unverified medications to solve slow growth. Stabilize water quality first, document the symptoms, and consult an aquatic veterinarian or qualified fish-health professional when the cause is unclear.

Can You Make Koi Grow Faster?

You can remove barriers to healthy growth, but you should not force it. The most useful steps are:

  • provide a spacious, mature pond designed for the adult population;
  • use biological and mechanical filtration sized for the real waste load;
  • maintain strong circulation and aeration, especially during warm weather;
  • test water consistently and respond to trends before they become emergencies;
  • feed a complete koi diet in amounts the system and fish can handle;
  • avoid crowding and ensure shy fish can feed;
  • quarantine new arrivals and act early when illness appears;
  • allow normal seasonal slowing rather than maintaining artificial high growth year-round.

Never restrict space or food to keep koi small. If a pond cannot accommodate the adult fish, arrange responsible rehoming. Do not release koi into natural waterways; ornamental fish can spread disease, disrupt ecosystems, and may be illegal to release.

Frequently Asked Questions

How long does it take a koi to reach full size?

There is no fixed age. Growth is fastest in the early years and then gradually slows, but koi may continue changing in length and body mass for many years. Genetics, climate, diet, water quality, and housing produce wide differences.

Do butterfly koi stay smaller?

No reliable rule says butterfly koi remain small. Longfin koi can become large pond fish, and their extended fins add to their overall dimensions. Plan for an adult koi, not a compact variety.

Will a koi stay small in a small pond?

A small pond may suppress growth through stress and poor conditions, but that is not safe size control. It also increases the risk of ammonia, nitrite, oxygen, temperature, and disease problems.

How big can koi get?

Many adult ornamental koi fall in the 20–30 inch range, with substantial variation. Exceptional carp can be larger. Read Is There a Small Koi Variety? before choosing koi for a limited space.

Does frequent feeding guarantee faster growth?

No. Growth requires an appropriate total diet plus clean water, oxygen, space, health, and suitable temperature. Excess feed can damage water quality and reduce welfare.

Related Koi Guides

References and Further Reading

Can Goldfish Live in Tap Water? Safe Water Guide

Can goldfish live in tap water

Yes, goldfish can live in tap water—but only after it has been made safe for aquarium use. Municipal tap water commonly contains chlorine or chloramine. Both can damage a fish’s gills and skin and can also harm the beneficial bacteria in the aquarium filter.

For most homes, properly conditioned tap water is the simplest and most practical choice. Treat every new batch before it contacts the fish, match its temperature to the aquarium, and test its chemistry rather than assuming all tap water is the same.

Quick method: Fill a clean aquarium-only container, add a conditioner that treats both chlorine and chloramine according to the label and the full volume of new water, bring it close to the tank temperature, then add it during a partial water change.

Goldfish swimming in a clean, filtered aquarium filled with conditioned tap water

Why untreated tap water is unsafe

Water utilities disinfect drinking water to control microorganisms. The concentrations used can be safe for people to drink but harmful to fish because water passes directly across their delicate gills. Chlorine and chloramine can also disrupt the bacterial colony that converts toxic ammonia into nitrite and then nitrate.

Chlorine and chloramine are not interchangeable. Free chlorine may dissipate under some conditions, but chloramine is more persistent and should not be expected to disappear simply because water is left standing. A conditioner labeled for both is the reliable everyday solution.

How to prepare tap water for goldfish

  1. Check your local supply. Your water provider’s quality report may say whether chlorine or chloramine is used. Treatment practices can change, so choose a conditioner that handles both.
  2. Use a clean container. Keep buckets and hoses for aquarium use only. Never use equipment that has held soap, detergent, pesticides, or household cleaners.
  3. Measure the conditioner accurately. Follow the manufacturer’s label. Dose for the amount of tap water being treated unless the product specifically instructs otherwise.
  4. Match the temperature. Bring replacement water close to the aquarium’s temperature before adding it. Avoid a sudden temperature swing.
  5. Add water gradually. During routine care, replace only part of the aquarium water. Pour or pump it in without disturbing the fish or substrate excessively.
  6. Test regularly. In the aquarium, ammonia and nitrite should both remain at 0 ppm. Monitor nitrate, pH, temperature, and, when relevant, hardness and alkalinity.

A suitable aquarium water conditioner works quickly when correctly dosed. More is not automatically better, so do not exceed the label unless the manufacturer explicitly provides an emergency dose for a specific use.

What if untreated tap water was added by mistake?

Act promptly, but stay calm:

  • Add an appropriate chlorine-and-chloramine conditioner according to its emergency or aquarium-volume directions.
  • Increase aeration and surface movement because gill irritation can make breathing difficult.
  • Test free and total chlorine if suitable tests are available, and test ammonia and nitrite because the biofilter may have been affected.
  • Watch for rapid breathing, gasping, lethargy, erratic swimming, excess mucus, cloudy eyes, or red and irritated gills.
  • Contact an aquatic veterinarian if breathing distress is severe or symptoms persist after the water has been made safe.

Do not respond by repeatedly adding untreated replacement water. If a water change is needed, condition the new water first. Avoid adding salt, antibiotics, or other medications unless a specific problem has been diagnosed; none of them neutralizes chlorine or chloramine.

Tap water chemistry still matters

Removing disinfectants is essential, but it is not the whole job. Tap water varies in pH, general hardness (GH), carbonate hardness or alkalinity (KH), nitrate, and dissolved minerals. Goldfish generally cope with a reasonable range better than many delicate species, but they do best when conditions are stable.

Test both the source water and the aquarium. If the pH, hardness, or nitrate level is unusual, investigate before making large changes. A sudden attempt to chase a “perfect” number can be more stressful than a stable, suitable value. If you need to adjust hardness, use a measured method and read our guide to softening aquarium water safely.

Do you need to age tap water?

No, not when you use an effective conditioner as directed. Historically, aquarists left water standing so free chlorine could dissipate. That approach is unreliable for chloramine, which is designed to remain in the water distribution system longer.

Aging water can still help it reach room temperature or release trapped gas, but it should not replace dechlorination. Boiling is also impractical and does not reliably solve chloramine treatment for aquarium volumes.

Is bottled water better for goldfish?

Usually not. Bottled-water chemistry varies by brand and source, and “purified” water may contain very few minerals while spring water may be quite hard. It is expensive for the large, frequent water changes goldfish require, and a label designed for human consumption does not guarantee ideal aquarium chemistry.

If bottled water is used temporarily, test its pH and mineral content and avoid sudden changes from the aquarium’s established chemistry. Properly conditioned tap water is generally more consistent and economical.

Can goldfish live in distilled or reverse-osmosis water?

Not safely as an unmodified long-term water source. Distillation and reverse osmosis remove most dissolved minerals and buffering capacity. Pure water can have unstable chemistry and does not provide the mineral profile expected in a freshwater aquarium.

Reverse-osmosis water can be useful when source water has a specific, confirmed problem, but it should be remineralized or blended under measured conditions. Do not use it merely because it sounds cleaner. Test GH, KH, and pH and make changes gradually.

Can well water be used?

Possibly, but it must be tested. Well water normally lacks municipal chlorine or chloramine, yet it can contain unsuitable levels of iron, copper, nitrate, salts, agricultural contaminants, or dissolved gases. Its pH and hardness may also differ greatly between locations and seasons.

Use a certified laboratory when contamination is possible. Aerate a sample before comparing its pH with the aquarium because dissolved carbon dioxide can make freshly drawn well water read differently. Never assume that water safe for human use is automatically suitable for fish.

What about rainwater?

Rainwater is not automatically clean aquarium water. It may collect air pollution, roofing residues, metals, bird droppings, pesticides, and other contaminants. It is also often low in minerals and buffering, which can make pH unstable. Unless its collection and chemistry are carefully controlled and tested, conditioned tap water is the safer choice for most goldfish keepers.

Goldfish need more than safe source water

Conditioning tap water does not cycle an aquarium or remove the waste goldfish produce. Goldfish are active, heavy-bodied fish with a substantial biological load. They need a spacious enclosure, a mature filter sized for that load, strong gas exchange, and regular partial water changes guided by test results.

Keep ammonia and nitrite at zero, control nitrate with maintenance, and preserve the filter’s bacterial media. Rinse mature media gently in removed aquarium water rather than chlorinated tap water, and never replace all of it at once. For equipment choices, see our guide to aquarium filter media.

A bowl or unfiltered container is not made safe simply by adding conditioner. Without adequate water volume and biological filtration, toxic waste can accumulate quickly.

Frequently asked questions

Can I put a goldfish straight into conditioned tap water?

Conditioning removes disinfectants, but a new aquarium must also complete the nitrogen cycle before fish are added whenever possible. Confirm 0 ppm ammonia and 0 ppm nitrite with a test kit. Match temperature and acclimate the fish carefully.

Should I condition the whole tank or only the new water?

Follow the product label. When water is treated in a separate container, the dose is generally based on that new-water volume. When untreated water is added directly while refilling, some products instruct dosing for the full aquarium volume. The manufacturer’s directions take priority.

Does a household drinking-water filter make tap water safe?

Not necessarily. Different cartridges remove different substances, and performance declines as media is exhausted. Unless the system is validated for the disinfectant in your supply and you can verify the output, use aquarium conditioner and test the water.

What water is best for goldfish?

For most keepers, the best option is stable, tested tap water treated for chlorine and chloramine. The aquarium should be fully cycled, filtered, well oxygenated, and maintained with regular partial water changes.

Key takeaway

Goldfish can thrive in tap water when it is properly conditioned and its chemistry is suitable. Neutralize both chlorine and chloramine, match temperature, test the source and aquarium, and protect the biological filter. Do not rely on standing water, bottled-water marketing, or visual clarity as proof that the water is safe.

This article provides general aquarium-care information. If a fish has severe breathing difficulty, loss of balance, extensive skin or gill damage, or persistent symptoms, consult a veterinarian experienced with aquatic animals.

Baby Snapping Turtle Care: Safety, Housing and Diet

Baby Snapping Turtle

A baby snapping turtle is a wild animal or specialist reptile—not a beginner aquarium pet. The hatchling may be small, but it can grow into a large, powerful, long-lived turtle that requires extensive aquatic housing, heavy-duty filtration, safe handling procedures, and access to a reptile veterinarian.

If you found a healthy baby snapping turtle outdoors, the best response is usually to leave it where it is and keep people and pets away. Do not take it home. If it is visibly injured or in immediate danger, contact a licensed wildlife rehabilitator or local wildlife authority for instructions.

Before considering captive care: identify the species, check local possession and transport laws, confirm that the animal is captive-bred and legally documented, locate an experienced reptile veterinarian, and plan the adult enclosure—not just the hatchling tank.

Young North American snapping turtle resting at the water surface

Identifying a baby snapping turtle

North American snapping turtles (Chelydra serpentina) have a large head, a long flexible neck, strong legs, webbed feet, a relatively small plastron underneath, and a long tail with a saw-toothed upper ridge. Hatchling shells are more strongly ridged than those of older adults.

Alligator snapping turtles belong to the genus Macrochelys. They have a more heavily sculptured shell with three prominent ridges and a worm-like lure on the tongue. Identification matters because adult size, distribution, conservation status, legal protection, and husbandry differ. Use a wildlife agency or qualified reptile professional rather than an image-search guess.

Should you keep a wild hatchling?

No. A wild hatchling belongs in its ecosystem. Taking it can be illegal, removes an animal from the breeding population, exposes the household to parasites and Salmonella, and creates a care commitment that may last for decades.

Do not move a healthy turtle to a pond that seems better, and never release a captive turtle. Relocation can spread disease, place the animal outside its home range, or introduce it where it is not native. If a hatchling is crossing a road and it is safe for you to help, seek local wildlife guidance and move it only in the direction it was already traveling.

Adult size changes everything

A tiny juvenile soon outgrows ordinary aquariums. Wildlife sources commonly report adult North American snapping-turtle carapaces around 8–16 inches, with powerful bodies and long necks adding substantially to the working space required. Alligator snapping turtles can become much larger.

There is no responsible universal “gallons per inch” formula for this animal. The enclosure must allow normal swimming, turning, surfacing, resting, and thermoregulation, while leaving safe clearance from heaters, plumbing, lids, and hands. Large custom tubs, indoor ponds, or legally compliant secure outdoor systems are often more realistic than glass tanks.

Housing priorities

Water depth and access to air

A young turtle must be able to reach the surface easily and rest near it without continuous swimming. Depth should be increased with the animal’s strength and ability, with stable structures that cannot trap or crush it. The enclosure must prevent escape: snapping turtles climb surprisingly well.

Filtration and water quality

Snapping turtles are messy feeders and produce a heavy waste load. Use robust mechanical and biological filtration with protected intakes. Keep ammonia and nitrite at 0 ppm, control nitrate with maintenance, remove uneaten food promptly, and condition tap water for chlorine and chloramine.

Size the system for adult waste production and real flow after media and plumbing losses. A filter advertised for a similarly sized fish aquarium may be inadequate for a large turtle.

Temperature, heat, and UVB

Do not rely on a single generic temperature range. Requirements depend on species, age, health, and origin. Ask a reptile veterinarian for a suitable water and basking-temperature plan and measure both with reliable instruments.

Provide an accessible, stable basking area and species-appropriate UVB when advised. Follow the lamp maker’s distance and replacement directions; ordinary glass and plastic can block UVB. Protect lamps and heaters from water, impact, and the turtle, and use electrical safety devices and drip loops.

Substrate and furnishings

A bare, easy-to-clean bottom may be safest in temporary juvenile housing. If substrate is used, avoid pieces the turtle can swallow and structures that can collapse. Smooth, stable hides and visual cover can reduce stress, but open swimming and turning space must remain.

What baby snapping turtles eat

Snapping turtles are omnivores. Wild juveniles eat small aquatic invertebrates, amphibian larvae, other suitable animal matter, and plant material. In captivity, a quality formulated aquatic-turtle diet can provide a consistent foundation, supplemented with suitable whole foods under veterinary guidance.

Do not feed only meat, fish fillets, dried shrimp, or live feeder fish. Muscle meat alone has an unsuitable calcium-to-phosphorus balance, and wild-caught or feeder animals can introduce parasites and disease. Bread, dairy, processed meat, and seasoned human food are inappropriate.

Food must be appropriately sized. Remove leftovers and monitor growth and body condition rather than feeding every time the turtle begs. See our evidence-based guide to wild and captive snapping-turtle diets.

Feeding frequency and supplements

Young turtles generally eat more frequently than adults, but a rigid schedule is unsafe without considering the species, size, body condition, diet, and water temperature. Follow the formulated food label as an initial guide and have a reptile veterinarian review growth.

Do not add calcium or vitamin supplements by guesswork. Deficiency is harmful, but excessive vitamin A, vitamin D, and minerals can also cause serious disease. UVB, dietary calcium, and temperature work together; one product cannot compensate for poor husbandry.

Can baby snapping turtles live together?

They should generally be housed separately. Competition, biting, food guarding, size differences, and unnoticed injuries make shared housing risky. Fish and other tank mates may be eaten, injured, or introduce disease. Adding fast fish does not make a safe community aquarium.

Safe handling

Handle only when necessary. Even a small turtle can bite, and an adult’s neck reaches much farther than many people expect. Never lift a snapping turtle by the tail because this can injure the spine and soft tissues. Do not use routine handling to try to “tame” it.

Ask a reptile veterinarian or trained wildlife professional to demonstrate a safe method for the identified species and size. Keep hands away from the head and front half of the shell, and never allow children to handle the animal.

Health monitoring

Record weight, appetite, activity, shell condition, water-test results, and measured temperatures. Arrange veterinary care for:

  • open-mouth breathing, nasal discharge, wheezing, or abnormal buoyancy;
  • swollen or closed eyes, mouth lesions, or inability to eat;
  • shell softness, ulcers, wounds, discharge, or foul odor;
  • persistent lethargy, weakness, swelling, or weight loss;
  • suspected ingestion of substrate, fishing tackle, or another foreign object.

Do not force-feed or medicate a hatchling without veterinary direction. If appetite declines, use our guide on responding when a turtle stops eating.

Hygiene and household safety

Turtles can carry Salmonella while appearing healthy. Wash hands with soap and running water after contact with the turtle, its food, water, or equipment. Keep the enclosure and cleaning equipment away from kitchens and food-preparation areas.

Reptiles are a poor fit for households with very young children, older adults, or people with weakened immune systems. Discuss household risk with a healthcare professional and reptile veterinarian.

Long-term planning

Before acquisition, budget for the adult enclosure, high-capacity filtration, water use, drainage, heating, UVB equipment, electricity, structural floor load, veterinary care, and emergency power. Confirm who will care for the turtle during travel and what will happen if the owner moves or can no longer manage it.

If rehoming becomes necessary, contact a licensed reptile rescue, zoo, wildlife agency, or veterinarian. Never release the animal or advertise it without checking local transfer rules.

Frequently asked questions

Can a baby snapping turtle live in a 10-gallon tank?

A very small hatchling may physically fit for brief, closely managed care, but a 10-gallon aquarium is not a responsible long-term plan. Water quality and temperature change quickly in small volumes, and the turtle will outgrow it. Plan the adult system before acquisition.

Do baby snapping turtles need land?

They are highly aquatic but should have an easy, stable route to a dry resting or basking area when the care plan calls for it. The design must prevent trapping and escape.

Are baby snapping turtles aggressive?

Snapping is defensive behavior, especially on land where the turtle cannot retreat easily. A calm juvenile can still bite suddenly. Treat every individual as capable of injury.

Where should I buy one?

First decide whether this specialist animal is appropriate and legal. If so, obtain only a legally documented, captive-bred animal from a transparent source—never a wild turtle. Verify the scientific name and adult requirements before paying.

Key takeaway

A baby snapping turtle is not a miniature version of an easy pet. Its adult size, bite risk, waste production, lifespan, legal status, and enclosure needs demand expert preparation. Leave healthy wild hatchlings where they belong; for legal captive-bred animals, build care around accurate identification, adult-scale planning, measured water quality, balanced nutrition, minimal handling, and reptile-veterinary support.

This article provides general information and does not replace advice from a reptile veterinarian or local wildlife authority.

Ammonia Poisoning in Bettas: Signs, First Aid and Prevention

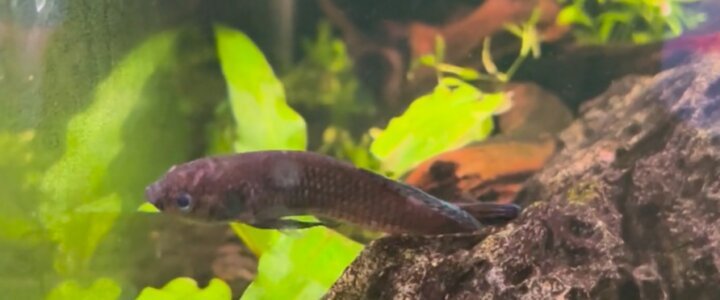
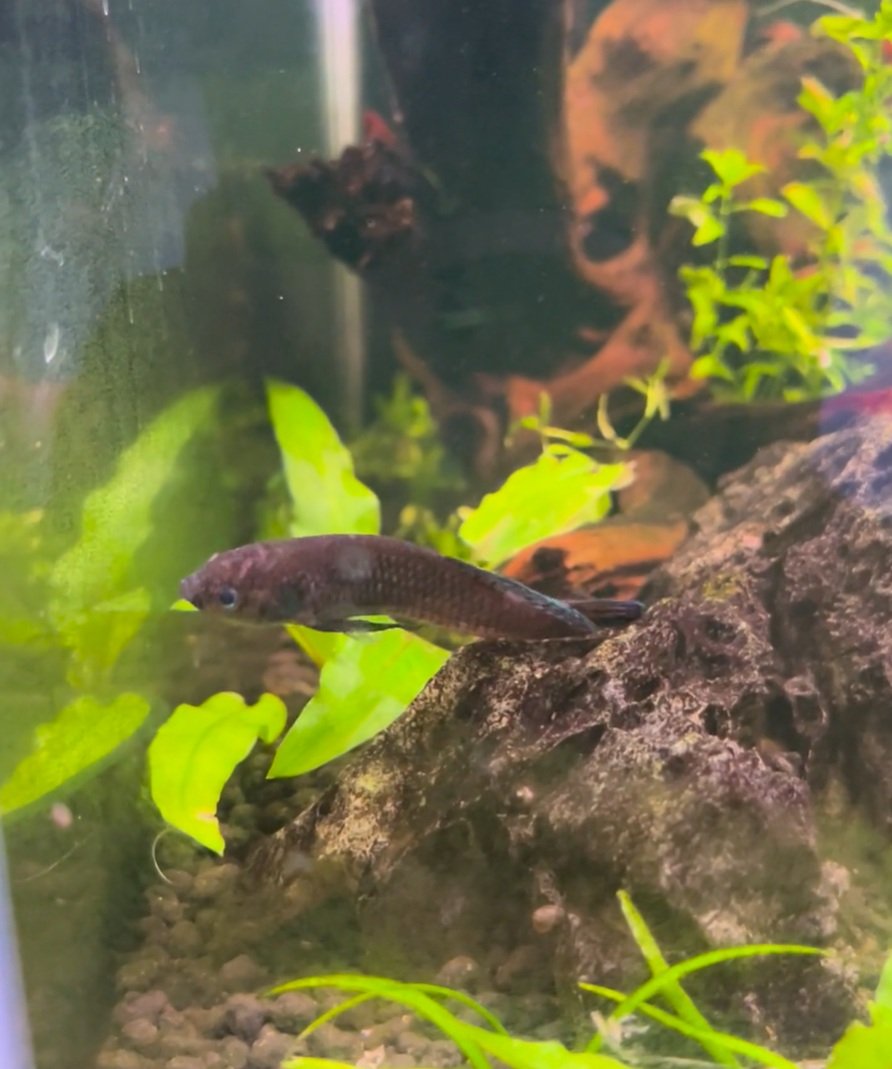
Dark betta fish resting near driftwood in a planted aquarium

Ammonia poisoning in bettas is a water-quality emergency. If a test shows any detectable ammonia, act promptly: change part of the water with conditioned, temperature-matched water, improve aeration, check that the filter is running, and keep testing. Ammonia can injure the gills and skin, but the same symptoms can also occur with nitrite exposure, low oxygen, parasites, or other gill disease.

This guide explains what to do now, how to recognize the warning signs, and how to correct the underlying problem without adding unnecessary medication.

Quick answer: In a healthy, fully cycled betta aquarium, both ammonia and nitrite should test at 0 ppm. Do not wait for cloudy water or visible burns—ammonia is colorless, so a reliable water test is the only way to confirm it.

What to do immediately

  1. Test the water. Check ammonia, nitrite, nitrate, pH, and temperature. Write the results down so you can see whether conditions are improving.
  2. Make a partial water change. Replace some aquarium water with dechlorinated water that is close to the tank’s temperature. If ammonia or nitrite remains detectable, repeat testing and make further partial changes as needed. Avoid sudden, extreme shifts in temperature or pH.
  3. Increase oxygen and circulation. Make sure the filter is operating and the surface is moving. Bettas breathe atmospheric air with their labyrinth organ, but their gills still need safe, oxygenated water.
  4. Remove the source. Siphon out uneaten food, decaying leaves, dead livestock, and obvious waste. Check that no fish or snail is hidden behind decorations.
  5. Pause or reduce feeding briefly. A sick adult betta can usually tolerate a short fast, and less food means less new waste while the biofilter recovers.
  6. Seek veterinary help for severe distress. Contact a veterinarian experienced with fish if the betta is gasping continuously, cannot remain upright, has significant bleeding or tissue damage, or does not improve after the water is made safe.

An ammonia-binding conditioner may temporarily reduce risk when used exactly as its label directs, but it does not remove waste or establish a biological filter. Some total-ammonia tests may continue to register ammonia after a binder is used, so follow the conditioner and test-kit instructions carefully.

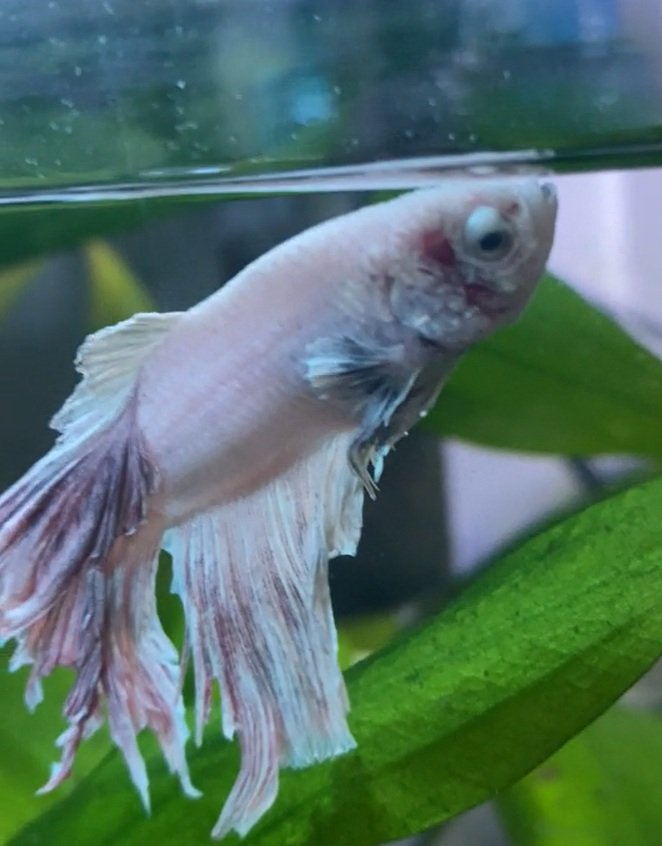
White betta fish with a visibly red and inflamed-looking gill area
Red or inflamed-looking gills can occur with ammonia exposure, but appearance alone cannot confirm the cause.

Signs of ammonia poisoning in a betta

Possible signs include:

  • rapid gill movement, gasping, or spending unusual amounts of time at the surface;
  • red, inflamed, pale, or swollen-looking gills;
  • lethargy, weakness, hiding, or lying on the substrate;
  • clamped fins and reduced appetite;
  • darting, rubbing, or other signs of irritation;
  • excess mucus, dull color, red streaks, or damaged skin in advanced cases.
Dark betta fish resting near driftwood in a planted aquarium
Lethargy or unusual resting can accompany poor water quality, but it is not specific to ammonia poisoning.

These signs are not specific to ammonia. Low dissolved oxygen, nitrite, chlorine or chloramine exposure, temperature stress, and gill infections can look similar. Test the water first and do not assume that a visible mark proves ammonia poisoning.

What ammonia does to fish

Fish release nitrogenous waste, and decomposing food and plant matter add more. In a mature aquarium, beneficial bacteria in the filter convert ammonia into nitrite and then nitrate. A new, damaged, undersized, or overloaded biofilter cannot process waste quickly enough, allowing ammonia to accumulate.

Aquarium tests generally report total ammonia, which includes ionized ammonium (NH4+) and un-ionized ammonia (NH3). The NH3 form is particularly toxic. Its proportion rises as pH and temperature rise, which is why the same total-ammonia reading can pose different risks in different tanks. During an incident, do not raise pH abruptly.

Ammonia irritates and damages gill tissue, making normal oxygen exchange more difficult. Prolonged or severe exposure can also harm skin and internal organs and may leave the fish vulnerable to secondary infection.

Common causes

An uncycled or newly established tank

“New tank syndrome” occurs before enough nitrifying bacteria have colonized the filter. A new aquarium should ideally be cycled without fish, with test results confirming zero ammonia and zero nitrite before a betta is introduced.

A disrupted biological filter

Replacing all filter media, rinsing it under chlorinated tap water, allowing it to dry out, or leaving the filter switched off can destroy much of the bacterial colony. Preserve established media and rinse it gently in removed aquarium water when maintenance is needed.

Too much waste

Overfeeding, overcrowding, decaying plants, and missed maintenance can exceed the filter’s capacity. Feed a measured amount of suitable betta food and remove leftovers rather than adding more because the fish appears interested.

Untreated tap water

Chlorine and chloramine can injure fish and damage beneficial bacteria. Always use an appropriate water conditioner for the full volume of new tap water, following the label.

A dead fish, snail, or large amount of decaying material

Decomposition can create a sudden spike even in an established tank. Remove the material, test immediately, and inspect hidden areas of the aquarium.

Helping a betta recover

Clean, stable water is the foundation of recovery. Keep ammonia and nitrite at zero, maintain a steady betta-appropriate temperature, and provide gentle filtration and good surface movement. Dim lighting and minimize handling while the fish is stressed.

Do not add antibiotics, aquarium salt, antiseptics, or “healing” oils automatically. They do not correct ammonia, and unnecessary treatments can add stress or affect the biofilter. Medication is appropriate only when a specific secondary disease has been identified and the product is suitable for that diagnosis. If injuries are serious or symptoms persist after water quality is corrected, consult an aquatic veterinarian.

A separate hospital container is not always safer: an uncycled container can rapidly accumulate more ammonia. Move the fish only when isolation is genuinely needed and you can provide heated, conditioned, closely monitored water.

If the betta is already in an uncycled tank

Do not simply wait for the cycle to finish while the fish remains in toxic water. Test ammonia and nitrite at least daily, change conditioned water whenever either is detectable, feed sparingly, and keep the filter running around the clock. Seeded filter media from a known healthy aquarium can help establish bacteria, but it does not replace testing.

Continue this careful “fish-in” management until repeated tests show zero ammonia and zero nitrite and nitrate is being produced. Read our guide to betta filtration and safe flow for help choosing a gentle setup.

How to prevent another ammonia spike

  • Fully cycle the aquarium before adding fish whenever possible.
  • Use an adequately sized filter and run it continuously.
  • Test ammonia, nitrite, nitrate, pH, and temperature regularly—not only when the fish looks ill.
  • Make routine partial water changes and remove debris from the substrate.
  • Condition all new tap water before it enters the aquarium.
  • Avoid overfeeding and remove uneaten food.
  • Never replace all biological filter media at once.
  • Test after power outages, filter failures, medication courses, a death in the tank, or a major cleaning.

Frequently asked questions

What ammonia level is safe for a betta?

The practical target is 0 ppm ammonia and 0 ppm nitrite. Any detectable result means the aquarium needs attention. The immediate risk also depends on pH and temperature, so do not rely on a single generic “safe” threshold.

Can a betta recover from ammonia poisoning?

Many fish can recover when exposure is recognized early and clean, stable water is restored. Prognosis is poorer after severe or prolonged gill and tissue damage. Improvement may take time even after the test result returns to zero.

Does cloudy water prove there is ammonia?

No. A bacterial bloom can make water cloudy, but dangerous ammonia may also be present in water that looks perfectly clear. Test it.

Should I replace all the water?

A substantial water change may be necessary in a serious incident, but matching temperature, conditioning the replacement water, and avoiding a sudden pH shift are important. Partial, repeated changes guided by test results are often easier to control.

Will ammonia detoxifier cycle the tank?

No. A conditioner can be a useful temporary aid if its label covers ammonia, but a stable nitrogen cycle still requires a functioning biological filter and time for bacteria to establish.

Key takeaway

Suspected ammonia poisoning calls for a water test and immediate correction of the environment. Restore zero ammonia and nitrite with conditioned water changes, working filtration, aeration, and waste removal; then solve the reason the biofilter failed. Treat persistent or severe symptoms as a veterinary problem rather than adding multiple products to the aquarium.

This article provides general aquarium-care information and is not a substitute for diagnosis or treatment by a qualified aquatic veterinarian.

What Do Snapping Turtles Eat? Wild and Captive Diet

What Do Snapping Turtles Eat

Snapping turtles are opportunistic omnivores. In the wild they eat aquatic plants, insects, crayfish, worms, mollusks, fish, amphibians, carrion, and occasional reptiles, birds, or small mammals. Plant material can form a meaningful part of the diet, so describing them as animals that need an all-meat menu is inaccurate.

A captive snapping turtle needs a measured, varied diet appropriate to its exact species, age, size, and health. It should not be fed wild-caught prey, processed meat, bread, or an unbalanced diet of muscle meat. Because these turtles become large, powerful, long-lived animals, captive care requires specialist planning and may be restricted by local law.

Wild turtle? Observe it from a safe distance and do not feed, capture, or relocate it. A snapping turtle on land may simply be moving between wetlands or a female may be seeking a nest site. Contact a wildlife authority or licensed rehabilitator only when the animal is injured or in immediate danger.

Close view of a North American snapping turtle in the water

What snapping turtles eat in the wild

North American snapping turtles (Chelydra serpentina) are both predators and scavengers. Government species accounts describe a broad diet that includes aquatic invertebrates, crayfish, fish, frogs, other reptiles, occasional birds and mammals, carrion, and vegetation. They take advantage of foods available in their habitat rather than relying on a single prey type.

Older turtles often wait motionless in cover and lunge at nearby prey, while juveniles may forage more actively for small invertebrates and amphibian larvae. Despite their reputation, research summarized by wildlife agencies indicates that predation on healthy waterfowl is often exaggerated.

Common versus alligator snapping turtles

The term “snapping turtle” may refer to different species. The North American snapping turtle belongs to the genus Chelydra. Alligator snapping turtles belong to Macrochelys, have a more heavily ridged shell and use a worm-like appendage on the tongue to lure prey.

These species differ in adult size, natural range, legal protection, housing, and feeding needs. Confirm the identification before applying captive-care advice. Never obtain a wild turtle or move one across regions; possession, transport, and sale rules vary.

What to feed a captive snapping turtle

A reptile veterinarian should help design the diet. A reputable, nutritionally complete pellet formulated for aquatic turtles can provide a consistent foundation. Appropriate variety may include species-suitable whole invertebrates and other foods that provide more than muscle meat alone, together with suitable plant material.

Suitable foundations

  • a quality formulated aquatic-turtle diet in an appropriate pellet size;
  • properly sourced whole invertebrates such as earthworms or selected aquatic invertebrates;
  • safe leafy greens and aquatic plants appropriate to the species and age;
  • other whole-food items recommended by a reptile veterinarian.

Use foods from reputable captive sources. Wild-caught fish, amphibians, insects, and other prey can carry parasites, pathogens, pesticides, fishing tackle, or environmental contaminants.

Foods to avoid

  • bread, crackers, cereal, and other processed human foods;
  • hot dogs, lunch meat, seasoned meat, and fatty scraps;
  • a routine diet of raw supermarket meat or boneless fillets;
  • cat or dog food as the staple diet;
  • wild-caught prey or live vertebrate prey;
  • moldy food, unidentified plants, or anything exposed to pesticides;
  • large pieces that could be difficult to swallow safely.

Read our guide explaining why turtles should not eat bread for safer alternatives.

How much and how often?

There is no dependable universal portion or schedule. Hatchlings and juveniles generally eat more frequently than adults, but their rapid growth also makes dietary balance particularly important. Adults need controlled portions that maintain healthy body condition without creating obesity or excessive waste.

Follow the formulated diet’s directions as a starting point, weigh the turtle regularly, and have a reptile veterinarian assess growth and body condition. Remove leftovers promptly. Do not feed heavily simply because a turtle continues to beg or strike at food.

Feeding baby snapping turtles

Young snapping turtles eat small animal foods and some plant material in nature. In captivity, food must be correctly sized and nutritionally complete. A pellet formulated for growing aquatic turtles, supplemented only with suitable foods under experienced guidance, is safer than trying to recreate a diet with random live prey.

Prevent excessively rapid growth. Poor calcium balance, incorrect UVB exposure, unsuitable temperature, and overfeeding can contribute to abnormal development. A hatchling that refuses food needs prompt husbandry checks and early veterinary advice; do not force-feed it.

Water, filtration, heat, and UVB matter

Diet cannot be separated from the enclosure. Snapping turtles produce substantial waste and require a very large, secure aquatic system with powerful mechanical and biological filtration. Keep ammonia and nitrite at zero, control nitrate with maintenance, and provide appropriate water depth, temperature, and structure for the turtle’s size and abilities.

Captive turtles also need a safe basking option and species-appropriate heat and UVB arrangements. UVB output and basking temperature must be measured and maintained according to veterinary and equipment guidance. A small aquarium that suits a hatchling will not remain suitable as the turtle grows.

Can snapping turtles eat fish?

Wild snapping turtles do eat fish, especially slow, small, injured, or dead fish, but fish are only one part of a broad omnivorous diet. A captive diet based heavily on fish can become nutritionally unbalanced, and some fish contain thiaminase, which can contribute to vitamin B1 deficiency when fed excessively.

Do not release feeder fish into the enclosure. They may introduce disease, injure or stress other animals, escape into waterways, or remain uneaten and add waste. Ask a reptile veterinarian whether any fish is appropriate for the individual animal.

Should you feed a wild snapping turtle?

No. Feeding wildlife can alter natural behavior, draw animals toward people and roads, concentrate them in polluted areas, and increase conflict. It can also expose the turtle to unsuitable food and expose the person to a severe bite.

Never hand-feed a snapping turtle. Its long neck can reach farther than many people expect, and its bite can cause serious injury. The safest interaction is distance.

Handling and relocation safety

Do not pick a snapping turtle up by the tail; this can injure its spine and soft tissues. Do not place hands near the head or front half of the shell. If a turtle must be moved from immediate road danger, contact a trained wildlife professional for local guidance. Keep it moving in the direction it was already traveling and never relocate it to a distant pond.

A pet snapping turtle should be handled only when necessary, using a method taught by an experienced reptile veterinarian or qualified keeper. Early handling does not make a large adult reliably tame.

A lifelong specialist commitment

Before acquiring any snapping turtle, investigate adult enclosure size, structural floor loading, water and drainage needs, electricity and heating safety, veterinary access, lifespan, local laws, and a responsible long-term care plan. Never release a captive animal into the wild.

If a captive turtle is no longer manageable, contact a licensed reptile rescue, wildlife agency, or veterinarian. Do not advertise it casually or transfer it without checking possession and transport rules.

Frequently asked questions

Do snapping turtles eat plants?

Yes. They are omnivores, and aquatic vegetation and other plant material can be a substantial part of the wild diet.

Do snapping turtles eat ducks?

They can take birds opportunistically, but wildlife authorities note that their reputation for heavy duckling predation is exaggerated. Fish, invertebrates, carrion, and plant material are also important foods.

Can snapping turtles eat fruit?

Fruit is not an essential staple for snapping turtles and is high in sugar. Do not add it routinely without species-specific veterinary guidance.

Can snapping turtles eat chicken?

Boneless chicken meat is not a balanced staple because it lacks the nutrient profile of a complete diet. Use an appropriate formulated food and veterinarian-approved variety instead.

What if a snapping turtle stops eating?

Check water and basking temperatures, UVB, water quality, stress, and the diet immediately. Appetite loss with breathing changes, swelling, abnormal buoyancy, wounds, eye or mouth problems, or weight loss needs prompt reptile-veterinary assessment. See our guide to turtle appetite loss and safe response.

Key takeaway

Wild snapping turtles eat a varied omnivorous diet and should be left to forage naturally. Captive animals need a measured, nutritionally complete diet supported by specialist housing, filtration, heat, UVB, and veterinary care. Avoid unbalanced meat-only feeding, wild-caught prey, processed food, and all hand-feeding of wild turtles.

This article provides general information and does not replace advice from a veterinarian experienced with reptiles or your local wildlife authority.

Smallest Koi Fish: The Truth About Mini Koi and Small Ponds

Smallest Koi Fish

There is no reliably miniature koi variety. Butterfly koi, standard-fin koi, and the named color varieties sold by breeders are all ornamental common carp (Cyprinus carpio) with the potential to become large, long-lived fish. A koi sold at 3 or 4 inches is a juvenile—not a small adult.

If your pond cannot support full-sized koi, the responsible choice is a smaller pond fish such as a shubunkin or comet goldfish, not a koi whose growth is expected to be restricted by limited space. This guide explains why, what “small koi” listings really mean, and how to plan for the fish’s adult needs.

Juvenile butterfly koi with long flowing fins
Butterfly koi have elongated fins, but they are not a miniature koi variety.

What is the smallest koi fish?

No recognized koi color or fin variety can be depended upon to remain small enough for an aquarium or a tiny decorative pond. Genetics affect final size, body shape, and growth rate, but husbandry, stocking density, water quality, temperature, and nutrition also influence growth. You cannot choose a named koi pattern and know that the adult will stop at 12 or 15 inches.

Koi are selectively bred common carp. The U.S. Geological Survey describes koi as ornamental domesticated carp, while its common-carp species profile records a potential size of 122 cm—about 48 inches. Most backyard koi will not reach that extreme, but adults around 24 inches are entirely realistic and some grow beyond 30 inches.

The important planning rule is simple: buy for the fish’s adult potential, not its current sales size.

Are butterfly koi smaller?

No. Butterfly koi—also called longfin koi—have elongated fins and a more flowing outline, which can make the body appear slender. That does not make them a dwarf form. They still require a purpose-built pond, robust filtration, oxygenation, and space to swim and grow.

Color names such as Kohaku, Sanke, Showa, Ogon, and Bekko describe patterns or lineage, not a dependable small-adult-size category. “Mini koi,” “small koi,” and “aquarium koi” are commonly sales descriptions for young fish rather than biological varieties.

Does a small pond keep koi small?

A cramped environment may suppress growth, but that is not a safe husbandry strategy. High stocking density increases the load of ammonia, suspended waste, pathogens, and oxygen demand. A 2024 review of koi cultivation found that increasing fish density reduces growth ratio, weight gain, and body length; that finding should not be interpreted as a method for producing healthy miniature pets.

Stunting can accompany chronic stress and poor water quality. Even if a koi remains shorter than expected, it can still develop a heavy body, produce substantial waste, and live for many years. The pond and filter must be designed for the eventual biomass—not merely the fish’s length on purchase day.

Can koi live in an aquarium?

An aquarium can be useful temporarily for quarantine, medical observation, or raising very young koi when the keeper already has an appropriate pond ready. It is not a responsible permanent home for ordinary koi.

Koi need more than a nominal number of gallons. They need swimming length, depth, stable temperature, high dissolved oxygen, mechanical removal of solid waste, biological filtration, and enough reserve capacity for equipment or power problems. For more detail, see our guide to keeping koi in a fish tank.

How large should a koi pond be?

There is no universal gallon figure that makes every koi stocking plan safe. Climate, adult fish count, pond shape, filter capacity, water-change schedule, and winter conditions all matter. However, the old suggestion that 300 gallons is adequate for two koi is far too small for permanent care.

For a small group of koi, plan in the range of at least 1,000–1,500 gallons, with substantially more water preferred as the group grows. Many successful dedicated koi ponds hold several thousand gallons. A practical pond should also provide:

  • Depth: commonly at least 3–4 feet, with climate-specific planning for winter heat and freezing.
  • Large horizontal swimming area: avoid narrow tubs with little usable length.
  • Bottom drainage or effective solid-waste removal: koi continually produce waste and disturb settled material.
  • Mechanical and biological filtration: sized for the eventual number and size of the fish.
  • Continuous aeration: especially in warm weather and around biological filters.
  • Safe edges and predator protection: without sharp objects or inaccessible traps.
  • Overflow and drainage planning: so heavy rain cannot release koi into natural waterways.

Koi Organisation International emphasizes that filtration must support the number and eventual size of the fish. A pond’s advertised volume alone does not establish its safe stocking capacity.

Landscaped ornamental pond designed for koi
A koi pond must be planned around adult fish, filtration, oxygen, and long-term maintenance.

How many koi can a pond hold?

Simple rules such as “one koi per 250 gallons” can be misleading because two ponds with the same volume may have completely different filtration and maintenance capacity. Begin conservatively and allow room for every fish to reach adult size.

A lightly stocked 1,500-gallon pond with excellent filtration may support a few koi, but seven growing koi can become an excessive load as they mature. Monitor actual performance: ammonia and nitrite must remain at zero, dissolved oxygen must remain adequate, and nitrate and suspended solids must be controlled through filtration and water changes.

Do not treat persistent algae, odor, cloudy water, rising nitrate, gasping, or recurring disease as normal features of koi keeping. They are signs that stocking, equipment, feeding, or maintenance needs correction.

Water-quality priorities

Koi tolerate a range of temperatures, but rapid changes are stressful and warmer water holds less oxygen. Instead of chasing one “perfect” pH, prioritize stability and sufficient alkalinity to support biological filtration. Test at least:

  • Ammonia
  • Nitrite
  • Nitrate
  • pH
  • KH (carbonate hardness)
  • Temperature

Ammonia and nitrite should be undetectable in an established pond. New ponds and newly cleaned filters require particularly close monitoring. Feed lightly when biological filtration is immature or water quality is deteriorating.

Do koi need plants?

Plants can provide shade and absorb nutrients, but they are not a substitute for filtration. Koi may uproot or eat plants and stir the substrate while foraging. Protect plant baskets or use a separate planted bog filter if vegetation is part of the design.

Never release unwanted koi into a lake, stream, drain, or public pond. Penn State Extension notes that Japanese koi belong in ornamental ponds rather than wildlife ponds, and common carp are invasive in many regions. Rehome fish through a pond club, retailer, rescue, or experienced keeper.

Better fish for a small pond

If the pond is too small for adult koi, consider fish whose normal adult size and waste production are better suited to the space.

Shubunkins

Shubunkins are single-tailed goldfish with calico coloration. Their mix of blue, red, orange, black, and white can provide some of the visual appeal people seek from koi, while their adult size is usually more manageable. They still need filtration, oxygen, swimming room, and winter planning.

Comet and sarasa comet goldfish

Comets are active, long-bodied goldfish. Sarasa comets have red-and-white patterns that can resemble Kohaku koi at a glance. They are not tiny fish, but they are generally a more realistic option than koi for a modest ornamental pond.

Native or locally appropriate pond fish

Where regulations and pond goals allow, a locally appropriate species may be the better ecological choice. Verify local laws and never move fish between natural waterways.

Avoid delicate fancy goldfish in outdoor ponds with strong currents, fast competitors, or predators. Their body shapes and fins can make feeding and escape more difficult.

What to ask before buying juvenile koi

  • What are the parent fish’s approximate adult sizes?
  • Is the fish standard-fin or longfin?
  • Has the stock been health screened or quarantined?
  • What temperature and water chemistry is it currently kept in?
  • Can your pond and filter support the fish at 24 inches or more?
  • Do you have a quarantine plan and a long-term rehoming option?

Online live-fish listings are not necessary for an educational guide and can encourage impulse purchases. Buy only after the pond is cycled, measured, and ready.

Adult koi swimming together in an outdoor pond
Plan stocking for the koi’s adult body size and long lifespan.

Frequently asked questions

What koi stays under 12 inches?

No common koi variety can be guaranteed to stay under 12 inches as a healthy adult. A fish advertised at that size is normally young, slow-growing, or already affected by its conditions.

Are Japanese koi smaller than domestic koi?

No. “Japanese,” “domestic,” and named color varieties do not provide a dependable small-size guarantee. Individual genetics and husbandry vary, and many Japanese bloodlines are selected for substantial growth.

Can I keep one koi alone in a small pond?

Koi are social fish, and keeping one alone does not solve the space, waste, filtration, or long-term welfare problems of a small pond.

How fast will a juvenile koi outgrow its pond?

Growth varies with genetics, temperature, nutrition, and water quality, but juveniles can grow quickly during warm seasons. Read our detailed guide to how fast koi grow and plan before purchase.

Bottom line

The smallest responsible koi is not a particular variety—it is a juvenile that still needs an adult-sized plan. Do not rely on butterfly fins, a seller’s “mini koi” label, or restricted space to keep the fish small. Build a properly filtered pond for full-sized koi, or choose shubunkins or comet goldfish for a genuinely smaller setup.

Authoritative references

Molly Fish Fry Care: Feeding, Nursery and Growth

Molly Fish Fry

Molly fry need stable, cycled water, protection from adult fish, gentle filtration, and several small meals of appropriately sized food. Mollies are livebearers: the female releases free-swimming young rather than laying eggs in the aquarium, and the adults provide no parental care. Adults may eat fry that they can catch.

You can raise fry in a separate cycled nursery aquarium or allow some to remain in a densely planted, mature community tank. A separate nursery usually gives more control and higher survival, but only when it is already biologically established and closely monitored.

Newborn checklist: keep ammonia and nitrite at 0 ppm, protect the filter intake, match the nursery’s temperature and chemistry to the birth tank, provide dense cover, feed tiny portions several times daily, and remove uneaten food.

Newborn molly fry swimming in a planted nursery aquarium

Do molly fry need a separate tank?

Not always, but separation improves the number that survive. Adult mollies and other community fish may eat newborns. Choose between these approaches before the female gives birth:

  • Cycled nursery aquarium: offers the best control over feeding, water quality, and observation. It needs mature biological filtration—not newly filled water and a new filter.
  • Planted main aquarium: floating plants, fine-leaved plants, moss, roots, and spawning mops provide refuge. Some fry will still be eaten.
  • Breeder box or net: useful for short-term collection or observation, but cramped boxes can have poor circulation, collect waste, and stress the female. They are not a long-term grow-out system.

Avoid confining a heavily pregnant female in a tiny box for days. Stress can interfere with normal behavior and welfare. If using a nursery aquarium, move the fry after birth or give the female ample space and remove her promptly once birthing has finished.

Set up the nursery before the fry arrive

Use mature biological filtration

A sponge filter driven by an air pump is a practical choice because it provides biological filtration and gentle water movement without an exposed intake. An internal or hang-on-back filter can also work when its intake is securely covered with fine sponge and the current is not overwhelming.

Seed the nursery with established filter media from a healthy aquarium. Filling it with old tank water does not cycle it, because most nitrifying bacteria live on filter media and other surfaces rather than in the water column.

Match water conditions

Use conditioned water and match the birth tank’s temperature, pH, and hardness as closely as practical. Mollies generally prefer mineral-rich water, but different molly species, strains, and source populations vary. Stability is more important than chasing a single universal number.

Do not add aquarium salt routinely just because the fish is a molly. Some mollies tolerate brackish conditions, but salt is not required for every captive strain and can harm plants or tank mates. Use it only as part of a deliberate species-appropriate plan.

Provide safe cover

Dense live plants, floating roots, Java moss, and spawning mops give fry places to rest and forage. Secure every decoration and avoid gaps where tiny fish can become trapped. Leave open areas so you can observe feeding and remove debris.

Water quality for molly fry

Fry are vulnerable to rapid changes and poor water quality. Test frequently, particularly in a small nursery or after increasing food. Keep:

  • ammonia at 0 ppm;
  • nitrite at 0 ppm;
  • nitrate controlled with partial water changes;
  • temperature stable and appropriate for the parent strain;
  • chlorine and chloramine at 0 through correct water conditioning.

Make small, regular water changes guided by testing and stocking density. Match replacement water carefully. Use a narrow siphon, airline tube, or intake guard and inspect the waste bucket so fry are not accidentally removed.

What to feed molly fry

Newborn mollies are free-swimming and can eat soon after birth. Offer food small enough to fit their mouths. Suitable options include finely crushed quality flake, a reputable powdered or micro-pellet fry food, and appropriately sized live or frozen foods from safe sources.

Because mollies are omnivorous grazers, include a balanced food with plant material rather than relying only on bloodworms or other rich animal foods. Newly hatched brine shrimp can provide useful variety but should not be the sole diet.

How often should fry eat?

Offer very small portions several times a day when practical. Each portion should be consumed quickly. Remove leftovers before they decay. Frequent feeding supports growth only when filtration and water changes keep pace with the extra waste.

Do not attempt to force faster growth through excessive food or high temperature. Steady growth in clean, stable water is safer than rapid growth accompanied by obesity or deteriorating water quality.

How many fry can a molly have?

Brood size varies with species, female size, age, condition, genetics, and environment. FishBase reports that Poecilia sphenops may produce about 20–150 young after roughly 28 days of gestation, while sailfin mollies have also been reported with broad brood ranges. These figures are context—not a prediction for an individual fish.

Female livebearers can store sperm and may produce later broods after separation from males. Plan space and rehoming before breeding; one pregnancy can quickly become many fish.

When can fry return to the main tank?

Do not use a fixed number of weeks. Move them only when they are too large for every tank mate to swallow, swim strongly, compete successfully for food, and tolerate the main aquarium’s flow. Size differences between fry mean they may not all be ready together.

Before moving them:

  1. confirm both aquariums have 0 ppm ammonia and nitrite;
  2. compare temperature, pH, and hardness;
  3. acclimate gradually if conditions differ;
  4. move fry with a cup or smooth container when possible rather than chasing them repeatedly with a net;
  5. watch feeding and aggression after release.

Sex separation and population control

Mollies can mature while still relatively small. Learn to distinguish the male’s gonopodium—the modified anal fin used in reproduction—from the fan-shaped anal fin of females. Separate sexes before young males can breed if you do not want another generation.

Do not release unwanted mollies into drains, ponds, streams, or other waterways. Mollies have established invasive populations outside their native range. Arrange responsible homes through experienced aquarists or local aquarium organizations.

Common problems

Fry disappear overnight

Check filter intakes, gaps behind equipment, and adult predation. Add dense cover or move survivors to a cycled nursery. Do not assume every expected embryo was born alive; brood sizes vary.

Fry gather at the surface

Test ammonia and nitrite immediately, check temperature, and improve gas exchange. Surface gathering can reflect low oxygen or gill stress, although mollies also naturally use the surface film. Behavior must be interpreted alongside test results.

Fry are thin or growing unevenly

Confirm that food reaches every fish, review food quality and particle size, reduce crowding, and check for bullying or disease. Separate much larger juveniles if they monopolize meals. Persistent wasting needs assessment by an aquatic veterinarian.

Fry have clamped fins or spots

Test water before adding medication. Temperature stress, ammonia, nitrite, parasites, and infection can produce overlapping signs. Avoid treating the entire nursery with multiple products without a diagnosis.

Do molly fry need special lighting?

No special high-intensity lamp is required for the fry themselves. Provide a consistent day-night cycle and enough light to observe them and grow any live plants. Allow a dark rest period and avoid 24-hour lighting, which can stress fish and encourage algae.

Frequently asked questions

Do mother mollies care for their fry?

No. Mollies do not provide parental care, and the mother may eat fry after giving birth.

Can molly fry stay in a breeder box?

Only temporarily. A box has limited space and can trap waste or restrict circulation. A cycled nursery aquarium provides better long-term grow-out conditions.

Can fry eat adult fish food?

Yes, when it is nutritionally suitable and crushed into particles they can swallow. A purpose-made fry food or micro-pellet may be easier to portion consistently.

Should I medicate fry preventively?

No. Good quarantine, clean water, appropriate food, and observation are safer than routine medication. Treat only a diagnosed or strongly suspected problem with a product suitable for the species and age.

Key takeaway

Successful molly-fry care depends less on special products than on preparation: a cycled nursery or dense cover, intake-safe filtration, stable water with zero ammonia and nitrite, tiny balanced meals, and a plan for growth and population control. Protect the fry without stressing the mother, and seek aquatic-veterinary help when abnormal behavior persists after husbandry is corrected.

This article provides general aquarium-care information and does not replace diagnosis or treatment by a qualified aquatic veterinarian.

Hygrophila Corymbosa Care: Temple Plant Growing Guide

Hygrophila Corymbosa

Hygrophila corymbosa is a fast-growing stem plant that can give a freshwater aquarium a full, bright-green background without demanding injected CO2. It is forgiving enough for beginners, but it still needs regular pruning, adequate nutrients, and enough room for its broad leaves.

Also called temple plant or giant hygro, this species is sold in several forms and cultivars. Their height, leaf shape, and color can differ, so confirm the plant label when buying and do not confuse it with Hygrophila polysperma, a different species that is federally regulated as a noxious weed in the United States.

Hygrophila corymbosa temple plant growing underwater in an aquarium
Hygrophila corymbosa is a broad-leaved stem plant suited to the middle or background of an aquarium.

Hygrophila corymbosa care at a glance

Common names Temple plant, giant hygro
Plant type Fast-growing stem plant
Typical aquarium height 8–12+ inches (20–30+ cm), depending on cultivar and trimming
Placement Background; compact cultivars can suit the midground
Light Low to medium; stronger light promotes denser growth
CO2 Optional, but beneficial for faster and more compact growth
Growth rate Fast
Propagation Stem cuttings and side shoots
Difficulty Easy

Tropica classifies standard H. corymbosa as an undemanding, fast-growing starter plant with low light and CO2 demands. That does not mean it thrives without nutrients or maintenance; fast growth can reveal shortages quickly.

What is Hygrophila corymbosa?

Hygrophila corymbosa is an accepted species in the Acanthaceae family. Kew’s Plants of the World Online records its native range as Indochina and the Philippines, including Cambodia, Laos, Myanmar, Thailand, and the Philippines. It grows in wet tropical habitats and can develop both submerged and emergent growth.

Submerged aquarium leaves are normally green, broad, and arranged opposite one another on an upright stem. Growth above the water can look different and may eventually produce flowers. A plant newly moved from a nursery may shed some emersed leaves while adapting to permanent submersion; healthy stems should then produce new underwater growth.

Popular forms and cultivars

The name “temple plant” is applied loosely in the aquarium trade. Common forms include broad-leaved standard plants, narrower-leaved forms often sold as “Siamensis,” and compact nursery cultivars.

Standard temple plant

The standard form becomes tall and broad. It is best used as a background plant in medium or large aquariums, where repeated groups of stems can form a dense green screen.

Hygrophila ‘Compact’

This nursery cultivar is commonly associated with H. corymbosa and has shorter spaces between the leaves with more lateral branching. Tropica notes that it stays more compact and can survive low light without injected CO2, although stronger light and CO2 promote healthier, denser growth.

Because trade names change, compare the actual plant’s leaf shape and expected height rather than assuming every pot labeled “giant hygro” will grow identically.

How to plant temple plant

  1. Remove any rock wool, foam, metal weight, or nursery anchor.
  2. Separate the bundle into individual healthy stems.
  3. Remove damaged leaves and strip leaves from the lowest 2 inches (5 cm).
  4. Insert each stem into the substrate with plant tweezers.
  5. Leave roughly 1–2 inches (2.5–5 cm) between stems so lower leaves receive light and water flow.
  6. Plant shorter stems toward the front of the group and taller stems behind them for a natural arrangement.

Do not bury intact leaves or crowd the entire bundle into one hole. Closely packed stems may shade one another, trap debris, and lose their lower leaves.

Light requirements

H. corymbosa can grow under low to moderate aquarium lighting. Under weak light it tends to stretch toward the surface, producing longer gaps between leaves and less compact growth. Moderate light usually gives a fuller shape and stronger stems.

More light also increases nutrient and carbon demand. If light intensity is raised without matching plant nutrition and maintenance, algae may increase rather than plant health. Start with a consistent 6–8 hour photoperiod and adjust gradually based on growth.

Does Hygrophila corymbosa need CO2?

No. Injected CO2 is optional for this species. It normally grows well in a stable, stocked aquarium with appropriate light and nutrients. CO2 supplementation can produce faster, denser growth, but it also increases pruning and fertilization needs.

For a beginner tank, stable conditions and balanced lighting are more valuable than adding CO2 equipment immediately.

Substrate and fertilizer

Temple plant can take up nutrients through both roots and leaves. It can grow in inert sand or gravel when the water column is fertilized appropriately, and it also benefits from a nutrient-rich planted substrate or root fertilization.

Follow a complete aquarium-plant fertilizer at the manufacturer’s measured dose and adjust using plant response, stocking, water changes, and test results. Do not add extra fertilizer merely because growth is slow; first check light, CO2 availability, temperature, plant adaptation, and whether the stems are healthy.

Temperature and water parameters

This adaptable tropical plant works across the conditions used for many community aquariums. A practical target is:

  • Temperature: approximately 72–82°F (22–28°C)
  • pH: roughly 6.0–8.0
  • Hardness: soft to moderately hard water

These are useful aquarium ranges rather than rigid boundaries. Avoid sudden changes. Matching healthy fish and maintaining stable water quality should take priority over chasing an exact pH for this forgiving plant.

How to prune Hygrophila corymbosa

Fast growth means regular trimming. When a stem approaches the surface or shades nearby plants:

  1. Cut the stem just above a healthy node at the desired height.
  2. Leave the rooted lower section in place if you want it to produce side shoots.
  3. Replant the healthy top cutting if you want a taller replacement stem.
  4. Remove weak, bare, or overcrowded old stems.

Alternating trimming heights creates a bushier group than cutting every stem into a flat line. Weekly inspection is useful in high-light or CO2-injected tanks; slower setups may need pruning much less often.

How to propagate temple plant

Propagation is straightforward. Take a healthy 4–6 inch (10–15 cm) top or side cutting, remove its lowest leaves, and plant the bare nodes in the substrate. Roots can develop from the buried nodes while the cutting resumes upward growth.

Do not release unwanted cuttings into ponds, drains, streams, wetlands, or gardens where fragments could reach natural water. Seal them in a bag for household disposal or dry them completely before composting where local rules permit.

Common problems

Lower leaves turn yellow or fall off

The lower stem may be shaded by dense growth, or the plant may lack balanced nutrients. Thin the group, check that light reaches the base, and review fertilization. Some leaf loss is also normal while emersed nursery growth converts to submerged growth.

Pinholes or damaged leaf edges

Damage may reflect nutrient imbalance, physical injury, snails feeding on already-dying tissue, or fish that nip plants. Diagnose the whole setup rather than assuming one deficiency from a single symptom.

Long gaps between leaves

Leggy growth commonly develops under weak light or heavy shading. Remove floating cover, thin neighboring stems, or moderately increase light while monitoring algae.

Stems rot after planting

Buried leaves, damaged stems, poor circulation, or a plant already deteriorating in the store can cause rot. Cut back to firm tissue and replant a healthy top section.

Growth reaches the surface too quickly

This is normal for a fast stem plant. Prune regularly, replant selected tops, or switch to a compact cultivar if the aquarium is shallow.

Fish and invertebrate compatibility

Temple plant is compatible with most peaceful community fish, shrimp, and snails. Dense stems provide cover for fry and shy animals. Goldfish, large herbivorous fish, and digging cichlids may eat, break, or uproot it.

Healthy aquarium snails usually graze biofilm and damaged material rather than destroying strong leaves. If leaves disappear, identify the actual fish or invertebrate responsible before treating the tank.

Do not confuse H. corymbosa with H. polysperma

Hygrophila polysperma—East Indian hygrophila—is a different plant. The University of Florida identifies it as a federally listed noxious weed and a prohibited aquatic plant in Florida because fragments can establish invasive populations. USDA’s weed-risk assessment for H. corymbosa treats temple plant separately and records it as introduced in Florida.

Plant laws can change and vary by state. Confirm the scientific name with the seller and check federal and state rules before purchasing or transporting any Hygrophila. Never dump aquarium plants or water containing fragments outdoors.

Frequently asked questions

Is Hygrophila corymbosa good for beginners?

Yes. It adapts to a broad range of freshwater aquariums, grows without injected CO2, and propagates easily. Its main demand is regular pruning.

Can it grow in gravel?

Yes. Anchor the stems carefully and provide balanced nutrients. A planted substrate can help, but it is not essential.

Why is my temple plant turning red or bronze?

Some cultivars develop bronze or reddish new growth under stronger light and suitable nutrition. Sudden browning, transparency, or soft tissue is more likely deterioration than healthy coloration.

Can it grow out of the aquarium?

Yes. It can grow emersed if stems reach above the surface and humidity is suitable. Trim it if the aquarium hood, lights, or desired layout cannot accommodate emergent growth.

Bottom line

Hygrophila corymbosa is an excellent background stem plant for beginners who want quick growth and a full green display. Give individual stems room, use low-to-moderate light, fertilize consistently, and prune before it shades the aquarium. Most importantly, verify the species and dispose of every cutting responsibly.

Authoritative references

How Many Cherry Shrimp per Gallon? A Practical Stocking Guide

How Many Cherry Shrimp Per Gallon

For a beginner’s cherry shrimp tank, start with about 10 shrimp in a mature five-gallon aquarium or 10–20 in a mature ten-gallon aquarium. These are conservative starting recommendations, not maximum capacities or a universal shrimp-per-gallon rule. Leave room for the colony to breed.

Cherry shrimp (Neocaridina davidi) are small, but their food supply, filtration and water stability matter more than a simple head count. A freshly filled tank is not ready for shrimp just because it has enough gallons.

A practical starting number by tank size

  • One or two gallons: not our recommendation for a beginner colony. Small volumes leave little margin for temperature changes, evaporation or a feeding mistake.
  • Five gallons: start with around 10 cherry shrimp in a cycled, established shrimp-only setup.
  • Ten gallons: start with 10–20. This gives a beginner more room to maintain stable conditions and watch the colony develop.
  • Twenty gallons: 20–30 is a manageable starting group; you do not need to fill the tank to an estimated capacity.

These AquariumHunter starting numbers assume filtration, grazing surfaces, careful feeding and no fish predators. They are not additive allowances on top of a fully stocked fish tank. Aquarium Co-Op recommends at least 10 Neocaridina for starting a breeding colony, while The Shrimp Farm recommends at least five gallons and notes that smaller tanks are harder for beginners to keep stable.

Cherry shrimp gathering to feed in an aquarium

Why there is no reliable maximum per gallon

A gallon of open swimming water does not describe how much biofilm grows on moss, wood, plants and substrate. Nor does it tell you how much food is added, how well waste is processed, or whether the count includes tiny newborns or adults.

A mature ten-gallon aquarium may support a colony larger than the starting group. That does not make 50 shrimp a safe purchase for every ten-gallon tank. Avoid jumping straight to dense stocking based on a breeder’s numbers; their feeding, maintenance and equipment may be very different.

Make the tank ready before adding shrimp

Complete a fishless cycle and let the tank develop natural grazing surfaces before buying shrimp. Plants and a filter do not instantly create a mature aquarium. Aqueon’s shrimp setup guidance explains the value of biofilm on plants and hardscape and recommends protecting filter intakes so tiny shrimp cannot be drawn in.

  • Use a sponge filter or a suitable intake sponge, and maintain gentle circulation.
  • Provide live plants, moss or other safe surfaces and hiding places.
  • Keep the aquarium away from direct sun and heating or cooling vents.
  • Keep a lid or cover fitted around equipment, and check the temperature with a thermometer.

Use the seller’s acclimation instructions and compare its water conditions with yours before purchase. Avoid sudden changes in temperature or water chemistry.

Water quality comes before adding more

Ammonia and nitrite should both be undetectable. Do not treat a detectable nitrite reading as safe. Aqueon’s freshwater shrimp care guide recommends undetectable ammonia and nitrite and nitrate below 10 ppm.

For everyday care, a stable temperature around 72–76°F is a useful target within Aquarium Co-Op’s recommended comfort range. A heater is only needed if the room cannot maintain suitable conditions. Do not heat the aquarium simply to accelerate breeding.

Test pH, general hardness (GH) and carbonate hardness (KH) as well as nitrogen waste. Cherry shrimp need suitable mineral content; pure distilled or reverse-osmosis water is not a complete prepared habitat. Ask the breeder about the water its shrimp are raised in rather than changing yours abruptly to chase one number. Our aquarium test-kit guide explains what different tests measure.

Feed the colony without feeding a waste problem

Grazing does not eliminate the need for a balanced diet. Offer small portions of suitable shrimp food and adjust to the number of animals and natural food available. Remove uneaten food before it spoils; repeatedly adding more because shrimp gather eagerly can foul a small tank.

During regular partial water changes, use conditioned water with closely matched temperature and chemistry. Inspect the bucket for tiny shrimp before disposal. Check the filter for blockages and avoid replacing all biological media at once. OATA’s invertebrate care guidance emphasizes gradual stocking and regular water tests.

Fish and snails change the stocking decision

A shrimp-only tank gives babies the best chance of survival. Even small fish can eat shrimplets, and a betta is not a reliably safe companion. Read our betta and shrimp compatibility guide before combining them.

Compatible snails can share the habitat, but they also need food and produce waste. Use our ten-gallon snail stocking guide to plan the whole aquarium rather than stacking separate maximum counts.

What if the colony keeps growing?

Track the population approximately alongside feeding, test results and maintenance. Stop adding livestock if ammonia or nitrite appears, nitrate becomes harder to control, food remains uneaten or unexplained deaths occur. Investigate the cause; a crowded-looking tank alone cannot diagnose it.

Arrange a larger established aquarium or responsible rehoming before maintenance becomes unmanageable. Never release shrimp into local waterways. Check that medicines and other additives are safe for invertebrates, especially copper-based treatments.