Ideal Guppy Temperature: Safe Range and Heater Guide

guppy temperature

The best water temperature for most pet guppies is 74–78°F (23–26°C). This is a practical everyday target that keeps tropical guppies active without pushing them toward either cold stress or the lower oxygen levels associated with very warm water.

Guppies can tolerate a broader range for limited periods, but “survives” is not the same as “thrives.” Stability matters as much as the exact number. Use a reliable thermometer, avoid sudden changes, and choose a heater based on the aquarium, room, and local climate rather than relying on a one-size-fits-all wattage rule.

Guppy temperature at a glance

Water temperature What it means Recommended action
74–78°F (23–26°C) Good routine target for most fancy guppies Keep stable and monitor daily
70–73°F (21–23°C) Cooler than ideal for many domestic strains Check behavior; warm gradually if needed
79–82°F (26–28°C) Warm end of the species’ range Increase aeration and investigate persistent heat
Below 68°F (20°C) Increasing cold-stress risk Correct the cause gradually; do not add hot water
Above 82°F (28°C) Increasing heat and low-oxygen risk Cool gradually, improve gas exchange, and test water

FishBase lists a broad environmental range of 64–82°F (18–28°C) for Poecilia reticulata, while also describing the species as requiring fairly warm water. The narrower 74–78°F target above is easier for most aquarium keepers to manage consistently.

Do guppies need a heater?

Most guppy aquariums need a thermostatically controlled heater because room temperature changes between day and night and across seasons. A heater is especially important when the room falls below 72°F, the tank is small, or air conditioning creates regular swings.

You may not need active heating if the water—not just the room—naturally remains within the target range around the clock. Even then, a heater set near the lower limit can act as insurance. Never assume a warm climate guarantees stable aquarium water.
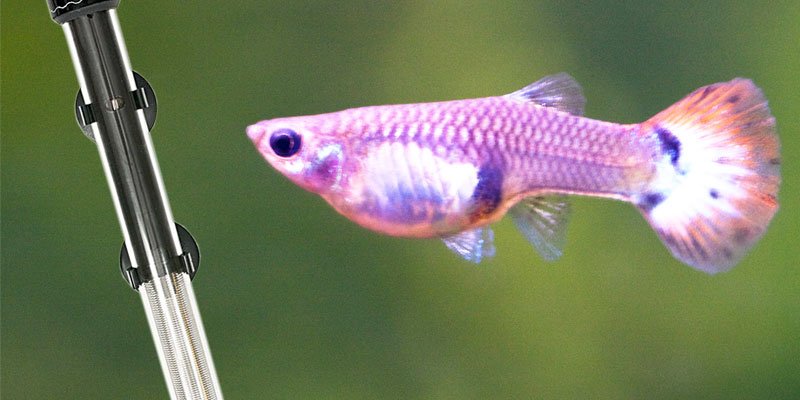
Aquarium heater maintaining stable water for guppies
A thermostatically controlled heater helps prevent stressful day-to-night temperature swings.

How to choose and use a guppy heater safely

  • Match it to the aquarium. Follow the manufacturer’s tank-volume and room-temperature guidance. A cold room or open-top tank loses more heat than a warm, covered aquarium.
  • Use a separate thermometer. Heater dials are approximate. Place the thermometer away from the heater so it measures the wider tank, not a local warm spot.
  • Maintain circulation. Position the heater where filtered water can distribute warmth through the aquarium.
  • Protect the fish and equipment. Use a heater guard when appropriate, keep the unit fully submerged if required, and inspect it for cracks, condensation, or a damaged cord.
  • Unplug before water changes. Follow the heater’s instructions for cooling before it is exposed to air and before restarting it.
  • Plan for failure. A spare suitable heater and thermometer are more useful than guessing during an emergency. In a large tank, two smaller heaters may provide more even heat and partial backup, but both must be correctly controlled.

Do not select a heater solely from a fixed “watts per gallon” formula. Tank shape, lid, flow, room temperature, and the required temperature increase all affect performance.

Why stable temperature matters

Fish are ectotherms, so water temperature influences their metabolism, digestion, activity, oxygen demand, and immune function. Rapid fluctuation from a failed heater, large water change, sunny window, or draft can create stress even when the final number falls inside the normal range.

The Merck Veterinary Manual’s environmental hazards table associates temperature fluctuation with immune compromise and possible mortality. Check temperature whenever guppies suddenly become lethargic, clamp their fins, gasp, hide, or stop eating—but test ammonia and nitrite at the same time because water-quality problems can cause similar signs.

What happens when guppy water is too cold?

Guppies kept too cold may become sluggish, eat less, remain near the heater, clamp their fins, or become more vulnerable to disease. Prolonged exposure is more concerning than a brief, minor dip, and fancy domestic strains may be less robust than wild populations.

If the tank is cold, do not pour in hot water or turn the heater far above the target. Confirm the thermometer with a second device, check whether the heater is operating, reduce drafts, and raise the temperature gradually. A rapid correction can be as stressful as the original problem.

What happens when guppy water is too warm?

Warm water holds less dissolved oxygen while also increasing fish metabolism and oxygen demand. Guppies may breathe rapidly, gather near the filter return, or remain at the surface. The Merck Veterinary Manual explains that water temperature is a major factor controlling how much oxygen remains dissolved.

For excessive heat:

  • Switch off a malfunctioning heater.
  • Increase surface movement and aeration.
  • Close blinds and reduce nearby heat sources.
  • Float a sealed cool-water bottle if emergency cooling is needed, replacing it gradually.
  • Never add loose ice or make a sudden large temperature drop.
  • Test ammonia and nitrite because toxicity and oxygen demand can worsen during heat stress.
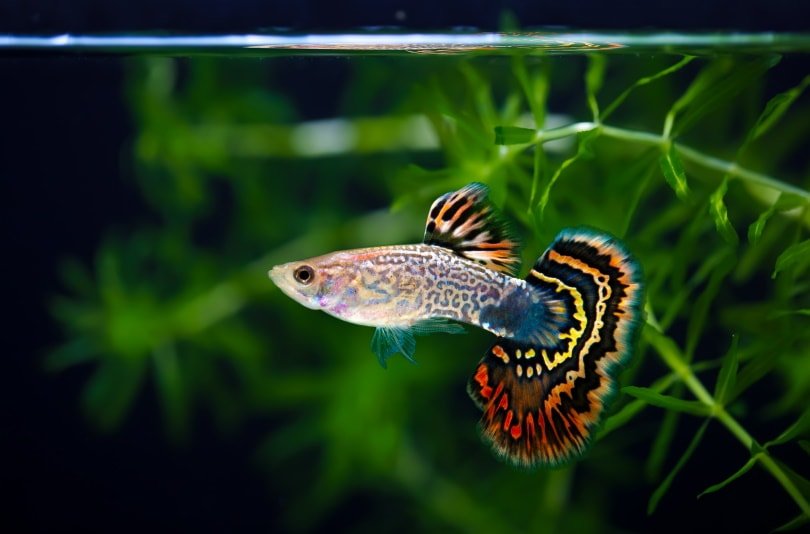
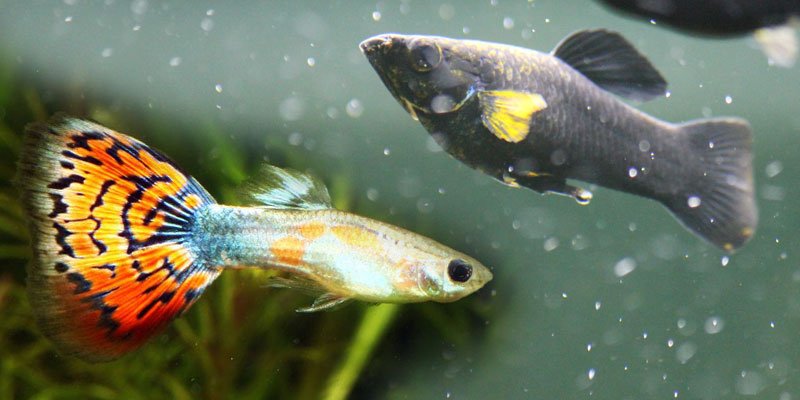
Colorful fancy guppies swimming in a planted aquarium
Healthy guppies are active and alert when temperature, oxygen, and water quality remain stable.

Temperature during water changes

Condition replacement water for chlorine or chloramine and match it closely to the aquarium temperature before adding it. Use a thermometer rather than your hand; human touch is poor at detecting small differences. Add water steadily so fish are not exposed to a sudden hot or cold current.

A water change should not be delayed merely because temperature matching is inconvenient. Prepare the water first, and use a safe mixing method outside the aquarium. Never run untreated tap water directly onto fish.

Acclimating new guppies

Turn off the aquarium light, compare the transport water with the tank, and follow the seller’s acclimation instructions. Floating a closed bag can equalize temperature, but it does not correct differences in pH, hardness, or salinity. When chemistry differs substantially, a gradual acclimation method may be appropriate.

Avoid adding store water to the aquarium. Transfer the fish with a net or suitable container after acclimation, and quarantine new arrivals when possible. Do not extend bag acclimation unnecessarily: once a shipping bag is opened, changing gas exchange and pH can make accumulated ammonia more hazardous.

Guppy fry and breeding temperature

Guppy fry can be kept within the same stable 74–78°F range as healthy adults. Warmer water can accelerate metabolism and growth, but it also increases appetite, waste production, maintenance demand, and oxygen needs. It should not be used as a shortcut for faster growth.

Prioritize frequent small meals, excellent water quality, appropriate stocking, and consistent warmth. Guppies reproduce readily; separate-sex housing or a realistic plan for fry is essential before breeding. A female can store sperm and produce more than one brood after mating.

Can guppies live in an outdoor pond?

Guppies can live outdoors only when the water remains safely warm and stable. Check nighttime water temperature, not just sunny daytime readings. In many climates they are seasonal pond fish and must be moved indoors before cold weather.

Use a covered or predator-aware setup, provide shade and aeration, and prevent escape during rain or flooding. Never release guppies into natural waterways. FishBase and the USGS species profile document introductions beyond the guppy’s native range, where released fish may affect local ecosystems.

Temperature is only part of guppy care

A perfect thermometer reading cannot compensate for an uncycled or overcrowded aquarium. Keep ammonia and nitrite at zero, control nitrate with stocking restraint and regular partial water changes, and maintain stable mineral content. Guppies generally do best in moderately hard, neutral-to-alkaline water rather than very soft, acidic conditions.

Provide open swimming space, plant cover, gentle-to-moderate flow, and a mature filter. Guppies are social, but a very small tank becomes unstable quickly and females can be harassed when the sex ratio and cover are poor.

Troubleshooting temperature problems

Problem Likely cause First checks
Temperature falls every night Undersized heater, cold room, open top Confirm thermometer, lid, heater rating, and circulation
Water is warmer than the heater setting Hot room, sun, lights, or stuck thermostat Unplug suspect heater and verify with a second thermometer
Warm near heater, cool elsewhere Poor circulation or incorrect placement Improve flow without creating an exhausting current
Guppies gasp despite normal temperature Low oxygen, ammonia, nitrite, or gill disease Increase aeration and test water immediately
Temperature changes during water changes Replacement water not matched Measure and mix replacement water before adding it

Frequently asked questions

Is 72°F too cold for guppies?

72°F (22°C) is at the cool end for many fancy guppies. Healthy fish may tolerate it, but a routine target around 74–78°F provides a better margin. Watch the fish, confirm the reading, and warm gradually if necessary.

Is 80°F too hot for guppies?

80°F (27°C) is within the broad species range but warmer than necessary for routine care. Ensure strong gas exchange and stable water quality. If the temperature rises above the heater setting, identify the heat source rather than accepting a continuing climb.

Can guppies survive at 60°F?

A guppy may survive brief exposure near 60°F (16°C), but this is not an appropriate target for a home aquarium. The U.S. Fish and Wildlife Service notes that the species cannot tolerate temperatures below about 59°F (15°C); that is a lower survival boundary, not a care recommendation.

How quickly should temperature be changed?

There is no single safe rate for every situation. Make ordinary adjustments slowly and avoid changes of several degrees at once. A true emergency such as severe overheating requires prompt action, but cooling should still be controlled while aeration and water quality are addressed.

Final recommendation

Set most guppy aquariums to a stable 74–78°F (23–26°C). Use a thermostatically controlled heater when the room cannot hold that range, verify it with a separate thermometer, match new water during changes, and maintain good surface movement. Stability, oxygen, and clean cycled water matter more than chasing one exact temperature.

Red Aquarium Plants: 5 Choices and How to Keep Their Color

Red Aquarium Plants

Good red aquarium plants include Ludwigia palustris ‘Super Red’, Ludwigia repens ‘Rubin’, Rotala rotundifolia, Alternanthera reineckii ‘Mini’, and reddish-brown forms of Cryptocoryne wendtii. The best choice depends on your lighting, available space, and whether you use injected CO2. A plant that stays healthy with modest equipment is a better choice than one that only looks red in a seller’s photograph.

Some of these plants can grow without injected CO2, but their color and shape may differ from a professionally maintained aquascape. Expect everything from bronze and pink to burgundy; not every variety will become bright scarlet.

Which red aquarium plant should you choose?

  • For a first red stem plant: try Ludwigia palustris ‘Super Red’ in an unshaded position.
  • For a bushy background: choose Rotala rotundifolia and plan to trim it regularly.
  • For darker, broader foliage: consider Ludwigia repens ‘Rubin’.
  • For a compact accent in a more demanding setup: consider Alternanthera reineckii ‘Mini’.
  • For warm brown tones rather than bright red: consider Cryptocoryne wendtii ‘Mi Oya’.

Buy a labeled species or cultivar. Trade names such as “red plant bundle” tell you little about mature size or care. Compare the seller’s submerged-growth photographs, not just plants grown above water.

5 red and reddish aquarium plants worth considering

1. Ludwigia palustris ‘Super Red’

This is a useful starting point for aquarists who want a red stem group. Tropica lists an approximate height of 4–12 inches or more, so place it where you can reach it for pruning. Its relatively small leaves suit a compact group better than a single isolated stem.

It can grow in a modest setup, but stronger suitable lighting and added CO2 can improve color and compactness. Lower leaves may suffer when crowded or shaded. Trim tall stems and replant healthy tops to maintain the group. See Tropica’s Ludwigia palustris growing guide for the distinction between easy survival and its best appearance.

2. Ludwigia repens ‘Rubin’

‘Rubin’ offers a darker red accent and is a reasonable alternative when you prefer a fuller-looking stem plant. Give it open space rather than squeezing it beneath floating plants. A group beside green foliage makes the contrast easier to appreciate.

Tropica includes it among its easy aquarium plants, while noting that stronger light intensifies its red color. “Easy” does not mean it will stay richly colored in a dim corner. Avoid treating ‘Rubin’ and ‘Super Red’ as interchangeable names when ordering.

3. Rotala rotundifolia

This fine-leaved stem plant works well in a background group. It may be green, pink, or reddish depending on the form and growing conditions. The rounded leaves behind its name are associated with above-water growth; submerged leaves look different.

Tropica’s Rotala rotundifolia profile explains that good light helps produce red leaves and that dense side growth needs pruning so light reaches lower foliage. Plan around roughly 6–12 inches or more of height before trimming. Check the cultivar: a deliberately green form is not a failed red plant. Trade labeling involving “Rotala indica” can also be confusing, so confirm the grower’s identification.

4. Alternanthera reineckii ‘Mini’

Choose ‘Mini’ for a shorter red-purple accent rather than a tall background thicket. With pruning, it can form a low group around 2–4 inches high. It is a better fit for someone prepared to manage plant nutrition, lighting, and CO2 consistently than for a dim, minimally maintained tank.

Tropica’s care profile recommends ample light and added CO2. Do not assume slow growth makes a plant beginner-proof: leaves that remain in place for a long time can become coated with algae if the tank is out of balance. Leave room around the group for maintenance.

5. Cryptocoryne wendtii ‘Mi Oya’

This is a choice for reddish-brown texture, not a promise of vivid red foliage. Its rosette shape provides a different look from upright stem plants. Tropica describes rosettes roughly 6–12 inches wide in its plant catalog, so allow floor space rather than judging suitability only by tank height.

Plant the roots in the substrate while keeping the crown, where the leaves emerge, exposed. Avoid repeatedly uprooting it to rearrange the display. A brown-leaved crypt can provide useful contrast even when a brighter red stem plant would need more light than the rest of your aquarium.

How to encourage healthy color

Match the light to the whole tank

Red plants are not all low-light plants. Some tolerate lower light while developing stronger colors under brighter conditions. Light reaching the leaves matters more than the fixture’s marketing name: tank depth, floating cover, neighboring plants, and dirty glass all affect it.

Use a timer and a consistent schedule. For a new setup, around 6–8 hours daily is a cautious starting point, adjusted to plant growth and algae. Do not jump to a much longer day to force color. Our aquarium plant lighting guide explains why a red-colored lamp alone is not the solution.

Feed for growth, not just redness

Iron alone is not a complete fertilizer. Plants also need other nutrients, and the right routine depends on fish stocking, water, substrate, and plant growth. Follow aquarium fertilizer directions and assess new growth before adding more products. See our guide to liquid fertilizers and root tabs for choosing between them.

Do not deliberately starve a community aquarium of nitrogen to chase a photograph. A healthy plant with less dramatic color is preferable to a red plant with deteriorating leaves. Likewise, do not increase CO2 simply until plants change color; fish and shrimp must remain safe.

Planting and maintenance

  1. Remove pots, weights, and packing material carefully. Rinse off tissue-culture gel and inspect plants before adding them.
  2. Separate stem plants and plant them with space between stems so light can reach the lower leaves. Keep rosette crowns above the substrate.
  3. Position the red group beside green plants, with enough room for its mature spread. A small, healthy group often looks better than many competing accents.
  4. Trim damaged leaves and tall stems as needed. Replant healthy stem tops; avoid letting a dense surface canopy shade everything below.
  5. Make one care adjustment at a time and judge the next new leaves. Older leaves may not regain their original appearance.

Why are my red plants turning green or losing leaves?

  • Healthy but greener growth: check the cultivar and whether the plant is shaded before changing fertilizer.
  • Bare lower stems: thin crowded groups and check light penetration.
  • Decline soon after planting: above-water-grown leaves may transition poorly underwater. Remove decaying material, watch new growth, and check water quality rather than repeatedly moving the plant.
  • Algae on leaves: review lighting duration, maintenance, circulation, and nutrient consistency. More light is not automatically the cure.

Keep expectations species-specific. Colorful nursery foliage does not guarantee the same underwater appearance, and green plants such as submerged Lobelia cardinalis should not be bought on the promise of reliably red leaves. Start with one suitable red variety, establish healthy growth, and expand from there.

How to Oxygenate a Fish Tank Without an Air Pump

oxygenate a fish tank without a pump

You can improve aquarium oxygenation without a separate air pump by moving the water surface with a working filter. During a power outage, gently pouring aquarium water back into the tank can provide temporary aeration while you arrange battery-powered backup. Neither approach removes the need to investigate fish that are struggling to breathe.

This guide separates everyday circulation from emergency help. It is research-based care advice, not a claim that we have tested an emergency treatment on fish.

If fish are gasping: what to do first

  1. Increase surface movement. If the filter works, direct its return toward the surface to create ripples without battering the fish.
  2. If power is out, use a clean aquarium-only jug. Scoop some tank water and pour it back gently from just above the surface, creating ripples and a little splashing. Keep the stream away from fish and loose substrate, and keep water away from electrical equipment. Repeat while arranging a more dependable source of aeration.
  3. Check temperature and water quality. Test ammonia and nitrite. A breathing problem is not proof that low oxygen is the only cause.
  4. Pause feeding during the immediate emergency. Remove uneaten food and obvious decaying material without stirring up the whole substrate.
  5. Get help if distress persists. Arrange a battery air pump promptly during an outage; seek an aquatic veterinarian for severe or continuing breathing trouble.

UK Power Networks’ aquarium outage advice supports manual surface agitation as a temporary measure and recommends battery-powered aeration. There is no fixed pouring schedule that guarantees safety in every aquarium. Stay with the tank and monitor the fish while you obtain reliable backup.

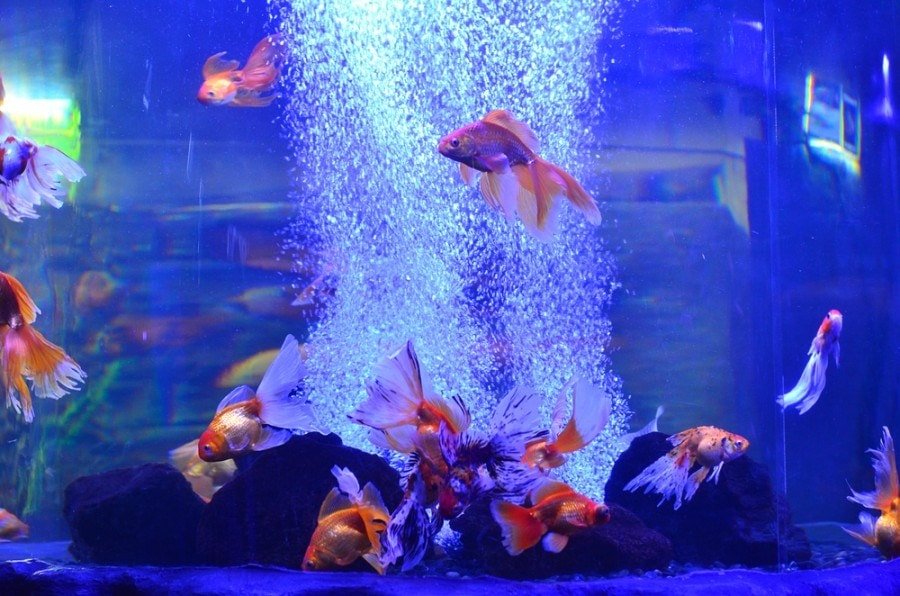
Aquarium fish swimming beside rising air bubbles
Circulation and surface movement help exchange gases between aquarium water and the air.

How oxygen gets into aquarium water

Fish use dissolved oxygen, not simply the visible bubbles passing them. Gas exchange occurs where air and water meet. Surface movement refreshes that contact, and circulation distributes the water through the aquarium. An air stone provides air-water contact and lifts water toward the surface; a filter return can also create useful movement.

Aqueon’s filtration overview explains how returning water agitates the surface. This is why a suitably stocked aquarium with effective circulation may not need a separate air pump. A tank with a motionless surface, poor circulation or heavy stocking needs a different assessment.

Improve oxygenation when the filter still works

  • Aim an adjustable outlet or spray bar so that it ripples the surface.
  • Check for a blocked intake or a clogged filter that has lost flow. Follow its cleaning instructions and preserve the biological media.
  • Keep the water at the equipment’s specified operating level. Do not expose a heater or run a pump dry to create a larger waterfall.
  • Leave calm areas for fish that dislike strong current. The goal is useful circulation, not the strongest possible jet.

For the difference between circulation and waste processing, see our aquarium filtration guide. Aerating the water does not remove ammonia or replace an established biological filter.

Use water changes for the right reason

A partial water change can help when water testing reveals a problem, but an automatic 50% change is not a universal oxygen treatment. Use conditioner appropriate for chlorine and chloramine, match the temperature and, for saltwater tanks, match salinity. Retest afterward and address the cause of contamination.

Keep cleaning targeted. Remove excess food and dead plant material; do not dismantle the aquarium during a breathing emergency. Our rock and gravel cleaning guide covers routine maintenance.

Check heat, plants and stocking

Warm water holds less oxygen at saturation than cooler water. Check the thermometer and the species’ requirements before changing anything. Avoid ice cubes or sudden cold-water changes; correct overheating gradually and maintain aeration.

Plants produce oxygen during photosynthesis but also respire. They cannot guarantee adequate oxygen overnight. Adding plants or leaving the lights on continuously is not a reliable emergency response. Likewise, more aeration does not make an overcrowded aquarium appropriately stocked.

How to measure dissolved oxygen

Use a dissolved-oxygen test or a suitable calibrated meter; ordinary ammonia and pH tests do not measure it. Results are commonly reported in mg/L, with meters sometimes also displaying percent saturation. The Merck Veterinary Manual gives above 5 mg/L as a general reference for most finfish, while emphasizing saturation and species-specific circumstances. Do not treat that number as a guarantee for every animal.

Surface gulping can also accompany nitrite problems or gill disease. Occasional air breathing is normal in some species, including bettas; a sudden change affecting several fish is more concerning. Check the whole system rather than diagnosing from one behavior.

Can there be too much aeration?

A strong current can exhaust fish even when oxygen levels are appropriate. That is different from gas bubble disease, which involves dissolved-gas supersaturation and is often associated with nitrogen. Do not switch off needed aeration simply because you can see bubbles. Adjust the current and investigate abnormal signs.

Prepare for the next outage

Keep a battery-powered aquarium air pump, suitable tubing and fresh batteries or a charged backup supply ready. Test the setup before you need it. During an outage, temperature and biological filtration also need attention; betta keepers can use our heater-failure guide. Manual pouring is a bridge to dependable equipment, not a permanent care routine.

How Often Do Koi Fish Lay Eggs? Spawning and Egg Care

How often do koi fish lay eggs

Most female koi spawn during a seasonal breeding period, commonly once in spring or early summer in temperate climates—but koi can spawn more than once when warm conditions last long enough. Frequency depends on water temperature, day length, climate, maturity, body condition, and whether suitable spawning material is available.

Koi do not give birth to live young. A female scatters adhesive eggs over plants, spawning brushes, or other surfaces while one or more males release milt to fertilize them externally. Adults provide no parental care and will eat eggs and fry.

Adult koi gathering in shallow pond water during spawning season
Koi normally spawn in shallow areas against plants, spawning ropes, or brushes.

How often do koi fish lay eggs?

In many backyard ponds with a cold winter, mature females have one main spawning event each year as water warms. That makes “once annually” a useful expectation, but it is not a biological rule.

The U.S. Geological Survey describes carp as having a flexible life history, an extended breeding season in suitable climates, and the ability to spawn multiple times per year. Research on feral koi also shows that latitude and temperature alter the reproductive cycle: high-latitude populations may spawn once during a short warm period, while populations in warmer regions can have more than one cycle.

A female may not spawn at all in a particular year if she is immature, in poor condition, stressed, without males, or exposed to unsuitable temperature and habitat.

When is koi spawning season?

In the continental United States, spawning is most often observed from late spring into early summer. Local timing can shift by weeks or months. Temperature is more useful than a calendar date.

Common carp generally begin spawning as water reaches the mid-to-upper 60s°F, with activity often occurring around 65–75°F (18–24°C). The University of Maryland’s aquaculture guidance lists approximately 68°F (20°C) as an optimum spawning reference while noting a much broader possible range.

Typical cues include:

  • Rising and stable water temperature
  • Increasing spring day length
  • Fresh water from rainfall or water changes
  • Shallow vegetation, spawning brushes, or fibrous surfaces
  • Mature, well-conditioned males and females

Do not force rapid temperature or water-chemistry changes to trigger breeding. Stability and fish health are more important than producing eggs.

How old must koi be to breed?

Maturity depends on sex, climate, growth, and body size. Males frequently mature earlier than females. In a New Zealand study of feral koi, males matured at about two years and females at about three years; colder-climate populations may mature later.

For a backyard pond, treat three to four years as a practical minimum expectation for females rather than trying to breed small juveniles. A sexually mature fish should also be healthy, well developed, and free from deformity or disease.

Signs that koi are preparing to spawn

  • A female develops a broad, soft-looking abdomen.
  • Males become more active and follow females closely.
  • Males may develop small white breeding tubercles on the gill covers and leading pectoral-fin rays.
  • Fish gather in shallow water, often around plants or spawning material.
  • Chasing becomes vigorous, frequently around dawn.

Spawning can look violent. Males press and bump females against the pond edge or vegetation to encourage egg release. Remove sharp rocks, exposed hardware, and narrow traps before the season begins. Watch for exhausted, injured, or stranded fish.

What do koi eggs look like?

Fresh koi eggs are small, round, translucent to pale amber, and sticky. They adhere individually to plants, brushes, ropes, pond walls, and debris rather than forming a protected nest.

Egg appearance changes during development:

  • Potentially viable eggs: remain translucent or amber and gradually show a darker embryo.
  • Unfertilized or dead eggs: commonly turn opaque white.
  • Fungused eggs: may develop white or gray fuzzy growth that can spread across neighboring eggs.

Color alone is not a perfect test immediately after spawning. Observe eggs over time and remove clearly opaque or fungused material carefully.

How many eggs can a koi lay?

Egg number varies enormously with female size, age, health, and condition. A mature female may produce tens or hundreds of thousands of eggs. Research on feral koi reported an average near 299,000 developing oocytes per female, with large individuals exceeding one million.

Those figures do not mean a backyard pond will produce the same number of fry. Many eggs are never fertilized, are eaten, develop fungus, or fail during incubation. Fry mortality is also high. Avoid fixed claims such as “60% will survive”; survival depends on conditions and management.

How long do koi eggs take to hatch?

Incubation is temperature-dependent. In typical warm spring pond conditions, hatching often takes about three to seven days. Maine’s fisheries guidance for common carp gives a broader four-to-ten-day range depending on water temperature.

Warmer water generally speeds development, but excessively warm water holds less oxygen and can increase microbial problems. Keep temperature stable, provide gentle aeration, and do not allow the egg mass to dry out.

Should you move koi eggs?

If the goal is to raise fry, separate the egg-covered spawning material from adult koi soon after spawning. Moving a spawning rope or brush is safer than scraping or handling individual eggs.

  1. Prepare a cycled nursery tank or protected pond area before spawning.
  2. Match temperature and water chemistry closely.
  3. Move the entire rope, brush, or plant section while keeping eggs wet.
  4. Provide gentle aeration nearby, not a forceful current directly on the eggs.
  5. Remove obviously dead or fungused eggs with clean tools.
  6. Test ammonia and nitrite daily once eggs begin hatching.

Do not move eggs into a natural lake or public waterway. Koi are ornamental common carp and can become invasive.

Protecting eggs in the original pond

Leaving eggs in a community koi pond results in heavy predation. If only a few naturally surviving fry are acceptable, provide dense protected spawning material and plant cover. If controlled breeding is the goal, use a separate breeding and nursery system.

A divider can help only if adults cannot reach through or around it and the protected side has adequate circulation. Check that small fry cannot be pulled into pump intakes.

Adult koi swimming in a mature outdoor pond
Adult koi will eat eggs and newly hatched fry, so breeding requires a protected nursery area.

Nursery water quality

Eggs and newly hatched fry need clean, oxygenated water without strong current. Use a mature sponge filter or an intake protected by fine foam. Important targets include:

  • Ammonia: 0 ppm
  • Nitrite: 0 ppm
  • Stable temperature
  • Adequate dissolved oxygen
  • Gentle circulation

A large container is not automatically safe if it is uncycled. Decomposing eggs and excess food can produce ammonia quickly. Make small, temperature-matched water changes as testing requires.

What happens after hatching?

Newly hatched larvae initially remain attached to surfaces and use their yolk sacs. Do not begin heavy feeding immediately. Once fry become free-swimming, offer appropriately small foods such as commercial fry powder, infusoria-sized foods, or newly hatched brine shrimp as the fish become large enough.

Feed tiny portions several times per day while removing waste. Growth will be uneven, so larger fry may need to be separated from smaller siblings. Raising hundreds of koi requires substantial space, filtration, food, sorting, and humane plans for fish that are not retained.

Can a female koi become egg-bound?

A swollen abdomen is not proof of eggs. It can also indicate overfeeding, fluid retention, internal disease, tumors, or constipation. Do not squeeze a koi to release eggs.

If a female remains unusually swollen, becomes lethargic, isolates herself, develops raised scales, stops eating, or has trouble swimming, contact an aquatic veterinarian or an experienced koi-health professional. Handling and sedation carry risks and should not be improvised.

How to reduce accidental spawning injuries

  • Remove sharp or unstable pond decorations.
  • Keep pump intakes protected.
  • Maintain excellent water quality before the breeding season.
  • Provide soft spawning brushes or safe plant material.
  • Observe intense chasing and separate an injured fish if necessary.
  • Have a covered recovery tank ready before moving any fish.

Spawning can temporarily cloud the water and increase organic waste. Check oxygen, ammonia, and nitrite afterward, remove damaged plant material, and perform an appropriate partial water change.

Frequently asked questions

Do koi lay eggs every year?

Many mature females in temperate ponds spawn once during the annual warm season, but some skip a year and others can spawn more than once under prolonged favorable conditions.

Do koi guard their eggs?

No. Koi scatter adhesive eggs and provide no parental care. Adults commonly eat both eggs and fry.

Can koi lay eggs without a male?

A female may release unfertilized eggs without a successful male spawning event, but those eggs cannot develop into fry.

What time of day do koi spawn?

Spawning is often most active in the early morning, though local conditions vary.

Why did my koi eggs turn white?

Opaque white eggs are commonly unfertilized or dead. Fuzzy growth suggests fungus. Remove affected eggs carefully and improve sanitation, oxygenation, and water quality.

Bottom line

Expect one main koi spawning period each year in many U.S. backyard ponds, but understand that warm-climate koi can spawn more than once and some females may not spawn at all. Prepare safe spawning material, protect females from injury, separate eggs only into a cycled nursery, and plan responsibly for the potentially enormous number of fry.

Authoritative references

How to Clean Fish Tank Rocks and Gravel Safely

How to Clean Fish Tank Rocks

For routine fish tank rock cleaning, remove loose waste with a siphon and scrub troublesome algae gently with an aquarium-only brush. You usually do not need to remove the fish, empty the tank or sterilize every stone. Preserve the useful microbial community while removing accumulated debris.

The right method depends on whether you mean gravel, decorative freshwater rocks, new dry rock or living reef rock. This guide covers routine freshwater maintenance first, then explains where different precautions apply.

Choose the right cleaning method

  • Established gravel: use a gravel siphon to lift waste while leaving the gravel behind.
  • Large freshwater rocks: brush accessible algae gently and siphon away what you loosen.
  • New aquarium gravel or dry decorative rock: follow the supplier’s preparation instructions; rinse ordinary dusty materials before use unless directed otherwise.
  • Marine live rock or coral-covered rock: do not use a freshwater scrubbing or disinfection routine. Seek advice specific to the organisms attached to it.

Gather a few simple tools

Use an aquarium-only bucket, a gravel siphon, a soft brush, towels, water conditioner and a thermometer. A small suction baster can help lift isolated debris from awkward corners. Avoid tools with soap, detergent, pesticide or household-cleaner residues.

The CDC recommends gloves for aquarium cleaning and washing hands after handling aquarium water or equipment. Use a utility sink or another suitable cleaning area instead of the kitchen sink when possible. Never start a siphon by mouth.

How to clean aquarium gravel with a siphon

  1. Prepare replacement water. Treat tap water for chlorine and chloramine according to the conditioner label, and match the aquarium’s temperature.
  2. Make equipment safe. Follow the heater’s cooldown instructions before lowering the water. Disconnect equipment that would otherwise run dry or become exposed.
  3. Start the siphon as its maker directs. Keep the receiving bucket below the tank and secure the hose so it cannot spill.
  4. Work through dirty, accessible patches. Let waste rise into the tube while gravel falls back. Control flow if gravel is being carried into the hose.
  5. Stop at your planned water-change volume. You can finish other areas at a later maintenance session.
  6. Refill slowly and restore equipment. Confirm normal filter flow and heater operation before leaving.

Aqueon’s cleaning checklist combines gravel vacuuming with conditioned, temperature-matched replacement water. Avoid turning a normal maintenance session into a complete tank reset.

Fish swimming in a decorated aquarium
Routine maintenance should preserve a stable aquarium while removing accumulated waste.

Sand and planted substrates need a lighter touch

Hover the siphon above sand to collect surface debris without removing the bed. Around rooted plants, avoid digging into the roots. Aquasoil and layered substrates may have specific maintenance requirements; follow the manufacturer’s directions instead of treating them like coarse gravel.

If an old, neglected substrate releases an unusual rotten-egg smell, stop stirring it. Seek experienced help before disturbing more of the bed. The Merck Veterinary Manual describes how disturbing oxygen-depleted, waste-rich sediment can release harmful hydrogen sulfide.

How to clean large rocks without a gravel vacuum

For a small accessible rock, gently brush the problem area and use a baster or small siphon to collect the loosened material. If you have no suction tool, a removable freshwater decoration can be brushed in a bucket of removed tank water. A cup alone cannot efficiently collect debris trapped deep in gravel; obtain an appropriate siphon for that job.

Leave stable rockwork in place where possible. Before lifting anything, check for hidden animals, attached plants and stones resting on it. Do not undermine a stack or set a heavy rock down on fish, shrimp or the glass. Clean one manageable area rather than dismantling the whole layout.

Do rocks need to look spotless?

No. Some algae and biofilm are normal and are not, by themselves, evidence that the water is dangerous. Remove excessive buildup for maintenance and visibility, but do not disinfect a healthy aquarium to make every surface look new.

If algae returns quickly, review lighting duration, feeding and maintenance rather than scrubbing harder. Check water quality when fish behave abnormally. Our filtration guide explains why protecting biological filtration matters.

Preparing new rocks: cleaning is not a safety test

Buy rock intended for aquarium use from a supplier who can identify it and explain its effect on water chemistry. Scrubbing cannot reliably make a contaminated or unidentified stone safe.

Limestone and coral-based materials can raise pH and alkalinity, which may suit some setups and conflict with others. Aqueon’s pH guidance discusses these effects. A vinegar fizz test is only a clue about carbonate content; a negative result does not rule out metals, pollutants or other problems. Likewise, surviving a 24-hour soak does not certify a rock as aquarium-safe.

Reject material with an uncertain contamination history, unstable layers or unsuitable sharp edges. Ask about coatings and previous chemical treatments. Choose a known suitable product rather than relying on home “sterilization” to solve those uncertainties.

Do not boil, bake or casually bleach aquarium rocks

Heat is unnecessary for routine cleaning. Never heat or aggressively scrub marine rock that may carry zoanthids or palythoas: some contain palytoxin. A CDC investigation documented serious exposures associated with aquarium corals, including aerosol-generating removal methods.

Bleach is not part of this routine cleaning method. Disinfection after disease or contamination requires a separate, material-specific plan and verified removal of residues. “It no longer smells of chlorine” is not adequate clearance to put an item back with fish. Never mix bleach with vinegar or other cleaners.

How often should you clean the rocks?

Inspect for debris during regular water changes and clean where needed. Stocking, feeding, substrate and plants affect the workload, so there is no requirement to scrub every rock each week. Remove uneaten food and decaying leaves promptly. Record recurring trouble spots and adjust maintenance before waste accumulates.

Keep the useful routine simple: inspect, remove excess debris, replace water correctly and confirm equipment operation. For broader setup and maintenance help, visit our aquarium basics hub. If fish are breathing abnormally, address that immediately using the oxygenation guide rather than starting a major cleaning project.

Fish Bowl Care: Safer Water and a Better Home for Your Fish

How to Care for Your Fish Bowl

A small, unfiltered fish bowl is not a suitable permanent home for pet fish. If you already have a fish in one, focus on water quality now and arrange an aquarium that meets the needs of its species. You do not need to find a tougher fish or add a cleanup crew.

This guide explains how to reduce immediate risks, clean without making conditions worse, and plan the move. It is a research-based care guide, not a claim that we have tested bowl keeping.

Why a small fish bowl is difficult to maintain

Small bowls leave little room for swimming, filtration and temperature control. Their limited water volume makes mistakes harder to manage. RSPCA Victoria advises keeping fish in properly equipped aquariums rather than small bowls, highlighting oxygen exchange and water-quality problems.

A larger vessel with suitable equipment still needs to meet the fish’s adult size, swimming and social needs. The word “bowl” on the packaging tells you very little about whether a setup is adequate. Choose the habitat for the fish, rather than choosing a fish to fit a decorative container.

If your fish is already in a bowl

  1. Identify the species. Use its actual care requirements to choose the replacement aquarium. Start with our fish care guides.
  2. Check the water. Measure ammonia, nitrite and temperature. Clear water does not establish that conditions are safe. Aim for no detectable ammonia or nitrite.
  3. Address contamination promptly. Use partial water changes with properly conditioned, temperature-matched water if waste compounds are detectable. Retest afterward; a single change does not solve an ongoing waste problem.
  4. Do not add more animals. Extra fish, snails or shrimp add to the demands on the setup.
  5. Arrange a suitable aquarium promptly. Ask an experienced aquatic retailer or fish veterinarian for help if you cannot safely stabilize the current housing.

OATA’s freshwater setup guidance explains cycling, testing and maintenance. A newly purchased filter is not an established biological filter. Do not assume a new tank is ready simply because the water has stood overnight.

How to clean without adding new risks

Use an aquarium-only bucket and siphon to remove uneaten food and waste. Never use soap, detergent or household cleaning spray on occupied aquarium equipment. For routine cleaning, avoid repeatedly catching the fish and stripping everything down.

Treat replacement tap water for chlorine and chloramine according to the conditioner label, and match the temperature before adding it. If an established filter needs cleaning, gently rinse its media in removed aquarium water rather than disinfecting it. These precautions are covered in the RSPCA’s aquarium maintenance advice.

How often should you change bowl water?

There is no reliable once-a-week schedule for every bowl. The fish, feeding, volume and filtration all matter. Test at least daily while managing temporary unfiltered housing, and act on the results. Weekly maintenance advice for an established aquarium should not be treated as a guarantee for an unfiltered bowl.

Keep a short record of test results and water changes. If ammonia or nitrite keeps returning, seek help and improve the housing rather than repeatedly accepting unsafe readings.

Can a betta live in a bowl?

A betta’s ability to take air at the surface does not remove its need for clean water, space and stable warmth. The RSPCA recommends an aquarium of about 5.3 US gallons (20 liters) or more where possible, with appropriate filtration and heating. Its advised temperature range is about 75–79°F (24–26°C). A secure lid should leave access to air above the water.

For a beginner, an equipped aquarium of this size or larger is a better starting point than a tiny ornamental bowl. Read our female and male betta guide before planning companions.

What about goldfish, guppies or schooling fish?

This guide does not recommend any of them for a small bowl. Choose housing using the exact species’ adult requirements. A tiny juvenile’s current length is not a stocking plan, and a schooling species needs both appropriate companions and room for the group. Review the species before buying additional fish.

When a fish needs urgent help

Persistent gasping, loss of balance, unusual inactivity or rapidly moving gills deserve immediate attention. Check water quality and temperature, and ensure suitable aeration. Occasional surface breathing is normal for a betta; a sudden change in breathing or behavior is different.

The RSPCA fish-health guide recommends checking water first and contacting a specialist fish veterinarian for diagnosis and treatment. Do not assume every struggling fish needs medication.

Plan the replacement before buying extras

Prioritize a suitable aquarium, filter, test kit, conditioner and species-appropriate temperature control. Decorations come after those essentials. Our aquarium basics hub can help you plan the setup. If you cannot provide suitable housing, seek responsible rehoming advice from an aquatic retailer or rescue.

Is Super Glue Aquarium Safe? Plant Glue vs. Tank Sealant

Super glue aquarium safe

Aquarium-labeled cyanoacrylate gel can be used to attach plants and certain decorations when you follow its directions. Super glue is not a substitute for the structural silicone seams that hold a glass fish tank together. The exact adhesive and the job both matter: a small plant attachment and a leaking tank require very different solutions.

If your aquarium is leaking, stop treating this as a glue-selection problem. Protect electrical equipment from water, move livestock to a suitable temporary setup, and have the tank assessed before using it again. Do not try to seal an occupied aquarium with a dab of super glue.

Which aquarium jobs suit which adhesive?

  • Attaching moss or plant roots to wood or rock: use an aquarium-labeled cyanoacrylate gel intended for that purpose.
  • Mounting coral frags: choose a reef-labeled adhesive and follow its specific handling directions.
  • Securing substantial rockwork: use a stable design and an aquarium-rated bonding system appropriate for its weight. A small spot of glue should not be the only thing preventing a heavy stack from collapsing.
  • Glass seams, leaks, or damaged bracing: seek tank-manufacturer guidance or professional repair. This is structural work, not an aquascaping-glue application.
  • Acrylic aquarium repairs: obtain material-specific professional advice; do not assume a glass-tank sealant or plant glue is suitable.

How to choose aquarium-safe super glue

Look for a product whose manufacturer explicitly supports aquarium use and the materials you intend to join. “Waterproof,” “non-toxic,” or a familiar brand name by itself is not enough to establish suitability for continuous immersion with livestock.

Cyanoacrylate gel is easier to place precisely than a runny liquid. Still, do not assume every product carrying the words “super glue” has the same formulation or approved uses. Check the exact package, directions, and safety information. If aquarium use is unclear, ask the manufacturer or choose a purpose-made aquarium adhesive.

Two current examples are Seachem Flourish Glue, intended for plants and moss, and Seachem Reef Glue, intended for coral mounting. Both are cyanoacrylate gels; their labels allow underwater use. These are examples based on manufacturer instructions, not products we claim to have personally tested.

Importantly, Seachem instructs users not to use either product to attach items to glass. An adhesive being suitable inside an aquarium does not mean it is suitable for every surface inside it.

How to attach aquarium plants with gel glue

Working on removable wood or rock outside the aquarium usually gives better control. Have the plant and attachment point ready before opening the tube, and keep plant foliage moist while you work.

  1. Check the plant’s growth habit. Plants grown attached to hardscape need their growing portions exposed. Do not bury or coat an entire rhizome in adhesive.
  2. Prepare the contact point. Remove loose debris and test the placement. Avoid an unstable or crumbling surface.
  3. Use a small amount. Apply just enough for a localized root or moss attachment, following the product label. Do not spread glue over leaves or growing tips.
  4. Hold the pieces still. Follow the stated bonding time. For example, Flourish Glue’s directions specify holding the attachment for 20 seconds.
  5. Check before replacing the decoration. Make sure the plant is secure and that there are no loose adhesive blobs. Follow the product’s directions for immersion; a quick initial bond is not a universal full-curing time.
  6. Inspect during maintenance. Plants grow and wood changes over time. Reposition or reattach a loose plant rather than adding a large amount of glue around it.

Stem plants such as the options in our red aquarium plant guide are normally planted in substrate. Glue is a tool for an appropriate attachment job, not something every planted tank needs.

Can you apply super glue underwater?

Only use it underwater when the exact product’s instructions allow that application. Seachem specifically supports underwater use for the two gels above, but that does not establish the same use for a household adhesive.

Keep fish and shrimp away from the working area and avoid releasing loose glue into the tank. For delicate attachments or a difficult angle, remove the decoration if practical. Do not chase a floating plant around an occupied tank while dispensing adhesive.

How long should the glue cure?

There is no single waiting time that applies to every aquarium adhesive. Initial bonding, handling strength, full cure, and permission to immerse are different instructions. The amount applied and the product formulation also matter.

Read the exact label instead of relying on an online rule such as “all glue is safe after a minute.” Aquarium silicone and two-part products have their own requirements. If the manufacturer does not state when the finished bond can be immersed, clarify that before putting it near livestock.

Super glue versus aquarium silicone

Super glue forms a relatively rigid attachment. Aquarium silicone provides a flexible seal and is used in glass aquarium construction. They are not interchangeable simply because both are adhesives.

Aqueon’s aquarium silicone is an example specifically marketed for freshwater and saltwater aquarium sealing. That product description does not mean every leak can be repaired by adding silicone over an existing seam. The condition of the original bond, glass, frame, and bracing must be assessed.

For silicone selection, see our aquarium silicone guide. Follow the tank manufacturer’s requirements and the sealant’s preparation and curing instructions. Never assume a bathroom or kitchen sealant is acceptable, and do not use a product with mold-control additives unless its manufacturer explicitly approves the intended aquarium application.

Common mistakes to avoid

  • Choosing by brand alone. One brand can sell cyanoacrylate, expanding glue, epoxy, and other products with different uses.
  • Using glue to compensate for unstable rocks. Arrange a secure base and account for digging fish. Our aquarium rock guide covers material selection; confirm that any chosen stone is suitable for your tank.
  • Applying a thick coating to a plant. Keep adhesive localized so roots and growing tissue remain exposed.
  • Treating hardened glue as fish food. Adhesive is not food. Remove loose pieces rather than leaving livestock to investigate them.
  • Using solvents inside the tank. Keep adhesive removers and cleaning chemicals away from aquarium water and livestock.

What if you used the wrong glue?

Remove the affected decoration if it can be done safely. Keep the package so you can identify the exact product and contact the manufacturer about aquarium exposure. Do not add another chemical to “neutralize” an unknown adhesive.

If livestock show distress, prioritize clean, conditioned water of a suitable temperature and adequate aeration, and seek advice appropriate to the animals and product involved. A universal waiting period cannot make an unidentified adhesive safe.

When handling cyanoacrylate, follow the label’s precautions: it can bond skin and eyes rapidly. Keep it away from children, protect your eyes, and use the manufacturer’s first-aid guidance if an accident occurs.

The practical choice

For a small plant or coral attachment, choose a clearly labeled aquarium gel and use the smallest effective amount. For a leak, damaged seam, or load-bearing repair, stop and assess the aquarium itself. Choosing the right adhesive starts with knowing which of those jobs you are doing.

Pregnant Neon Tetra? Eggs, Bloating, and What to Do

Pregnant Neon Tetra

Neon tetras do not become pregnant with live babies: females develop eggs. Neon tetras (Paracheirodon innesi) lay eggs that are fertilized outside the body. However, a rounded belly alone cannot tell you whether a fish has eggs, has recently eaten, or is unwell.

Start with the fish’s behavior and your water tests. A comfortable, active female with a gently rounded abdomen needs a different response from a fish that is rapidly swelling, breathing hard, or struggling to swim.

Can neon tetras get pregnant?

Neons are egg scatterers. During spawning, a female releases eggs and a male releases sperm. There is no livebearer-style pregnancy or predictable “due date.” The more accurate term for a female carrying developed eggs is gravid.

The University of Florida’s guide to ornamental fish reproduction describes tetras as generally scattering eggs and sperm over underwater structures, without parental care. Adults may eat the eggs, so successful spawning in a community tank does not necessarily produce surviving fry.

Eggs, a full stomach, or illness?

Compare the fish with its usual appearance, ideally before feeding and from both the side and above. Adult females are often fuller-bodied than males, but body shape and the curve of the blue stripe are clues, not reliable pregnancy tests.

What you notice What it may mean Best next step
Gradual, fairly even fullness; normal appetite and swimming Normal female body shape or developing eggs Observe without repeatedly catching or isolating the fish.
Belly looks fuller immediately after a meal Recent feeding may explain the change Review portion size and compare again before the next feeding.
Increasing or uneven swelling; appetite loss or unusual hiding A health problem needs consideration Test water and seek advice from a veterinarian who treats fish if it persists or worsens.
Raised scales, severe swelling, gasping, or loss of balance Urgent warning signs Address water quality promptly and contact a fish veterinarian.

Fluid buildup can produce a swollen abdomen and raised, pinecone-like scales. As the Merck Veterinary Manual explains, fish diseases can have overlapping signs. “Dropsy” describes a condition rather than identifying its cause. A photograph or swollen belly does not justify choosing an antibiotic, salt treatment, or parasite medication.

What to do when a neon tetra looks swollen

  1. Check the whole aquarium. Are other fish breathing quickly, hiding, or refusing food? A shared change makes environmental trouble especially important to investigate.
  2. Test the water. Check ammonia, nitrite, nitrate, pH, and temperature. Ammonia and nitrite should be undetectable in an established aquarium. Our aquarium test kit guide explains which measurements different kits cover.
  3. Correct problems gently. Use conditioned, temperature-matched replacement water for an appropriate partial water change, and check that filtration and surface movement are working. Do not abruptly change pH or hardness to encourage spawning.
  4. Keep a short record. Note appetite, breathing, swimming, test results, and whether swelling changes. Clear photos taken under similar lighting help show progression.
  5. Escalate when needed. Rapid deterioration, raised scales, or difficulty swimming deserves prompt veterinary advice. See our guide to a fish swimming sideways for environmental checks while arranging help.

If the female otherwise behaves normally, keep ordinary maintenance and modest, balanced meals consistent. She does not need a cramped breeding box simply because she looks round. Never squeeze her abdomen to “release” eggs.

If you want to breed neon tetras

Breeding is a separate project, not a treatment for swelling. Prepare space for growing fry and an appropriate first-food culture before attempting it. A spare tank is only useful when its water quality and filtration are ready for fish.

A practical beginner preparation is a covered 10-gallon breeding aquarium with a mature, gently running sponge filter and fine-leaved plants or a spawning mop. This is a planning suggestion, not a claim that every successful breeder uses that size. Keep the community tank’s normal care routine intact.

Neon breeding commonly uses very soft, acidic water and subdued light. In his firsthand breeding account, John Robertson describes success around 75–78°F and emphasizes light-sensitive eggs and fry. Those observations are not a reason to suddenly acidify an established tank. Acclimate fish carefully; very low buffering makes pH harder to manage. Our RO and tap-water mixing guide explains why both hardness and buffering need attention.

Remove adults after spawning if you intend to protect eggs. Avoid bright inspection lights. Newly hatched larvae initially use their yolk reserves; once free-swimming, they need food small enough to swallow, such as suitable infusoria or cultured Paramecium, before progressing to larger foods. Tiny, measured feedings and careful waste removal matter more than adding large quantities of food.

Common questions

How long is a neon tetra pregnant?

It is not pregnant in the livebearer sense. A rounded female does not have a dependable countdown to spawning. Do not wait for a supposed due date if swelling is worsening or the fish is unwell.

Does chasing mean spawning is about to happen?

Not necessarily. Chasing alone cannot confirm fertilization or even that you have correctly identified a male and female. Watch for persistent harassment and give fish cover rather than assuming all chasing is courtship.

Can a female lay eggs without a male?

A female can release unfertilized eggs, but those eggs will not develop into fry. Finding eggs does not prove that fertilization occurred.

Why are there no babies in my community tank?

Eggs may be unfertilized, eaten, or lost before you notice them. Fry also need suitable food and protection from filter intakes and tank mates. A full-bellied female by itself is not evidence that any eggs were laid.

Guppy Molly Hybrid: What the Evidence Actually Shows

Guppy Molly Hybrid

Guppy–molly hybrids have been reported in research, but they are not a predictable result of keeping guppies and mollies together. The molly species involved matters, and unusual-looking fry are not proof of a cross.

If you found babies in a mixed aquarium, the useful first step is to check the parents’ history and care for the fry. Do not assume that a molly fertilized a guppy simply because no male guppy is currently in the tank.

Can guppies and mollies crossbreed?

Guppies (Poecilia reticulata) and mollies belong to the genus Poecilia. That relationship does not mean every species or pairing can produce viable offspring. “Molly” also covers more than one species and many aquarium strains.

A 1996 study by Rodionova, Nikitin, and Borodin examined chromosomes in P. velifera × guppy hybrids and found extensive problems with chromosome pairing during sperm-cell development. The study’s research abstract provides evidence for that particular cross; it does not establish an easy home-breeding method.

By contrast, a 2017 experiment involving sailfin mollies, P. latipinna, and guppies reported no pregnancies or larvae in its cross-species treatments. One unsuccessful trial does not prove all crosses impossible, but it does undermine blanket promises that these fish readily hybridize.

The practical answer: do not buy a mixed group expecting a dependable hybrid breeding project. Reports about one molly species cannot automatically be applied to every fish sold as a molly.

What are “muppies” and “gollies”?

These are informal hobby names for claimed guppy–molly hybrids. They are not scientific species names, certified pedigrees, or reliable descriptions of which parent was the guppy. Sellers and hobbyists may use the terms differently.

Ask for the actual parent species and breeding records. A label, video title, body shape, or unusual color does not establish ancestry. Nor does a resemblance to both fish demonstrate that an offspring is fertile.

Why unexpected fry are often misidentified

Females can store sperm

Research on female sperm storage in guppies shows that stored sperm can remain relevant to reproduction for months. A female purchased from a mixed-sex tank may therefore produce young after moving into a tank with no male of her own species.

This makes “she has only lived with a male molly since I bought her” insufficient evidence of hybrid parentage. Separating an adult female for a few weeks does not establish that she had never mated.

Appearance is not a parentage test

Domestic strains vary, and juvenile proportions and colors change as fish grow. A short body, unusual tail, or mixed color pattern is not a diagnostic hybrid feature. A deformity should be assessed as a welfare concern, not promoted as evidence of a rare cross.

Convincing identification requires a documented breeding history that rules out earlier matings and accidental mixing. Where a firm conclusion matters, specialist genetic work may be needed. Most home aquarium observations can support only “parentage uncertain.”

Are all guppy–molly hybrids sterile?

Do not make an absolute claim about every alleged hybrid. The chromosome findings above indicate reproductive difficulties in a particular researched cross; they do not verify the ancestry, sex, lifespan, or fertility of an unidentified aquarium fish.

There is likewise no sound basis here for promising that all offspring will be male, that every fish will die young, or that hybrids will grow to a fixed size. Those claims require evidence about the exact cross and fish being discussed.

Can guppies and mollies live together?

They may share an appropriately planned aquarium, but peaceful behavior, adult size, and suitable water matter more than whether a cross is theoretically possible. A male chasing another species is not proof of successful breeding.

  • Identify the molly. Larger sailfin types need more swimming space than small guppies. Choose tank size for the adults and the complete stocking plan, rather than using a fish-per-gallon rule.
  • Check water requirements before combining them. Review your stock’s temperature and mineral needs with its breeder or supplier. Our guppy temperature guide explains temperature management; do not assume that one setting suits every molly strain and every tank mate.
  • Watch individual behavior. Provide plants and broken sightlines. Separate fish if chasing prevents feeding or resting, or causes injury. Adding more fish to distract a persistent male can create another stocking problem.
  • Plan for ordinary livebearer babies. Keep filtration mature and monitor water quality. Mixed-sex groups may produce more fish than the aquarium can accommodate, regardless of hybridization.

We do not recommend confining mismatched fish together or removing all same-species partners to force a cross. There is no dependable “one male plus two females” recipe for producing these hybrids.

What to do if you already have suspected hybrid fry

  1. Protect them without sacrificing water quality. Use a suitable established nursery if necessary, with a protected filter intake and gentle circulation.
  2. Feed for their size. Offer small amounts of suitable finely sized fry food and remove leftovers. Our molly fry care guide covers practical nursery care.
  3. Keep records. Record purchase dates, known adults, births, and photographs as the fish grow. Preserve uncertainty rather than guessing a pedigree.
  4. Rehome honestly. Describe them as fish of uncertain parentage unless the cross is established. Never release aquarium fish into local waterways.

Healthy housing and honest identification are more useful than a catchy hybrid name. If your main goal is learning to breed livebearers, start with a known species and a manageable plan for its offspring.

Kuhli Loach Care: Tank Size, Groups, Food and Tank Mates

Kuhli Loach

Kuhli loaches do best in a group, in a mature aquarium with soft sand, plenty of cover and food that actually reaches them. These slender bottom-dwelling fish are peaceful, but they are not a cleanup service and should not be expected to survive on scraps.

The name “kuhli loach” is used for several Pangio species. A shop label saying Pangio kuhlii does not necessarily identify the fish precisely. This guide focuses on the small, banded kuhli loaches commonly kept in freshwater aquariums.

Kuhli loach care at a glance

Group Plan for at least six compatible kuhli loaches
Tank A 20-gallon-long aquarium is a practical starting point for a small group; allow more space for tank mates
Adult length Commonly around 8–12 cm (3–5 inches), depending on species
Temperature 24–26°C (75–79°F) is a useful starting range for commonly traded banded forms; confirm the supplier’s conditions
Water Stable, generally soft to moderately soft freshwater; no detectable ammonia or nitrite
Substrate Soft aquarium sand with smooth shelters and shaded areas
Food Small sinking prepared foods, supplemented with suitable frozen foods

The tank and group recommendations above are practical planning guidance, not a stocking formula. Floor area, filtration, feeding access and the other animals in the aquarium still matter.

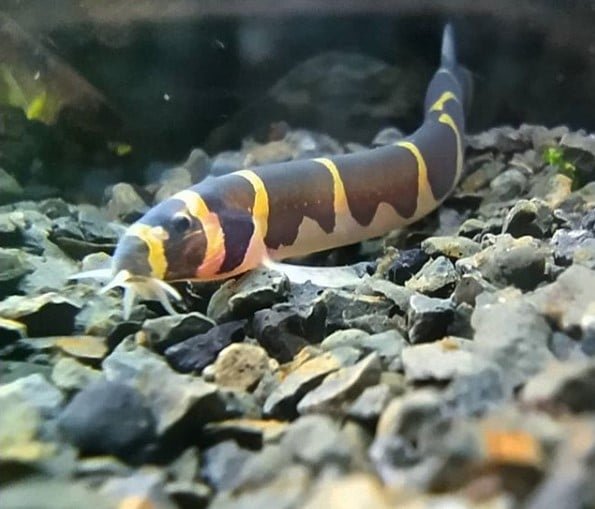
Banded kuhli loach with an elongated body

Which kuhli loach do you have?

Kuhli loaches belong to the loach family Cobitidae; they are fish, not eels. Their elongated bodies and small fins give them an eel-like appearance. FishBase lists P. kuhlii at up to 12 cm total length, but this figure should not be applied to every fish sold under the common name.

Pangio semicincta is frequently sold as P. kuhlii. Other related species also enter the trade, and band patterns alone may not resolve their identity. Ask the seller for the scientific name and origin when available. Avoid treating conflicting wild-habitat measurements from different species as interchangeable aquarium targets.

Tank size, sand and hiding places

Choose a long aquarium with usable floor space. A tall tank of the same volume can offer less room to forage. Plan the layout around a group of loaches before adding other bottom dwellers; their small body size does not make crowded stocking appropriate.

Use soft sand, shaded retreats and smooth, stable decor. Leave accessible feeding areas so you can check that food is being eaten. Plants and wood can divide the floor into sheltered routes. Do not remove every hiding place to make the fish easier to see.

Check the setup for narrow holes, exposed filter intakes and gaps around the lid. Fit an appropriate intake guard or sponge. Secure heavy decorations so burrowing cannot undermine them. Inspect hollow ornaments before lifting them out, because a loach may be inside.

Water quality and routine maintenance

Use a fully cycled aquarium and test ammonia, nitrite, nitrate, pH and temperature. Zero detectable ammonia and nitrite are the routine goal. A filter advertised for a particular tank volume is not proof that the aquarium is biologically ready.

Many traded kuhli loaches are kept in mildly acidic to neutral water. Check your tap water and the supplier’s conditions before purchase. Do not rapidly alter pH or try to reproduce extreme peat-swamp acidity with an unmeasured dose of chemicals or leaves.

Perform partial water changes appropriate to the aquarium’s test results and stocking. Treat replacement tap water for chlorine and chloramine, and match its temperature. Keep biological filter media functioning; replacing all of it at once can destabilize the aquarium. See our Aquarium Basics guide for the foundations.

During cleaning, keep the siphon intake in view and check the bucket before disposing of water. Work around occupied shelters rather than stirring the whole substrate at once. If a fish disappears, check equipment and hiding places carefully before dismantling the tank.

Kuhli loach resting near the aquarium bottom

What should you feed kuhli loaches?

Offer small sinking pellets or other complete prepared food they can swallow, with suitable frozen foods such as bloodworms or brine shrimp as part of a varied diet. Their ability to search for food does not mean that everything they find is nutritious.

Place modest portions near their shelters when lighting is subdued. Watch what happens: if faster fish take everything, change the feeding location or divide the food among several spots. Adjust portions to the fish’s condition and the amount left behind. Leaving a large pile overnight can foul the water.

A useful feeding check is whether each loach maintains a reasonably filled body and is seen feeding over time. A persistently thin fish needs investigation, but thinness alone does not prove internal parasites. Competition, inadequate food and other illnesses are possible explanations.

Groups, behavior and tank mates

Keep kuhli loaches with their own kind rather than buying a lone specimen. They may rest together while foraging independently. Being hidden during the day is not automatically a problem; use quiet observation around feeding time to monitor them.

Choose small, peaceful tank mates with compatible water and temperature needs. Check the requirements of the exact species rather than assuming every tetra, rasbora or gourami is suitable. Avoid predators, persistent fin-nippers and territorial bottom-dwelling fish. A loach’s speed is not protection against an unsuitable companion.

Additional bottom feeders can compete for the same food and shelters. Shrimp eggs, tiny young animals and fish eggs may be eaten; a breeding colony needs a more cautious compatibility assessment than an ordinary display tank. Bettas vary individually, so have a separation plan if one starts harassing the loaches.

Health problems and safe handling

Kuhli loaches do have skin. The term “scaleless” is often used loosely in aquarium care and is not a diagnosis or a medication-dosing instruction. Never assume every product is safe, or automatically halve a dose without checking the specific treatment guidance.

Rapid breathing, wounds, persistent weight loss, white spots or sudden loss of coordination warrant attention. Test the water and check equipment first. Record when signs began, recent additions and any products already used; a fish veterinarian can use that history to guide diagnosis and treatment.

Quarantine new arrivals in suitable, cycled housing with cover and separate equipment. Avoid routine combinations of salt and medications “just in case.” When moving loaches, be aware of their small defensive spines beneath the eyes, which can catch in nets. Use careful handling and never pull an entangled fish free by force.

Can you breed kuhli loaches at home?

Aquarium spawning has been reported, but it is uncommon and the fish’s identity is often uncertain. Mature females may become fuller-bodied, while male fin features can differ. Do not squeeze a fish to inspect it or assume any swelling is caused by eggs.

We do not recommend a guaranteed breeding recipe. Stable care, good nutrition and suitable cover are more responsible goals than deliberately shocking the aquarium with temperature or chemistry changes. If eggs or fry appear, document the conditions and seek species-specific advice before moving them. Exact hatching times and first-food requirements should not be guessed from a generic “kuhli” label.

Kuhli loach showing its banded body pattern

Frequently asked questions

Can I keep just one kuhli loach?

A group is the better plan. If your aquarium cannot accommodate a group with sufficient floor space and food, choose a different species rather than keeping one as a bottom-cleaner.

Will kuhli loaches eat algae or fish waste?

They should not be bought for either job. Provide their own food, remove waste during maintenance and address algae through aquarium management.

Why are my kuhli loaches always hiding?

Check the group, shelter, lighting, feeding access and behavior of tank mates. Hiding by itself can be normal. Hiding combined with weight loss, abnormal breathing or failure to eat needs closer investigation.

How long do kuhli loaches live?

They can be a long-term commitment: Aquarium Industries reports lifespans of up to about ten years under suitable conditions. That is a possible upper lifespan, not a guarantee for a newly purchased fish.

Sources and further reading