How to Raise KH in an Aquarium Safely

How to Raise KH in Aquarium

Carbonate hardness (KH) is the part of aquarium water chemistry that helps resist sudden changes in pH. If your KH is too low for the animals or system you keep, raise it gradually and measure the result. The safest method is usually a water change with conditioned water that already has a suitable KH. For reverse-osmosis (RO) water or naturally soft tap water, use a measured remineralizer or sodium bicarbonate rather than guessing.

This guide explains how to raise KH without confusing it with general hardness (GH), forcing every aquarium toward the same number, or causing an abrupt pH shift.

What KH Means in an Aquarium

KH is the aquarium hobby’s practical measure of carbonate and bicarbonate buffering. These compounds neutralize acids and help keep pH more stable. Test kits commonly report KH in degrees of carbonate hardness (dKH) or parts per million (ppm) as calcium carbonate. The conversion is:

1 dKH is approximately 17.9 ppm as calcium carbonate.

KH and pH are connected, but they are not the same measurement. pH describes how acidic or alkaline the water is at that moment. KH describes much of the water’s capacity to resist acid-driven pH change. A tank can therefore have an acceptable pH reading while its low KH leaves it vulnerable to a later drop.
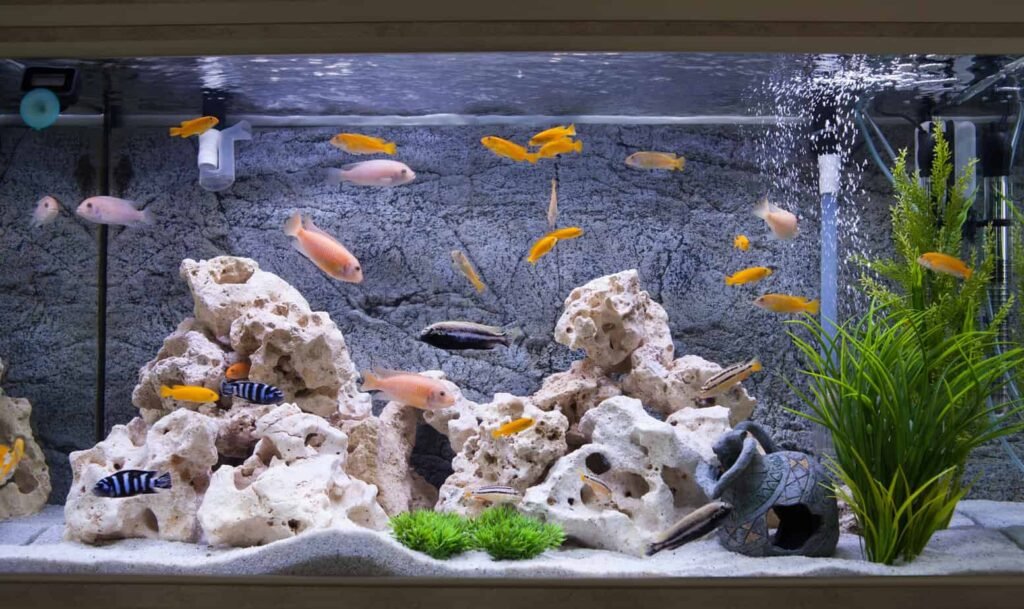
Cichlid aquarium whose KH should match the fish and source water

KH Is Not the Same as GH

GH measures mainly dissolved calcium and magnesium. Those minerals affect osmoregulation, plant growth and the needs of particular fish and invertebrates, but increasing GH does not necessarily provide enough carbonate buffering. Likewise, baking soda raises KH without providing the calcium and magnesium needed to raise GH.

Test both values when preparing water. If RO or distilled water needs both GH and KH restored, choose a remineralizing product designed for both. If only KH is low, use a KH-specific method. Do not assume that a product labelled “aquarium salt” raises either value appropriately.

How Much KH Does Your Aquarium Need?

There is no ideal KH for every aquarium. Soft-water fish, many planted aquariums and tanks using active substrate may be managed at a relatively low KH. Livebearers, African Rift Lake cichlids and many marine systems generally require more mineralized, strongly buffered water. The correct target is the stable range appropriate for your livestock and the way the aquarium is maintained.

Before changing anything, check reliable care information for the species, test the aquarium, and test the water used for changes. Stability matters. Raising KH merely to reach a generic chart value can be more stressful than leaving a deliberately soft-water aquarium alone.

Why KH Falls

KH can decline because the source water contains little alkalinity, RO or distilled water is used without remineralization, or water changes do not replace buffering as quickly as the aquarium consumes it. Normal biological filtration consumes alkalinity as bacteria process ammonia. Acids from respiration and decomposing organic matter also add to the demand.

Other causes include acidifying substrate, peat or botanicals, heavy stocking, accumulated waste, and some carbon-dioxide-injected planted-tank setups. A falling KH is therefore not always a dosing problem. Check maintenance, stocking, filtration and source water before repeatedly adding chemicals.

How to Raise KH Safely

1. Test the tank and replacement water

Use a liquid drop test or another reliable aquarium test. Record KH, pH, GH, ammonia and nitrite. Test tap water after it has been treated as you normally prepare it. If the aquarium’s KH is dropping while the source remains suitable, investigate maintenance and biological load rather than changing the source-water recipe.

2. Use an appropriate water change first

If conditioned tap water has the KH your fish need, a routine partial water change is usually the simplest correction. It replaces buffering while reducing accumulated waste. Match temperature and avoid an unnecessarily large, sudden chemistry change.

If ammonia or nitrite is detectable, treat that as a water-quality problem: use conditioned water, protect oxygenation, check the filter and continue testing. Do not rely on KH additives to solve toxic nitrogen waste.

3. Remineralize RO or very soft water

RO and distilled water contain little buffering. Prepare replacement water in a separate container with a reputable remineralizer that suits the aquarium. Some products raise both GH and KH; others adjust one more than the other. Follow the manufacturer’s measured dose, circulate or mix thoroughly, then test before adding the water to the tank.

4. Use sodium bicarbonate as a measured adjustment

Plain sodium bicarbonate (baking soda, without fragrances or other additives) raises bicarbonate alkalinity and KH. It can also raise pH, especially when buffering was very low. Never tip an estimated spoonful directly over fish.

  1. Calculate the actual volume of replacement water, not just the aquarium’s advertised size.
  2. Dissolve a small measured amount in a separate bucket of conditioned water.
  3. Mix thoroughly and retest KH and pH.
  4. Adjust in stages until the prepared water matches the planned target.
  5. Add it gradually during the water change and test the aquarium again afterward.

Product strength, measurement accuracy, substrate and existing chemistry can alter the result, so testing is more reliable than a universal spoon-per-gallon rule. Once you have a repeatable recipe for your source water, record the exact weight and volume for future batches.
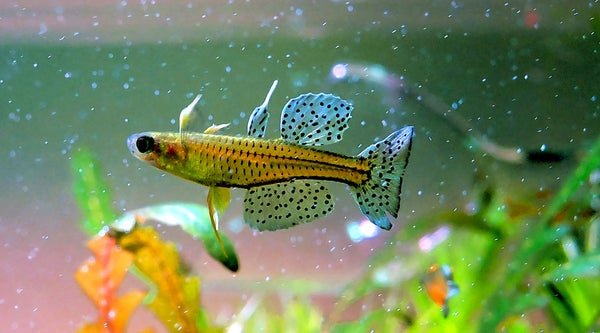
Aquarium fish in stable, appropriately buffered water

5. Use crushed coral or aragonite for slower support

Crushed coral and aragonite dissolve more readily as water becomes acidic, adding carbonate and calcium. They can be useful where source water is consistently soft and the livestock benefits from harder, more alkaline water. Put a modest amount in a mesh bag in the filter, or use it as part of the substrate, then monitor KH, GH and pH over several weeks.

The effect depends on water chemistry, particle size, flow and quantity, so this is not a precise instant dose. Start conservatively. Replace or clean the material when its effect declines, and do not use it in a soft-water setup simply because low KH appears unusual.

6. Limestone and dolomite require care

Aquarium-safe limestone can provide gradual buffering, while dolomite also contributes magnesium. Test decorative rock before relying on it and monitor the tank. Never use quicklime or hydrated lime in a home aquarium; these highly caustic materials can cause a dangerous pH rise and serious injury.

A Special Warning About Very Old, Acidic Tanks

A neglected aquarium with very low pH and depleted KH needs careful handling. Ammonia is generally more toxic as pH rises, so rapidly increasing pH in water that contains accumulated total ammonia can suddenly make the situation more dangerous. Test ammonia, nitrite, pH and KH before making a large correction.

If fish are distressed or the readings are extreme, use staged, temperature-matched water changes and seek advice from an aquatic veterinarian or an experienced aquarium professional. Restore safe water quality and biological filtration; do not try to fix “old tank syndrome” with one large dose of buffer.

How to Keep KH Stable

  • Test the source water whenever supplies or seasons change.
  • Use a consistent water-change schedule.
  • Measure remineralizers by weight or with the supplied scoop.
  • Prepare and test replacement water before it enters the aquarium.
  • Remove excess waste and avoid overstocking or overfeeding.
  • Track KH and pH together instead of reacting to one isolated reading.
  • Account for active substrate, botanicals and injected CO2 in planted tanks.

Testing aquarium water before adjusting carbonate hardness

Frequently Asked Questions

Does raising KH always raise pH?

Increasing carbonate buffering often increases or stabilizes pH, but the size of the change depends on the starting chemistry and carbon dioxide level. This is why KH and pH should be tested together and corrections made gradually.

Can I raise KH without raising GH?

Yes. Sodium bicarbonate primarily raises KH and alkalinity, not the calcium and magnesium measured as GH. A combined remineralizer or calcium- and magnesium-containing material is needed when both values must rise.

Will crushed coral raise KH too much?

It is usually slower and partly self-limiting as pH rises, but it can still push water beyond a species-appropriate range. The result varies between tanks, so begin with a small amount and test regularly.

Should I raise KH in an active-substrate shrimp tank?

Not automatically. Some active substrates are designed to absorb carbonate and maintain acidic, low-KH water for particular shrimp. Adding buffers can exhaust the substrate faster and create unstable readings. Follow the needs of the shrimp and the substrate maker’s system.

Bottom Line

Raise KH only when testing and livestock requirements show that it is needed. Start by identifying why it is low. Use appropriate conditioned source water, a measured remineralizer, carefully prepared sodium bicarbonate, or gradual mineral media such as crushed coral. Make changes in stages, test the result, and keep KH, GH and pH as separate but related measurements. A consistent water-preparation routine is safer than chasing a number inside the aquarium.

How to Oxygenate a Fish Tank Without an Air Pump

oxygenate a fish tank without a pump

You can improve aquarium oxygenation without a separate air pump by moving the water surface with a working filter. During a power outage, gently pouring aquarium water back into the tank can provide temporary aeration while you arrange battery-powered backup. Neither approach removes the need to investigate fish that are struggling to breathe.

This guide separates everyday circulation from emergency help. It is research-based care advice, not a claim that we have tested an emergency treatment on fish.

If fish are gasping: what to do first

  1. Increase surface movement. If the filter works, direct its return toward the surface to create ripples without battering the fish.
  2. If power is out, use a clean aquarium-only jug. Scoop some tank water and pour it back gently from just above the surface, creating ripples and a little splashing. Keep the stream away from fish and loose substrate, and keep water away from electrical equipment. Repeat while arranging a more dependable source of aeration.
  3. Check temperature and water quality. Test ammonia and nitrite. A breathing problem is not proof that low oxygen is the only cause.
  4. Pause feeding during the immediate emergency. Remove uneaten food and obvious decaying material without stirring up the whole substrate.
  5. Get help if distress persists. Arrange a battery air pump promptly during an outage; seek an aquatic veterinarian for severe or continuing breathing trouble.

UK Power Networks’ aquarium outage advice supports manual surface agitation as a temporary measure and recommends battery-powered aeration. There is no fixed pouring schedule that guarantees safety in every aquarium. Stay with the tank and monitor the fish while you obtain reliable backup.

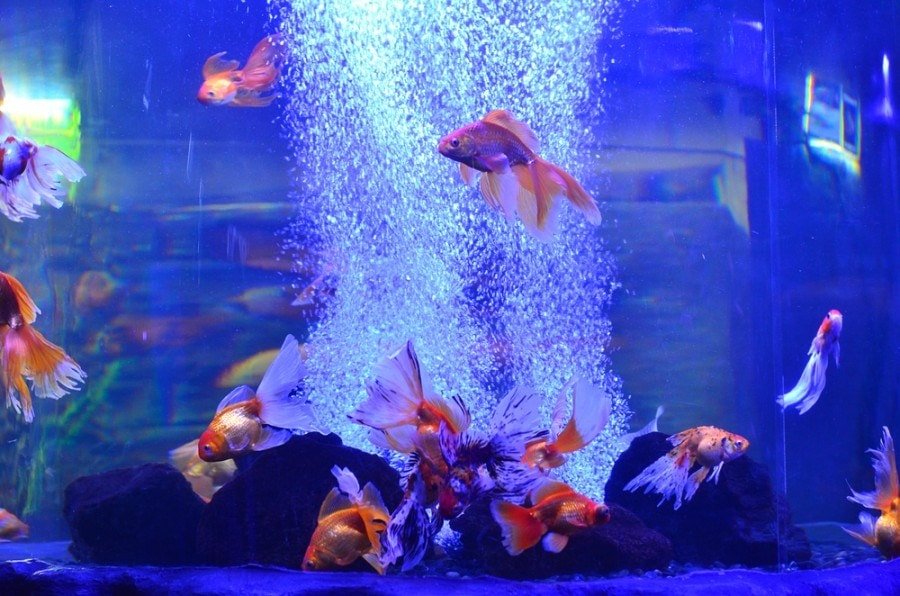
Aquarium fish swimming beside rising air bubbles
Circulation and surface movement help exchange gases between aquarium water and the air.

How oxygen gets into aquarium water

Fish use dissolved oxygen, not simply the visible bubbles passing them. Gas exchange occurs where air and water meet. Surface movement refreshes that contact, and circulation distributes the water through the aquarium. An air stone provides air-water contact and lifts water toward the surface; a filter return can also create useful movement.

Aqueon’s filtration overview explains how returning water agitates the surface. This is why a suitably stocked aquarium with effective circulation may not need a separate air pump. A tank with a motionless surface, poor circulation or heavy stocking needs a different assessment.

Improve oxygenation when the filter still works

  • Aim an adjustable outlet or spray bar so that it ripples the surface.
  • Check for a blocked intake or a clogged filter that has lost flow. Follow its cleaning instructions and preserve the biological media.
  • Keep the water at the equipment’s specified operating level. Do not expose a heater or run a pump dry to create a larger waterfall.
  • Leave calm areas for fish that dislike strong current. The goal is useful circulation, not the strongest possible jet.

For the difference between circulation and waste processing, see our aquarium filtration guide. Aerating the water does not remove ammonia or replace an established biological filter.

Use water changes for the right reason

A partial water change can help when water testing reveals a problem, but an automatic 50% change is not a universal oxygen treatment. Use conditioner appropriate for chlorine and chloramine, match the temperature and, for saltwater tanks, match salinity. Retest afterward and address the cause of contamination.

Keep cleaning targeted. Remove excess food and dead plant material; do not dismantle the aquarium during a breathing emergency. Our rock and gravel cleaning guide covers routine maintenance.

Check heat, plants and stocking

Warm water holds less oxygen at saturation than cooler water. Check the thermometer and the species’ requirements before changing anything. Avoid ice cubes or sudden cold-water changes; correct overheating gradually and maintain aeration.

Plants produce oxygen during photosynthesis but also respire. They cannot guarantee adequate oxygen overnight. Adding plants or leaving the lights on continuously is not a reliable emergency response. Likewise, more aeration does not make an overcrowded aquarium appropriately stocked.

How to measure dissolved oxygen

Use a dissolved-oxygen test or a suitable calibrated meter; ordinary ammonia and pH tests do not measure it. Results are commonly reported in mg/L, with meters sometimes also displaying percent saturation. The Merck Veterinary Manual gives above 5 mg/L as a general reference for most finfish, while emphasizing saturation and species-specific circumstances. Do not treat that number as a guarantee for every animal.

Surface gulping can also accompany nitrite problems or gill disease. Occasional air breathing is normal in some species, including bettas; a sudden change affecting several fish is more concerning. Check the whole system rather than diagnosing from one behavior.

Can there be too much aeration?

A strong current can exhaust fish even when oxygen levels are appropriate. That is different from gas bubble disease, which involves dissolved-gas supersaturation and is often associated with nitrogen. Do not switch off needed aeration simply because you can see bubbles. Adjust the current and investigate abnormal signs.

Prepare for the next outage

Keep a battery-powered aquarium air pump, suitable tubing and fresh batteries or a charged backup supply ready. Test the setup before you need it. During an outage, temperature and biological filtration also need attention; betta keepers can use our heater-failure guide. Manual pouring is a bridge to dependable equipment, not a permanent care routine.

How to Clean Fish Tank Rocks and Gravel Safely

How to Clean Fish Tank Rocks

For routine fish tank rock cleaning, remove loose waste with a siphon and scrub troublesome algae gently with an aquarium-only brush. You usually do not need to remove the fish, empty the tank or sterilize every stone. Preserve the useful microbial community while removing accumulated debris.

The right method depends on whether you mean gravel, decorative freshwater rocks, new dry rock or living reef rock. This guide covers routine freshwater maintenance first, then explains where different precautions apply.

Choose the right cleaning method

  • Established gravel: use a gravel siphon to lift waste while leaving the gravel behind.
  • Large freshwater rocks: brush accessible algae gently and siphon away what you loosen.
  • New aquarium gravel or dry decorative rock: follow the supplier’s preparation instructions; rinse ordinary dusty materials before use unless directed otherwise.
  • Marine live rock or coral-covered rock: do not use a freshwater scrubbing or disinfection routine. Seek advice specific to the organisms attached to it.

Gather a few simple tools

Use an aquarium-only bucket, a gravel siphon, a soft brush, towels, water conditioner and a thermometer. A small suction baster can help lift isolated debris from awkward corners. Avoid tools with soap, detergent, pesticide or household-cleaner residues.

The CDC recommends gloves for aquarium cleaning and washing hands after handling aquarium water or equipment. Use a utility sink or another suitable cleaning area instead of the kitchen sink when possible. Never start a siphon by mouth.

How to clean aquarium gravel with a siphon

  1. Prepare replacement water. Treat tap water for chlorine and chloramine according to the conditioner label, and match the aquarium’s temperature.
  2. Make equipment safe. Follow the heater’s cooldown instructions before lowering the water. Disconnect equipment that would otherwise run dry or become exposed.
  3. Start the siphon as its maker directs. Keep the receiving bucket below the tank and secure the hose so it cannot spill.
  4. Work through dirty, accessible patches. Let waste rise into the tube while gravel falls back. Control flow if gravel is being carried into the hose.
  5. Stop at your planned water-change volume. You can finish other areas at a later maintenance session.
  6. Refill slowly and restore equipment. Confirm normal filter flow and heater operation before leaving.

Aqueon’s cleaning checklist combines gravel vacuuming with conditioned, temperature-matched replacement water. Avoid turning a normal maintenance session into a complete tank reset.

Fish swimming in a decorated aquarium
Routine maintenance should preserve a stable aquarium while removing accumulated waste.

Sand and planted substrates need a lighter touch

Hover the siphon above sand to collect surface debris without removing the bed. Around rooted plants, avoid digging into the roots. Aquasoil and layered substrates may have specific maintenance requirements; follow the manufacturer’s directions instead of treating them like coarse gravel.

If an old, neglected substrate releases an unusual rotten-egg smell, stop stirring it. Seek experienced help before disturbing more of the bed. The Merck Veterinary Manual describes how disturbing oxygen-depleted, waste-rich sediment can release harmful hydrogen sulfide.

How to clean large rocks without a gravel vacuum

For a small accessible rock, gently brush the problem area and use a baster or small siphon to collect the loosened material. If you have no suction tool, a removable freshwater decoration can be brushed in a bucket of removed tank water. A cup alone cannot efficiently collect debris trapped deep in gravel; obtain an appropriate siphon for that job.

Leave stable rockwork in place where possible. Before lifting anything, check for hidden animals, attached plants and stones resting on it. Do not undermine a stack or set a heavy rock down on fish, shrimp or the glass. Clean one manageable area rather than dismantling the whole layout.

Do rocks need to look spotless?

No. Some algae and biofilm are normal and are not, by themselves, evidence that the water is dangerous. Remove excessive buildup for maintenance and visibility, but do not disinfect a healthy aquarium to make every surface look new.

If algae returns quickly, review lighting duration, feeding and maintenance rather than scrubbing harder. Check water quality when fish behave abnormally. Our filtration guide explains why protecting biological filtration matters.

Preparing new rocks: cleaning is not a safety test

Buy rock intended for aquarium use from a supplier who can identify it and explain its effect on water chemistry. Scrubbing cannot reliably make a contaminated or unidentified stone safe.

Limestone and coral-based materials can raise pH and alkalinity, which may suit some setups and conflict with others. Aqueon’s pH guidance discusses these effects. A vinegar fizz test is only a clue about carbonate content; a negative result does not rule out metals, pollutants or other problems. Likewise, surviving a 24-hour soak does not certify a rock as aquarium-safe.

Reject material with an uncertain contamination history, unstable layers or unsuitable sharp edges. Ask about coatings and previous chemical treatments. Choose a known suitable product rather than relying on home “sterilization” to solve those uncertainties.

Do not boil, bake or casually bleach aquarium rocks

Heat is unnecessary for routine cleaning. Never heat or aggressively scrub marine rock that may carry zoanthids or palythoas: some contain palytoxin. A CDC investigation documented serious exposures associated with aquarium corals, including aerosol-generating removal methods.

Bleach is not part of this routine cleaning method. Disinfection after disease or contamination requires a separate, material-specific plan and verified removal of residues. “It no longer smells of chlorine” is not adequate clearance to put an item back with fish. Never mix bleach with vinegar or other cleaners.

How often should you clean the rocks?

Inspect for debris during regular water changes and clean where needed. Stocking, feeding, substrate and plants affect the workload, so there is no requirement to scrub every rock each week. Remove uneaten food and decaying leaves promptly. Record recurring trouble spots and adjust maintenance before waste accumulates.

Keep the useful routine simple: inspect, remove excess debris, replace water correctly and confirm equipment operation. For broader setup and maintenance help, visit our aquarium basics hub. If fish are breathing abnormally, address that immediately using the oxygenation guide rather than starting a major cleaning project.