Clownfish Tank Setup: A Beginner Guide for Ocellaris Clownfish

Clownfish Tank Setup

A practical first clownfish setup is a cycled 30–40-gallon saltwater aquarium for one compatible pair of captive-bred ocellaris clownfish. This is our conservative beginner recommendation, not a minimum for every clownfish species. Larger, more territorial species need a different plan.

Clownfish are marine fish: they cannot live in freshwater. Start with the fish and its long-term needs, then choose the equipment. An anemone is optional and adds substantial care requirements.

Choose the species and tank before buying fish

This guide focuses on Amphiprion ocellaris, the common or false percula clownfish. Do not assume a maroon, tomato or Clark’s clownfish has the same adult size and temperament. Color-pattern names alone may not identify the species.

Prefer captive-bred fish from a reputable supplier. ORA explains that its farm-raised clownfish are accustomed to common aquarium foods. Captive breeding does not eliminate the need for health checks or quarantine.

Tank recommendations vary with species and stocking. PetMD’s veterinary care sheet recommends at least 29 gallons for a single adult and more space for additional or larger fish. Our 30–40-gallon starting plan is for a small ocellaris pair with restrained stocking, not an automatic allowance for a full community.

Choose a tank with useful swimming length, a secure stand and room to service equipment. Read our beginner saltwater fish guide before selecting additional residents.
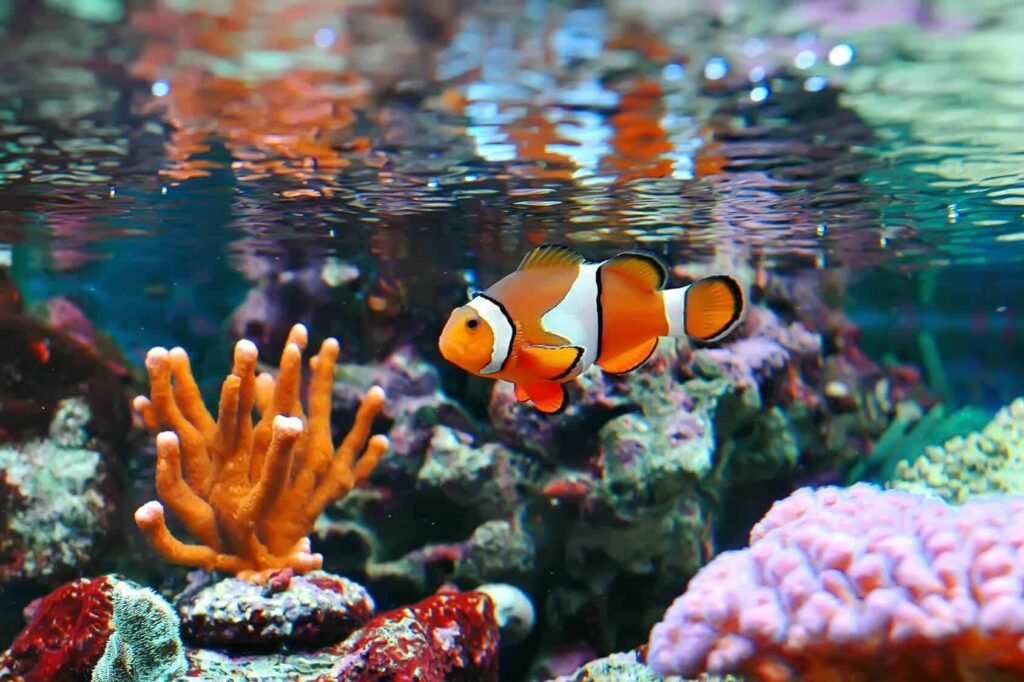
Clownfish in a marine aquarium

Essential equipment

  • Biological filtration: an appropriate filter, established media and/or reef-safe porous rock with adequate circulation. Mechanical media needs regular cleaning.
  • Heater and thermometer: sized for the aquarium and room conditions, with temperature checked independently of the heater setting.
  • Marine salt mix and suitable source water: usually RO/DI water or reliable prepared saltwater. Table salt and freshwater “aquarium salt” do not create seawater.
  • Salinity measurement: a seawater-appropriate refractometer or other suitable instrument, checked or calibrated as its manufacturer directs.
  • Water tests: marine-compatible ammonia, nitrite, nitrate and pH tests, plus alkalinity; a reef needs additional testing.
  • Safe shelter, lid and lighting: stable rockwork, open swimming space and a regular day/night cycle.
  • Maintenance supplies: dedicated buckets, siphon, algae scraper and a dependable freshwater top-off routine.

A protein skimmer can help with waste removal, but it does not replace cycling or water changes. Avoid choosing equipment by a fish-per-gallon rule.

Prepare saltwater outside the stocked tank

Put suitable freshwater in a clean mixing container, then add marine salt according to its label. Circulate until dissolved and follow that product’s instructions for mixing time and temperature. Check salinity, then bring the batch to the aquarium’s temperature before use.

Red Sea’s mixing guidance emphasizes adding salt to water, checking instrument calibration and measuring the finished batch. Its exact mixing instructions apply to its own salts; follow the directions for yours.

For a fish-only ocellaris setup, a stable specific gravity around 1.024–1.025 is a practical choice within common care guidance. Specific gravity depends on temperature and instrument calibration; it is not the same unit as parts per thousand. If planning corals, establish a reef-appropriate salinity and chemistry plan before stocking them.

Set targets and cycle without fish

OATA’s clownfish care guidance gives approximately 75–79°F, pH 7.9–8.3, and undetectable ammonia and nitrite. Keep conditions stable within suitable ranges rather than repeatedly adjusting toward an exact midpoint. Monitor nitrate and manage it with feeding and maintenance; corals may require tighter nutrient management than a fish-only tank.

Install the rockwork and equipment, run the system, and establish biological filtration before adding fish. Use a documented fishless-cycling process with a measured ammonia source and appropriate tests. DrTim’s Aquatics provides a fishless-cycling protocol; follow the specific product instructions rather than mixing different dosing recipes.

A tank is not cycled merely because it has stood for a week or contains bottled bacteria. Verify that it processes the protocol’s ammonia dose and that ammonia and nitrite return to the required endpoint. Never add cycling ammonia to a tank containing livestock. Adjust nitrate with prepared saltwater changes before introduction as needed.

Introduce a compatible pair carefully

Buying an established compatible pair from a reliable breeder is simpler than attempting to combine two unknown adults. The Aquarium of the Pacific describes male-to-female sex change in clownfish social groups; two established females are not a safe pairing strategy.

Arrange a separate, cycled quarantine system and an observation or treatment plan with an experienced marine professional or aquatic veterinarian. Follow the supplier’s transport and acclimation guidance, accounting for salinity differences and shipping conditions. Avoid transferring shipping water to the display.

Watch for relentless chasing, torn fins or a fish unable to feed or shelter. Be ready to separate incompatible fish. Do not add a second pair to this beginner setup.

You do not need an anemone

OATA confirms that clownfish can be kept successfully without anemones. Provide secure shelter and suitable conditions instead. Anemones need species-specific lighting, flow and a mature, stable system; they are a separate husbandry commitment, not a required accessory for a new clownfish tank.

Feeding and the weekly routine

Offer small portions of a quality marine omnivore pellet or flake, with suitable frozen foods such as mysis for variety. Observe both fish eating and remove leftovers. Start with two small meals daily and adjust portions to body condition and waste production.

Check behavior, temperature, equipment and water level daily. Test regularly, siphon accumulated debris and change water with matched, prepared saltwater according to the tank’s needs. Never use household cleaning agents in the aquarium.

Replace evaporation with suitable freshwater, not saltwater: the salt remains when water evaporates. Water removed during maintenance, in contrast, is replaced with matched saltwater. Check salinity rather than guessing.

Rapid breathing, refusal to eat, heavy mucus or spots need prompt water checks and expert advice. Do not assume hardiness makes clownfish immune to disease or dose an unverified medication into a reef. Our test-kit guide can help you confirm that the tests you own cover the measurements required.

Frogspawn Coral Care: Placement, Lighting, Feeding and Health

Frogspawn Coral

Frogspawn coral is a large-polyp stony (LPS) coral valued for its rounded, branching tentacle tips and movement in the current. It belongs in an established saltwater reef aquarium with stable chemistry, appropriate reef lighting, and room for its tentacles to expand without touching neighbors.

For a first specimen, a healthy aquacultured branching frag is usually a more manageable choice than a large wall colony. Start with the seller’s lighting and water information, then make changes gradually. “Hardy” does not mean tolerant of sudden salinity changes, torn tissue, or an uncycled aquarium.

Branching versus wall frogspawn

The name frogspawn is used for more than one coral. Fimbriaphyllia divisa has a continuous wall-like skeleton, while Fimbriaphyllia paradivisa forms separate skeletal branches. Older labels commonly use Euphyllia. The World Register of Marine Species recognizes Fimbriaphyllia divisa as the accepted name.

This distinction matters for handling and propagation: a separate branch can sometimes be divided through exposed skeleton, whereas cutting a wall colony involves much greater risk to continuous living tissue. Ask the seller which form you are buying and whether the frag has healed.

Frogspawn coral with expanded fleshy tentacles

Practical water and placement targets

Factor Starting guidance
Temperature About 76–80°F; keep daily changes small
Salinity About 35 ppt, roughly specific gravity 1.026 at reef temperatures
Alkalinity A stable target around 8–9 dKH
Calcium About 400–450 ppm
Magnesium About 1,250–1,400 ppm
pH Approximately 7.8–8.3; assess daily trends
Light Moderate, with gradual acclimation
Flow Broad, indirect movement; no concentrated jet against flesh
Space Clearance for full expansion, sweepers, and future growth

These are practical reefkeeping targets, not a prescription to rapidly correct every small deviation. Compare them with your salt mix and supplier’s system. Bulk Reef Supply’s water-testing guidance emphasizes holding a consistent target instead of allowing large fluctuations within a nominally acceptable range.

Test alkalinity often enough to establish consumption, especially after adding stony corals. Dose only from measured demand and the product instructions. Keep a dated log of tests, water changes, and additions so an equipment problem or dosing error can be traced.

Replace evaporation with fresh RO/DI water, not additional saltwater. Use properly mixed saltwater for water changes and verify its salinity before adding it. An automatic top-off system can help maintain water level, but still needs inspection and a safe reservoir arrangement.

Lighting and water movement

Do not place a new frag high under powerful lights simply to make its colors brighter. Ask what light level it came from. If that information is unavailable, a moderate location around 75–150 PAR is a cautious starting range, with observation and gradual adjustment. PAR is measured at the coral; a fixture’s percentage setting is not a transferable light measurement.

Watch for sustained retraction, paling, or tissue damage after a lighting change. None identifies the cause by itself: check water chemistry, flow, and nearby animals too. Tidal Gardens’ frogspawn care guide discusses lighting and circulation.

The tentacles should move rather than remain pinned against the skeleton. Redirect or diffuse a pump outlet if flow is one-sided and forceful. Leave enough circulation to prevent debris collecting around the colony. Our aquarium wavemaker guide explains adjustable circulation options; the highest flow rating is not automatically the best choice.

Placement and coral neighbors

Choose a stable mounting point that keeps living tissue clear of sharp rock edges and prevents the coral from falling. Handle the plug or skeleton rather than squeezing the inflated head. Allow the coral to retract before moving it, and minimize handling.

Leave several inches of open space in every direction initially, then watch tentacle reach after dark and as the coral grows. A fixed gap is not a guarantee: water movement can carry sweeper tentacles toward a neighbor. Increase the distance if any contact occurs.

Do not assume frogspawn, hammer, and torch corals are safe touching because shops group them together. Compatibility varies, and torches can injure neighboring colonies. Clownfish may also irritate or damage a frogspawn by repeatedly pushing into it; the coral is not a substitute anemone that must accept hosting.

Does frogspawn need target feeding?

Photosynthetic symbionts supply much of the coral’s energy. Direct feeding can be optional in a suitably maintained reef; it should not compensate for unsuitable light or poor water quality. Tidal Gardens notes that frogspawn may respond weakly to direct feeding.

If you try feeding, offer a very small amount of fine coral food or suitably small thawed marine food and observe whether it is retained. Do not force large pieces into the mouth or repeatedly feed a retracted, deteriorating colony. Remove uneaten food and stop if feeding increases waste without an obvious response.

Monitor nitrate and phosphate instead of assuming either dirty water or zero nutrients is ideal. Changes to feeding and nutrient export should be gradual and evaluated alongside the whole reef.

Retraction, tissue loss, and brown jelly

Brief retraction can follow disturbance. Persistent collapse, exposed fresh skeleton, receding tissue, or brown disintegrating material warrants prompt investigation. Brown jelly is a descriptive warning sign, not something that can be diagnosed from water quality alone.

  1. Check temperature, calibrated salinity, alkalinity, and recent dosing or maintenance changes.
  2. Look for direct pump damage, stinging neighbors, fish picking, and visible pests.
  3. If tissue is rapidly breaking down, seek experienced coral-health help promptly and isolate the affected colony in a suitable stable reef quarantine system if available.
  4. Avoid blowing decaying tissue around the display or repeatedly moving the colony between unsuitable containers.

Tidal Gardens’ troubleshooting guide explains aggression, pests, and rapid tissue deterioration. A coral dip is not a universal cure and may not eliminate eggs or all hidden pests. Use only a product suitable for the purpose, follow its label, and do not improvise antibiotic or peroxide doses.

Propagation: what beginners should avoid

Do not cut fleshy polyps with household scissors. Fragging requires knowing exactly where living tissue ends, using appropriate equipment, and working with a healthy colony. Branching frogspawn is generally easier to propagate than wall frogspawn; beginners should seek a demonstration from an experienced coral propagator before attempting either.

Polyp bailout, where living tissue separates from the skeleton, is a stress response—not a recommended reproduction method. Investigate the underlying conditions instead of deliberately trying to trigger it.

Buying and routine care checklist

  • Choose a specimen with intact tissue and ask to see it under ordinary lighting as well as blue light.
  • Confirm the growth form, healed-frag status, and seller’s husbandry conditions.
  • Plan inspection and quarantine before purchase; a quick dip alone does not guarantee a pest-free coral.
  • Check expansion, tissue edges, equipment, and water level daily; record chemistry trends on a regular schedule.
  • Allow space for growth and reassess neighbors rather than repeatedly relocating an established coral.

A small frag does not define a minimum tank volume by itself. The aquarium must support stable reef conditions and the adult colony’s spacing needs. Frogspawn can be rewarding for a careful newer reefkeeper, but it is not a low-maintenance decoration.

Saltwater Plants for Aquarium: Macroalgae and Seagrass Guide

Saltwater Plants for Aquarium

For most saltwater aquariums, macroalgae such as Chaetomorpha, Gracilaria and Ulva are more practical than true marine plants. Choose according to the job: nutrient export in a refugium, edible growth for herbivores, or an ornamental display. Seagrasses and mangroves need a more specialized setup.

A successful marine planted tank starts with the right identification. A freshwater stem plant will not become a saltwater plant simply because it is sold alongside aquarium supplies.

Saltwater plants, macroalgae and seagrass: the difference

Most aquarium “saltwater plants” are macroalgae: larger algae with visible blades, branches or filaments. They are not flowering plants and do not have the same root-and-leaf structure as freshwater aquarium plants.

Seagrasses are different. They are true flowering plants adapted to marine life, with roots and underground stems called rhizomes. NOAA explains this distinction in its seagrass overview. Red mangroves are trees; their roots can grow in saltwater, but their leaves belong above the water.

Which saltwater plants suit your aquarium?

Option Best use Main limitation
Chaetomorpha (chaeto) Harvestable macroalgae in a refugium Needs adequate light, nutrients and room for water movement
Gracilaria Red ornamental growth or food for suitable grazers Species differ; fish may eat the display
Ulva (sea lettuce) Fast-growing refugium crop or supplemental food Loose blades can reach pumps and drains
Halimeda Calcified green display algae Requires attention to calcium and alkalinity
Red mangrove Open-top, long-term display with space above it A growing tree, not a compact underwater filter
Turtle grass Dedicated seagrass aquarium Deep substrate, strong lighting and careful planting

1. Chaetomorpha: a practical refugium starting point

Chaeto forms tangled, wiry strands rather than a rooted carpet. A separate refugium makes it easier to contain, inspect and harvest without disturbing the display. Do not wedge a dense mass against a pump intake or allow the bottom to collect debris indefinitely.

Start with a manageable portion. As it grows, remove some and leave healthy strands with space around them. A refugium light must illuminate the algae itself, not just the water above it; our refugium lighting guide explains the equipment considerations.

2. Gracilaria: red color and potential grazing food

Gracilaria includes several red macroalgae sold under names such as ogo. Ask for the species and the supplier’s cultivation conditions: one trade name does not describe every growth form. It can add contrast to a marine display, but a tang or other herbivore may make short work of it.

If the goal is a lasting ornamental clump, protect it from grazers. If the goal is food production, keep a separate growing portion and offer small amounts that your fish actually eat. It is a supplement for appropriate animals, not a complete diet for every marine fish.

3. Ulva: useful growth that needs containment

Sea lettuce has thin green blades and can grow quickly under suitable conditions. That makes it useful for harvesting, but it also means maintenance matters. Keep fragments out of overflow teeth, pump guards and filter compartments.

AlgaeBarn’s cultivation overview of chaeto, Ulva and Gracilaria describes their different growth forms and uses. Begin with one species you can manage rather than buying a mixture with incompatible requirements.

4. Halimeda: attractive, but not just another nutrient sponge

Halimeda has firm, segmented growth because it deposits calcium carbonate. A healthy patch can be attractive in a display, but its mineral demand deserves attention alongside any stony corals. Test calcium and alkalinity and base supplementation on measured consumption; adding a plant does not automatically mean a dosing product is needed.

Species also differ in how they attach and grow. The cultivator’s Halimeda incrassata profile, for example, describes a substrate-anchored form. Confirm the species before deciding whether to place it in sand or on rock.

5. Red mangroves: plan for the space above the tank

A red mangrove is an option for an open system with overhead growing room. Keep its leaves out of the water and provide suitable light above them. Do not trap a developing plant beneath a tight aquarium lid or allow roots to interfere with equipment.

Choose a specimen suited to your water conditions and follow the grower’s acclimation instructions. AlgaeBarn’s mangrove growing guide covers the basic arrangement. Treat a mangrove as a living display project, not a promise that water changes or other filtration can stop.

6. Turtle grass: for a dedicated seagrass setup

Turtle grass, Thalassia testudinum, is not a seaweed. It needs room for its roots and rhizomes, substantial sediment depth and strong lighting. These requirements make it a poor impulse purchase for a shallow sand bed in an established reef.

The Marine Plant Book turtle grass profile recommends a sediment bed at least 6–8 inches deep. Plan the aquarium around the grass, obtain responsibly cultured material where available, and avoid damaging the rhizomes when planting.

How to keep marine macroalgae healthy

  • Match the environment. Ask for the exact species, salinity, temperature and lighting conditions used by the grower. There is no single “low-light saltwater plant” setting that fits everything.
  • Keep salinity stable. Use properly mixed marine saltwater for water changes. Replace evaporation with suitable freshwater, not more saltwater. See our reef salt guide and auto top-off guide for the separate jobs these supplies perform.
  • Inspect new additions. Check for unwanted algae, pests and attached animals. Buy from a supplier that can explain its culture and handling practices.
  • Keep water moving. Avoid stagnant, debris-filled clumps, while protecting delicate growth from being shredded by pumps.
  • Measure before dosing. Poor growth can have several causes. Check lighting, salinity and available nutrients before adding fertilizer or trace elements. Freshwater fertilizer and CO2 routines are not a default marine prescription.
  • Remove dying growth. Soft, disintegrating material should not accumulate in the system. Investigate the cause before replacing it with a larger batch.

Do saltwater plants clean the water?

Growing algae take up nutrients, including nitrogen and phosphorus. Harvesting healthy growth exports some of those nutrients from the aquarium. Leaving it to die and decompose can return them to the water. Macroalgae do not replace a cycled biological filter, sensible feeding or water-quality checks.

Nor should the aim automatically be to drive every nutrient reading to zero. Corals and macroalgae both need an appropriate supply. Adjust growth and harvesting to the needs of the whole aquarium.

Can freshwater plants live in a saltwater aquarium?

Common freshwater aquarium plants such as Ludwigia repens are not suitable for a full-strength marine tank. Do not use them as substitutes for marine macroalgae. Check the scientific name and salinity requirements before buying anything labeled simply “aquarium plant.”

What should a beginner choose?

For a first refugium, a small, contained portion of chaeto is a practical starting choice when lighting and nutrients are adequate. For an ornamental display, investigate a specifically identified Gracilaria. Leave seagrass and mangroves for setups designed around their needs, and judge success by healthy, manageable growth rather than the number of species collected.

Best RO/DI Systems for Reef Aquariums: 5 Options

Best RO/DI Systems for Reef Aquariums: 5 Options

A reef aquarium RO/DI system should produce consistently low-TDS source water, protect its membrane from sediment and disinfectants, and make cartridge condition easy to monitor. The best choice depends on tap-water chemistry, pressure, required daily output, replacement-filter availability and whether your utility uses chlorine or chloramine.

Multi-stage reverse-osmosis deionization system for aquarium water
A reef RO/DI unit uses prefilters, an RO membrane and deionization resin to prepare consistent source water.
Quick recommendation: The LiquaGen 5-Stage RO/DI is the best conventional reef-focused option here. The compact Aquatic Life RO Buddie +DI suits lower-volume production, while SpectraPure is the stronger premium choice when monitoring and long-term replacement support matter most.

Quick comparison

System Best for Key point Buying option
LiquaGen 5-Stage Best all-round reef option Standard housings and final DI stage Check on Amazon
Aquatic Life RO Buddie +DI Compact, lower-volume use 50 GPD rating under specified conditions View manufacturer
AquaFX Barracuda Conventional reef system Confirm current membrane and accessories Check on Amazon
Koolermax AR-122 Higher nominal output Verify pressure and replacement compatibility Check on Amazon
SpectraPure MaxCap Premium monitoring and support Multiple current capacities View manufacturer

Rated GPD output is measured under specific pressure and temperature conditions. Real production is commonly lower with cold water or low pressure.

1. LiquaGen 5-Stage RO/DI System

Best for: a conventional reef-focused system using standard cartridges.

LiquaGen’s current elementary five-stage layout uses sediment filtration, two carbon stages, an RO membrane and mixed-bed DI resin. The current 75 GPD model includes an automatic shutoff and check valve, and optional pressure-gauge and dual-TDS monitoring upgrades are available. Standard 10-inch prefilter housings simplify sourcing replacements.

Choose the membrane capacity for actual weekly water-change and evaporation-replacement needs rather than the largest headline figure. A pressure gauge and TDS readings before and after DI are more useful upgrades than additional unlabeled “stages.”

Check LiquaGen on Amazon   Current manufacturer details

2. Aquatic Life 50 GPD 4-Stage RO Buddie +DI

Best for: smaller aquariums and compact storage.

The current four-stage RO Buddie +DI includes sediment, carbon, membrane and color-changing mixed-bed DI cartridges. Aquatic Life rates output at up to 50 gallons per day at 65 PSI and 77°F, with a typical rejection ratio of about 1:3.4. In a cool or low-pressure home, expect slower production.

Its compact proprietary cartridges are convenient but smaller than standard 10-inch housings. Check replacement cost and availability before choosing it for a large reef. An exact current four-stage Amazon listing was not verified, so we link to the manufacturer.

View the current RO Buddie +DI

3. AquaFX Barracuda RO/DI

Best for: buyers wanting a traditional full-size reef RO/DI format.

The Barracuda uses the familiar sediment, carbon, RO and DI sequence in full-size housings. That layout is easier to service than many compact units and allows each stage to be replaced for its actual condition. Confirm the current listing’s membrane capacity, chloramine suitability, gauge, flush valve and TDS meter because packages under the same family name can vary.

Check the AquaFX Barracuda on Amazon

4. Koolermax AR-122 6-Stage RO/DI

Best for: shoppers prioritizing higher nominal output and an included gauge.

The AR-122 is sold as an aquarium RO/DI system rather than a remineralizing drinking-water filter. Its extra stage count should not be treated as proof of better water: membrane rejection, adequate carbon contact time, fresh DI resin and accurate monitoring determine performance.

Verify that replacement cartridges and the exact membrane size remain readily available. High-output membranes also require adequate feed pressure and matching flow restriction to perform properly.

Check the Koolermax AR-122 on Amazon

5. SpectraPure MaxCap RO/DI Systems

Best for: premium reef installations and long-term cartridge support.

SpectraPure currently supports MaxCap aquarium RO/DI systems in several capacities and maintains manuals, diagrams and replacement matching for its product families. That documentation is valuable when diagnosing rejection rate or ordering the correct resin and prefilters years later.

Current configurations vary, so choose directly from the manufacturer by feed-water chemistry, output and monitoring needs. No exact Amazon offer was verified for the current configuration.

Compare current SpectraPure systems

RO versus RO/DI

Reverse osmosis removes most dissolved material, while DI resin polishes the remaining ions after the membrane. For reef aquariums, a properly functioning final DI stage provides more predictable source water than RO alone. Drinking-water systems with an alkaline or remineralization cartridge deliberately add minerals back and are not the preferred final path for reef water.

What to check before buying

Tap-water disinfectant

Ask the water utility whether it uses chlorine or chloramine. Chloramine can require greater carbon capacity or a purpose-designed carbon stage to protect the membrane. Do not guess from taste or smell.

Pressure and temperature

Membranes need adequate pressure. Low pressure reduces output and can worsen efficiency; a correctly selected booster pump may help. Never run hot water through an RO membrane. Output ratings normally assume warmer water than many household cold-water supplies.

TDS monitoring

Measure feed TDS, RO-only permeate and final DI water. Membrane rejection is calculated from feed and RO-only readings—not from the DI outlet. Replace DI resin before it releases weakly held ions, and do not rely only on color change.

Output and storage

A 50 GPD label means theoretical production across 24 hours under rated conditions, not a 50-gallon batch on demand. Use a food-safe reservoir with a secure float shutoff if the system is designed for one, plus an independent overflow plan. Never leave a running unit unattended solely because it has an auto-shutoff valve.

Installation and maintenance

  1. Install according to the exact manual and verify that sediment and carbon stages precede the membrane and DI follows it.
  2. Flush new carbon cartridges and the membrane as directed before sending water through DI.
  3. Check every fitting under pressure and provide a safe route for reject water.
  4. Record pressure and TDS readings when the system is new; these become the maintenance baseline.
  5. Replace sediment and carbon filters based on pressure loss, chlorine protection, water use and manufacturer limits.
  6. Change DI resin when final TDS rises from zero or according to the resin manufacturer’s guidance.
  7. Sanitize housings during scheduled service and never use cartridges of uncertain identity.

Wastewater and efficiency

RO creates a concentrated reject stream. The ratio depends on membrane, restrictor, pressure, temperature and feed water. Do not arbitrarily restrict the waste line to save water; inadequate concentrate flow can foul or damage the membrane. Where local rules allow, collect reject water for suitable non-potable household uses, avoiding salt-sensitive plants.

Frequently asked questions

Is zero TDS water ready for the aquarium?

No. RO/DI water must be mixed with an appropriate salt mix for a marine aquarium, or remineralized to controlled hardness for freshwater use. Never place animals directly into pure RO/DI water.

How often should filters be replaced?

There is no reliable universal calendar. Sediment load, disinfectant exposure, water use, pressure and TDS readings determine service life. Stay within each manufacturer’s maximum interval even when appearance seems acceptable.

Why did production slow down?

Cold water, low pressure, clogged prefilters, a fouled membrane or an incorrect flow restrictor are common causes. Compare current readings with the system’s clean baseline.

Final verdict

LiquaGen’s five-stage system is the best all-round conventional choice here. The RO Buddie +DI suits compact, lower-volume use, while AquaFX and Koolermax offer full-size alternatives whose current bundle details should be checked carefully. SpectraPure is the premium choice for buyers who value long-term documentation, monitoring and replacement support.

Affiliate disclosure: Aquarium Hunter may earn a commission from qualifying Amazon purchases, at no additional cost to you. We link only to products that match the models discussed.