Lemon Tetra Care: Tank Size, Schooling, Diet and Tank Mates

Lemon Tetra

Lemon tetras (Hyphessobrycon pulchripinnis) are peaceful, active schooling fish that suit a planted community aquarium. Their small size does not make them bowl fish: plan for a group of at least 8–10, a long swimming area, and a fully cycled tank.

For a straightforward home setup, we recommend a 20-gallon long aquarium or larger, with plants around the edges and open water through the middle. Choose tank mates only after checking their adult size, temperament, and water requirements.

Lemon tetra care at a glance

Care factor Practical guidance
Adult size Approximately 1.5–2 inches
Group At least 8–10 of the same species
Tank 20-gallon long or larger; prioritize swimming length
Temperature 74–79°F is a practical everyday target
Water Soft to moderately hard; roughly pH 6.0–7.5 and 2–12 dGH (about 36–215 ppm general hardness)
Water quality 0 ppm ammonia and nitrite; manage nitrate with maintenance
Diet Small complete tropical fish food with varied frozen or live supplements
Breeding Egg scatterer; adults may eat eggs and fry

These are husbandry targets, not instructions to change established water suddenly. Ask the seller about the conditions the fish are already accustomed to. Species references list a broader temperature range, but its extremes are not useful goals for routine care.

Appearance, origin, and lifespan

Lemon tetras have a translucent yellow body, yellow-and-black fin markings, and red coloration in the upper part of the eye. Juveniles may be pale. Color depends on age, lighting, surroundings, diet, and condition; it is not a reliable diagnosis of health by itself.

Lemon tetra showing its yellow body and contrasting fin markings

The species comes from Brazil, although its precise distribution and the identity of some related regional forms remain uncertain. Avoid treating every yellow or orange tetra sold under a similar common name as the same fish. The Seriously Fish species account explains those identification questions.

Plan for a commitment of several years. Around five years is a reasonable planning estimate rather than a guaranteed average; individual aquarists have reported specimens living seven years or longer.

Tank size and setup

A long tank provides more useful swimming space than a tall tank of similar volume. Our 20-gallon-long recommendation is a starting point for a modest single-species group, not permission to add an unlimited community. Move up in size when adding other schools or larger bottom dwellers.

  • Plant the back and sides while leaving a clear swimming lane.
  • Provide shaded areas with plants or carefully arranged wood.
  • Use a secure lid and a filter that circulates water without forcing the fish to fight a strong jet.
  • Keep the heater and thermometer accessible so you can check actual temperature.

A 40-gallon breeder aquarium offers more room for planting and a planned community. Whatever the tank size, leave access for cleaning and observe whether every fish can feed comfortably.

Water quality and maintenance

Cycle the aquarium before adding the group. Clear water can still contain harmful waste, so use a suitable aquarium test kit rather than judging safety by appearance. Test ammonia and nitrite after adding fish, after filter problems, and whenever behavior changes.

As an initial routine, change about 20–30% of the water weekly, then adjust to stocking, feeding, and test results. Match replacement water reasonably closely for temperature and chemistry, and treat tap water for chlorine or chloramine. Remove leftover food and accumulated debris without stripping the entire tank clean. Preserve biological filter media instead of replacing all of it at once.

Do not repeatedly add pH-adjusting chemicals to chase an exact number. If your source water is very different from the seller’s, make a long-term water plan before buying fish. A stable, suitable supply is more useful than a one-time reading.

Feeding lemon tetras

Offer a complete tropical flake or small pellet that the fish can swallow easily. Feed a modest portion once or twice daily, watching the group eat, and remove leftovers. Supplement with appropriately sized foods such as frozen daphnia or brine shrimp; treats should not replace a balanced staple.

Spread food across the feeding area if dominant fish take everything. A fish that repeatedly misses meals needs attention even when the rest of the group looks well fed. Aqueon’s tetra guide provides additional feeding and general housing advice.

Tank mates and schooling behavior

Keep lemon tetras with their own species rather than counting unrelated tetras as substitutes for a group. Small, peaceful rasboras, compatible tetras, and appropriately housed small catfish can be considered when the aquarium has enough space for each species’ social group.

Avoid predatory fish, persistent fin nippers, and combinations with incompatible temperature needs. Tiny shrimp may be eaten, so a breeding shrimp colony is not a risk-free pairing. Long-finned or unusually timid fish also need careful observation.

Short displays and chases between males can occur. Repeated injury, a fish trapped in a corner, or exclusion from food requires intervention. Check space, cover, group size, and the behavior of other inhabitants rather than assuming every chase is harmless.

Breeding and raising fry

Lemon tetras scatter eggs and do not provide parental care. For intentional breeding, prepare a separate, cycled spawning setup with gentle filtration and fine plants or a spawning mop. Protect the eggs from the adults and remove the adults after spawning.

Prepare suitable tiny fry foods before attempting a spawn. Newly free-swimming fry need much smaller food than the adults; cultured infusoria can be useful initially, with larger foods introduced as the fry grow. Do not assume crushed adult pellets will be small enough. The FishProfiles firsthand breeding account describes egg predation and early feeding challenges.

There is no guaranteed daily egg count or fixed hatch schedule for every aquarium. A swollen abdomen alone does not establish that a female is carrying eggs; our guide to eggs versus bloating in tetras explains why behavior and other symptoms matter.

Health checks and common questions

Why are my lemon tetras pale or hiding?

New surroundings, bright lighting, a small group, bullying, and illness are possible explanations. Check temperature and water tests first, then feeding, breathing, fins, and social behavior. Persistent deterioration calls for help from an aquatic veterinarian; color alone is not a reason to medicate.

Can they live in a 5- or 10-gallon tank?

We do not recommend those sizes for a permanent lemon tetra group. Choose a longer aquarium that accommodates their activity and social needs.

Are they suitable for beginners?

Yes, for a beginner who has cycled the aquarium, can maintain suitable water, and will keep a proper group. Quarantine new arrivals separately before mixing them with established fish. Keep a record of purchases, test results, water changes, and unusual behavior so problems are easier to trace.

Chili Rasbora Care: Tank Size, Water, Feeding and Tank Mates

Chili Rasbora

Chili rasboras (Boraras brigittae), also called mosquito rasboras, are tiny red schooling fish with very small mouths. Their care depends less on buying elaborate equipment than on providing stable water, gentle filtration, enough companions, and food they can actually eat.

For most home fishkeepers, we recommend a mature, planted 10-gallon aquarium or larger with a group of at least 8–12. Smaller specialist setups exist, but a 10-gallon tank gives more room for a group and more margin for routine maintenance.

Chili rasbora care at a glance

Care factor Practical guidance
Scientific name Boraras brigittae
Adult size About 3/4 inch
Group size At least 8–12 of the same species
Recommended starting tank 10 gallons or larger, established and planted
Temperature 74–80°F is a useful everyday target
Water preference Soft, acidic to neutral water; ask about the supplier’s conditions
Filter Gentle flow; protect exposed intakes
Food Fine complete food plus suitably tiny live or frozen foods
Temperament Peaceful; vulnerable to predators and food competition

Identification and natural habitat

Chili rasboras originate from southwestern Borneo, where they inhabit shaded freshwater habitats associated with peat-swamp forests. They were described by Vogt in 1978; claims that they were first discovered in 1991 are incorrect.

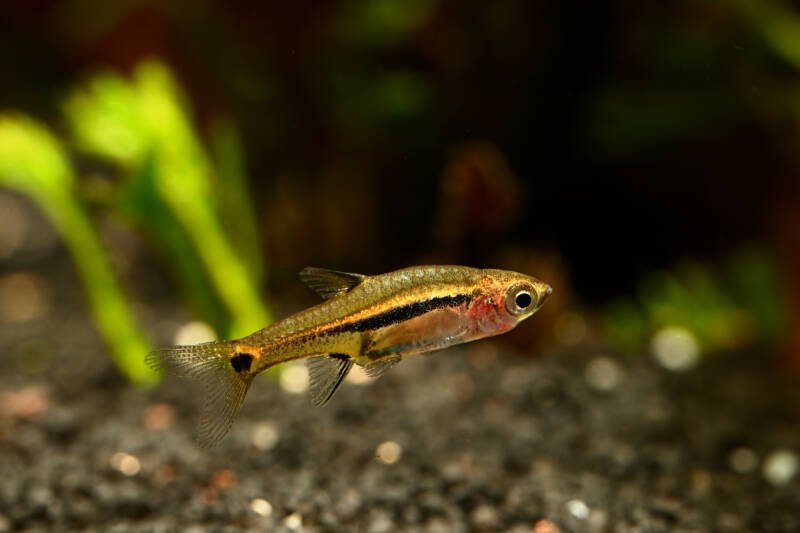
Look for a slender body with red coloration and a dark lateral marking. Males are often more intensely colored, while mature females may look fuller. Color alone is not enough to identify every fish: related Boraras species are sometimes mixed or mislabeled in the trade. Ask the seller for the scientific name rather than relying only on “dwarf rasbora.”

Chili rasbora with a red body and dark lateral marking

The Seriously Fish species account discusses their distribution and similar-looking species. Their forest habitat explains the preference for shelter and subdued light, but a home aquarium does not need to reproduce every extreme wild-water measurement.

Tank size and group size

Use a group-based stocking plan, not a fixed number of fish per gallon. Tank dimensions, filtration, plants, feeding, and other inhabitants all affect the result. Start with one group and watch water quality before adding more animals.

A species-focused 10-gallon setup is easier to plan than a crowded miniature community. If you want other schooling fish or bottom dwellers, choose a larger aquarium so each species can have its own suitable group. A lone chili rasbora or a pair does not replace a school.

Setting up a stable planted aquarium

  • Establish the filter first. Do not use these fish to cycle a brand-new tank. Confirm that the system can process waste before stocking it.
  • Provide shelter. Arrange plants at different heights, with shaded spaces and small open areas for feeding.
  • Protect the intake. A sponge filter is one option; cover a power filter’s intake with a suitable prefilter sponge and check it for clogging.
  • Keep flow gentle. Fish should be able to hover and feed without being swept across the aquarium.
  • Control temperature. Use a thermometer and, where needed, a thermostatic heater. Avoid direct sun as a heating method.

Begin with plants that fit the available light and maintenance routine rather than adding equipment simply because a tank is planted. Our low-light aquarium plant guide can help you compare planting options. Leave access to the filter, heater, and substrate for maintenance.

Water parameters: stability before extreme numbers

A practical planning range is around pH 6.0–7.0 and 1–10 dGH, approximately 18–179 ppm general hardness. These are not sharp survival boundaries. Aquarium Co-Op reports keeping chili rasboras in a broader range, while species references emphasize their soft-water origins. The source and acclimation history of your fish matter.

Test your tap water before buying. If it is much harder or more alkaline than the supplier’s water, discuss a sustainable plan with an experienced fishkeeper. Do not suddenly force an established tank to a lower pH with chemicals. GH measures general hardness; KH describes buffering capacity. They are different tests, and deliberately driving KH to zero can make management more difficult.

Use dechlorinated replacement water with reasonably matched temperature and chemistry. For a lightly stocked tank, a modest weekly partial water change is a useful starting routine; adjust its size and frequency using tests and the amount of waste. Small fish still need maintenance.

Ammonia and nitrite should read 0 ppm. Test promptly if fish gasp, stop eating, or act unusually, and correct a water-quality problem before assuming an infection. This aquarium water-testing guide explains the different readings. Keep records so you can recognize changes rather than relying on a single result.

Feeding tiny mouths successfully

Choose a complete food fine enough for the fish to swallow. Finely crushed tropical flakes or an appropriately sized micro food can form the staple, with small live or frozen foods providing variety. Suitable options include baby brine shrimp, microworms, or tiny frozen cyclops; check particle size rather than assuming any package marked “small fish” will work.

Offer small portions once or twice daily and watch individual fish take food. Spread it over a sheltered feeding area so the whole group gets access. Food drifting past the fish or accumulating below them is a sign to adjust its size, quantity, or delivery—not simply add more.

If other fish take every meal first, change the feeding arrangement or separate incompatible competitors. A planted tank may support tiny natural food organisms, but it should not be assumed to feed an adult group without supplemental food.

Choosing tank mates

Chili rasboras are safest with similarly small, peaceful animals that thrive in the same conditions. In a sufficiently large aquarium, carefully selected small tetras or dwarf catfish may be options. Account for the tank mates’ group sizes and activity levels as well as their adult lengths.

Avoid fish large enough to swallow them, persistent chasers, and fast feeders that prevent them eating. Bettas vary individually, so this is not a dependable beginner pairing. A calm-looking large fish can still regard a chili rasbora as food.

Adult dwarf shrimp can be compatible, although tiny shrimplets may be eaten. Check the shrimp’s water needs separately; very soft, acidic conditions do not suit every shrimp or snail. See our freshwater shrimp guide before planning a mixed setup.

Breeding chili rasboras

These fish scatter eggs and do not guard their offspring. A mature, densely planted tank may produce occasional fry, but adults can eat eggs and young. For a planned attempt, prepare a separate stable setup with gentle filtration, fine vegetation or a spawning mop, and a way to keep adults away from eggs.

Prepare microscopic fry food cultures before spawning. Feed only once fry are free-swimming and ready to eat; newly hatched fry initially rely on their yolk reserves. Larger foods can be introduced as their mouths develop. Raising fry successfully is more demanding than simply seeing eggs, so avoid relying on a promised egg count or rigid day-by-day schedule.

Common problems and buying checklist

Why are my chili rasboras pale?

Juvenile coloration, transport, lighting, and stress can all affect appearance. Look at appetite, breathing, fins, and behavior alongside color. A pale fish is not automatically sick, and a bright fish is not proof that water is safe.

Are chili rasboras beginner fish?

They can suit a prepared beginner with an established aquarium, but are a poor choice for an uncycled bowl or an unstable first setup. Tiny food and close observation are important.

How long do they live?

Plan for several years of care. Published hobby estimates vary, so a precise average or guaranteed maximum would be misleading. Purchase healthy fish and maintain consistent care rather than treating a lifespan figure as a promise.

Before buying, confirm the species, group size, supplier’s water conditions, and foods being accepted. Quarantine arrivals separately before adding them to an established community. Do not add medication solely because the fish are small or newly purchased; persistent symptoms need an appropriate diagnosis, ideally with an aquatic veterinarian’s help.

Denison Barb Care: Tank Size, Schooling and Water Needs

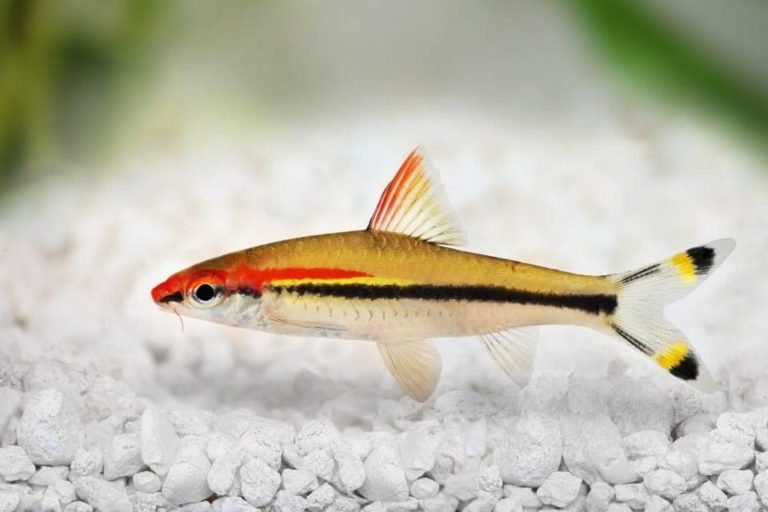
Denison barb (aka Roseline Shark)

Denison barbs (Sahyadria denisonii), also called roseline sharks or red-line torpedo barbs, are fast, peaceful schooling fish from India’s Western Ghats. They reach about 6 inches (15 cm), need a group of at least six and require a long, mature aquarium with clean, highly oxygenated water. They are not suitable for a small community tank.

School of Denison barbs Sahyadria denisonii
Denison barbs show their best behavior and reduce social stress when kept in a proper school.

Denison barb care at a glance

Scientific name Sahyadria denisonii (some databases currently display Dawkinsia denisonii)
Common names Denison barb, roseline shark, red-line torpedo barb, Miss Kerala
Adult length About 6 in (15 cm)
Group At least six; a larger school is preferable when space permits
Temperature About 68–77°F (20–25°C)
pH Approximately 6.8–7.8; prioritize stability
Tank Long aquarium, roughly 75 gallons or larger for a group
Difficulty Intermediate
Conservation Endangered in the wild; choose verified captive-bred fish

Appearance and correct identification

The species has a silver body, a black horizontal band and a bright red stripe extending from the snout toward the middle of the body. Black and yellow markings appear on the tail. “Roseline shark” is only a trade name; this fish is a barb in the cyprinid family, not a true shark.

Confirm the scientific name when buying. Related species and hybrids may be sold under similar common names, and taxonomy has changed over time.

Adult size, school and tank dimensions

Adult roseline shark or Denison barb in an aquarium
A long swimming footprint matters more than a tall tank for these active barbs.

Around 75 gallons with a four-foot or longer footprint is a practical minimum starting point for six, provided the aquarium is not crowded with other large active fish. More length and volume provide better swimming room and dilute waste. A pair or trio is not a responsible space-saving substitute for a school.

Leave a broad open lane through the middle and upper levels. Place plants, rounded rocks and securely anchored wood around the edges. Use a tight lid because startled fish can jump.

Water, flow and oxygen

Denison barbs come from flowing hill streams and rocky pools. Maintain strong gas exchange and clean water, but include calmer zones where fish can rest. A stable 68–77°F (20–25°C) suits the species better than very warm tropical conditions, which reduce dissolved oxygen and can shorten the margin for error.

Keep ammonia and nitrite at zero and manage nitrate with stocking, measured feeding and regular partial water changes. Match replacement-water temperature and chemistry, and use conditioner when the supply contains chlorine or chloramine.

Filtration and maintenance

Use mature biological filtration with substantial mechanical capacity. Direct outlets along the tank to create circulation without forcing fish to fight one concentrated jet. A separate air stone or second filter provides useful oxygen and outage redundancy.

  • Rinse reusable media in removed aquarium water or conditioned water.
  • Do not replace every biological surface at once.
  • Vacuum accessible waste without stripping the whole aquarium sterile.
  • Test more often after a filter failure, medication or major maintenance.
  • Confirm every filter and air pump restarts after a power interruption.

Diet and feeding

Provide a quality omnivore staple with plant matter and appropriately sized frozen or live foods such as daphnia or brine shrimp. Feed small measured portions and distribute food across the swimming area so every member of the school eats. Remove leftovers; heavy feeding cannot substitute for an appropriate group or tank.

Tank mates

Choose peaceful, robust fish that share the cooler temperature range and can cope with an active school. Avoid slow long-finned species, tiny fish likely to be intimidated, aggressive fin-nippers and fish requiring consistently hot water. Stock the Denison group first in your capacity calculation: six 15 cm fish create a meaningful bioload.

Behavior and stress signs

A healthy group swims actively and feeds readily, with individuals able to rest without being isolated or chased continuously. Warning signs include rapid breathing, clamped fins, persistent hiding, loss of color, repeated jumping, collisions, weight loss or separation from the school.

Test ammonia, nitrite, nitrate and temperature immediately when behavior changes. Seek an aquatic veterinarian for persistent breathing problems, ulcers, swelling, loss of balance or unexplained deaths rather than adding random medications.

Quarantine and acclimation

Quarantine new fish in a fully cycled, covered aquarium with adequate oxygen. Add the whole intended group together where possible after quarantine, rather than repeatedly disrupting the school. Match temperature and acclimate according to differences in source and destination water without leaving fish in polluted transport water longer than necessary.

Breeding

Commercial and specialist breeding has been achieved, but routine community-aquarium breeding is uncommon. Do not purchase a small mixed group expecting easy spawning, and do not use repeated temperature or chemical shocks to force reproduction.

Conservation and sourcing

FishBase and IUCN sources list the Denison barb as Endangered. Wild collection, habitat loss and trade pressure have contributed to concern. Ask sellers for captive-bred stock and avoid fish with unclear origin. Never release unwanted fish or aquarium water into waterways; use a responsible retailer, aquarium group or experienced keeper for rehoming.

Frequently asked questions

Can I keep one Denison barb?

No. It is a gregarious schooling species; plan for at least six from the outset.

Are Denison barbs aggressive?

They are generally peaceful, but a cramped aquarium or inadequate group can cause stress and chasing. Their speed may also unsettle slow fish.

Can Denison barbs live with discus?

They are a poor default match. Discus are commonly kept warmer and prefer a calmer environment, while Denison barbs favor cooler, highly oxygenated moving water.

Do they need a heater?

That depends on the room. Use a controlled heater when needed to prevent the aquarium falling below the chosen stable range; do not warm the tank unnecessarily.

How long do Denison barbs live?

They can be a commitment of several years, but lifespan claims vary. Plan suitable housing for the full life of the school rather than relying on a precise promise.

References and related guidance

Final recommendation

Choose Denison barbs only when you can house at least six in a long, cool-to-moderate, highly oxygenated aquarium. Their peaceful temperament does not make them a nano fish, and captive-bred sourcing should be part of the buying decision.

Blue Velvet Shrimp Care: Water, Feeding, Molting and Breeding

Blue Velvet Shrimp Care

Blue velvet shrimp are a blue color variety of Neocaridina davidi, the same freshwater species as cherry shrimp. They graze on biofilm and other small food particles, but they still need an established aquarium, suitable minerals, supplemental food, and regular maintenance.

For a first colony, we recommend a planted 10-gallon tank with gentle filtration and about 10 shrimp from a reliable breeder. A carefully managed 5-gallon setup can work, but more water gives a beginner extra room for error. A shrimp-only aquarium offers the best chance of seeing young survive.

Blue velvet shrimp care at a glance

Factor Practical starting point
Species Neocaridina davidi, selectively bred blue variety
Adult size Usually around 1 inch; larger females may approach 1.5 inches
Starting aquarium 10 gallons recommended for a first colony
Temperature About 68–76°F for routine care
pH Approximately 6.5–8.0
General hardness (GH) About 6–12 dGH, or 107–215 ppm
Carbonate hardness (KH) About 2–8 dKH, or 36–143 ppm
Ammonia and nitrite 0 ppm
Reproduction Eggs hatch into miniature shrimp in freshwater

These are planning ranges, not reasons to suddenly alter water that already supports a healthy colony. Ask the breeder for the actual conditions in which your shrimp were raised. The Shrimp Farm’s blue velvet listing distinguishes its own holding conditions from broader care ranges.

Blue velvet, blue dream, and other blue shrimp

“Blue velvet” is a trade name rather than a separate species or a universally standardized color grade. Blue dream and blue jelly names can overlap between sellers. Ask about the breeding line, look at representative animals, and verify the scientific name; not every blue shrimp is a Neocaridina.

The University of Florida’s species account describes how selective breeding produced different colors from wild-type shrimp. There is no need to invent a single documented ancestry for every blue strain sold today.

Blue freshwater dwarf shrimp grazing on an aquarium surface

If you want to preserve a particular color line, keep it separate from other N. davidi colors. They can interbreed, producing less predictable coloration over generations. That is a color-breeding issue, not evidence that differently colored shrimp cannot coexist peacefully.

Prepare the tank before adding shrimp

A cycled filter is essential, but a freshly cycled, spotless aquarium may still provide little grazing. Allow plants and surfaces to develop biofilm, then confirm the tank is stable before stocking. Do not add shrimp as a solution to an ammonia problem or as a way to cycle the aquarium.

  • Protect small animals: use a sponge filter or cover an exposed intake with an appropriate prefilter sponge.
  • Add grazing surfaces: plants, aquarium-safe wood, and smooth hardscape provide places to explore.
  • Provide cover: moss and other dense plants shelter newly molted adults and tiny young.
  • Keep maintenance accessible: leave room to remove food, clean the filter, and inspect the substrate.

A simple inert substrate is a straightforward starting choice. Do not buy a strongly pH-lowering shrimp soil merely because it is labeled for shrimp; products intended for soft-water Caridina setups may work against the water conditions you want for Neocaridina.

A heater is optional if the room keeps the aquarium within a stable suitable range. Check the actual water temperature across day and night before deciding. Avoid pushing temperature upward just to accelerate breeding.

Water changes, minerals, and acclimation

Test the tank and source water with a suitable aquarium test kit, including GH and KH. GH relates mainly to dissolved calcium and magnesium; KH describes buffering capacity. A TDS reading alone cannot tell you whether those minerals are in the right balance.

For a lightly stocked colony, a modest weekly water change is a useful starting routine. Adjust the amount to nitrate trends, feeding, and waste rather than using the same schedule regardless of conditions. Treat tap water for chlorine or chloramine, match temperature reasonably closely, and add replacement water gently.

If using RO/DI water for water changes, remineralize it appropriately before it enters the aquarium. Pure RO/DI water is not a complete long-term habitat by itself. Evaporation removes water while leaving minerals behind, so top-offs and water changes have different jobs; repeatedly topping off with mineral-rich water can raise dissolved solids.

Follow the supplier’s arrival instructions, especially for shipped animals. Compare water conditions and make any necessary transition gradually in a clean container. A fixed, prolonged drip period is not automatically safest for every shipment. Do not pour shipping water into the aquarium, and do not try to force a major chemistry change after the shrimp are already in the tank.

Feeding: a cleanup crew still needs food

Biofilm and soft algae are useful grazing resources, not a guarantee of a complete diet. Offer a small amount of complete shrimp food and observe how readily it is eaten. A feeding dish can make leftovers easier to see and remove.

Occasional small portions of thoroughly rinsed, softened vegetables can add variety. Remove uneaten perishable food before it breaks down; a small colony should not receive a portion intended for a heavily stocked fish tank. Adjust feeding to colony size and available natural grazing instead of adding food automatically.

Healthy plants generally provide habitat rather than becoming a meal. Shrimp may pick at damaged or decaying leaves. Their activity does not replace filter care or water changes. The Shrimp Farm’s care guide covers supplemental feeding and colony husbandry.

Molting and copper: avoid common mistakes

A shed exoskeleton is usually translucent and hollow; it can remain in the aquarium for grazing. An actual dead shrimp contains opaque tissue and should be removed. Newly molted shrimp may hide while their shell hardens, so do not pull apart the tank simply because one is temporarily missing.

Repeated failed molts warrant checking GH, KH, recent water changes, and nutrition. Do not automatically add calcium, crushed coral, or mineral powder without testing. A white band is not enough by itself to identify the cause of a shrimp’s decline. Aquarium Co-Op’s Neocaridina guide discusses mineral needs and molting.

Copper-containing fish medications can be dangerous to shrimp. However, “any trace of copper is fatal” is inaccurate: concentration and formulation matter. Seachem explains why its Flourish fertilizer is shrimp-safe at its labeled dose. That statement does not make every fertilizer, medication, or overdose safe.

Check each product’s invertebrate guidance, measure doses for the actual water volume, and keep sprays, pesticides, soap, and other household contaminants away from the tank. Quarantine or inspect new plants and livestock as appropriate to their source.

Tank mates and breeding

For the highest shrimplet survival, keep a dedicated shrimp colony. Even peaceful fish may eat young shrimp. Small fish can sometimes coexist with adults when water conditions and space suit both, but “nano” does not mean predator-free. Our chili rasbora guide discusses one possible pairing and its limitations.

Bettas are an unpredictable choice for a colony you want to protect. Suitable snails may be easier companions, but their mineral needs and eventual size also matter. Bamboo shrimp have specialized filter-feeding requirements and are not simply larger versions of blue velvet shrimp; see our bamboo shrimp guide before combining them.

With both sexes present and suitable conditions, females carry eggs under the abdomen and fan them until hatching. Development takes several weeks and varies with temperature. The young emerge as small shrimp; there is no need for a saltwater larval stage. Protect filter intakes, retain grazing surfaces, and avoid accidentally siphoning out babies.

Plan for colony growth and responsible rehoming. Do not release shrimp, plants, or aquarium water containing animals into natural waterways. Keep records of the breeding line if maintaining a specific color is important.

When to investigate a problem

If several shrimp suddenly become inactive, try to leave the water, or die, check ammonia, nitrite, temperature, aeration, and recent additions immediately. A suitable partial water change may be needed when contamination or water quality is involved. Correct the identified cause instead of adding multiple treatments blindly.

Blue velvet shrimp are rewarding for a prepared beginner, but “low bioload” does not mean “no care.” A stable routine, cautious additions, and measured feeding are the foundation of a healthy colony.

How to Tell If Angelfish Eggs Are Fertilized

How To Tell If Angelfish Eggs Are Fertilized

Developing angelfish eggs usually stay translucent, with a cream or amber tint, while failed eggs often turn opaque white. Color is a clue, not proof: the strongest evidence is an embryo developing inside the egg, followed by hatching. A newly laid egg can look promising before you know whether it will develop.

This guide concerns freshwater angelfish, commonly Pterophyllum scalare. Watch changes over time instead of trying to diagnose an entire clutch from one photograph.

What fertile and failed angelfish eggs look like

What you see What it may mean What to do
New, translucent cream or amber eggs Potentially viable; too early for certainty Record the laying time and observe without disturbing them
Visible embryo development inside a translucent egg Much stronger evidence of successful fertilization Maintain stable conditions and watch for hatching
Opaque white eggs that do not develop Nonviable eggs; they may have been unfertilized or died afterward Check water quality and remove accessible failed eggs carefully if needed
Cottonlike growth around an egg Microbial growth associated with a failed egg Address dead material and water conditions; do not assume the entire clutch is lost
Tiny larvae wriggling while still attached The eggs have hatched Protect them from strong flow and filter intakes

Lighting, the spawning surface and the camera’s white balance can change apparent color. Compare the same area of the clutch under similar lighting each day. Avoid repeatedly lifting a leaf or slate out of the water just to inspect it.

What does not prove fertilization?

Eggs sticking to a leaf, parents guarding them, or a second fish passing over them are not proof. Adhesion is a normal feature of angelfish eggs. A female can lay without a male, and two females may display apparently paired spawning behavior.

Sera’s explanation of eggs that fail to develop notes that an apparent fertilizing pass does not show whether fertilization actually occurred. It also identifies unsuitable water and two-female pairings as possibilities. A white egg alone cannot tell you which cause applies.

How long do angelfish eggs take to hatch?

Expect roughly 2–3 days to hatching under typical warm breeding conditions. This is an estimate, not a deadline. Temperature and the condition of the eggs affect the schedule.

After hatching, the young are often called wigglers. They remain attached or clustered and use their yolk reserves before swimming freely. Parents may move them to another surface, so an empty original spawning site does not always mean the eggs were eaten.

Aquarium Co-Op’s angelfish breeding guidance describes hatching after about 2–3 days and free swimming several days later. Have suitable first food ready before that stage; newly hatched baby brine shrimp are a common option once the fry are swimming and ready to feed.

Keep the water stable while the eggs develop

Use an established aquarium with gentle filtration and reliable temperature control. Around 80°F is a useful breeding reference, but consistency matters more than repeatedly adjusting the heater to chase a hatch time. The breeder AngelsPlus reports hatching around 60 hours at 80°F, with several more days before free swimming.

  • Test ammonia and nitrite. Both should read 0 ppm on an appropriate aquarium test. Detectable readings need attention; they are not acceptable simply because they seem low.
  • Use conditioned replacement water. Match temperature closely and avoid abrupt changes in water chemistry. Do not use a large cold-water change to force spawning.
  • Provide gentle circulation. Eggs need oxygenated water, but a forceful jet can damage or dislodge them.
  • Protect future fry. A mature sponge filter or a suitably protected intake reduces the risk of tiny fish being drawn into equipment.
  • Keep maintenance careful. Remove waste without siphoning up eggs or larvae. Small equipment and good visibility help.

If a water-quality problem appears, prioritize correcting it with appropriately matched water and restored filtration. Leaving harmful water untouched is not the same as keeping conditions stable.

Should you leave the eggs with the parents?

Leaving a clutch with the parents allows them to fan and clean it. It also lets you observe their behavior without transferring delicate eggs. The disadvantages are predation by tankmates and the possibility that the parents eat the clutch, especially when disturbed or inexperienced.

A quiet breeding setup gives the pair a better opportunity than a busy community aquarium. Keep routine activity calm and avoid tapping the glass or constantly shining a light at the eggs. You do not need to remove good parents automatically when the fry begin swimming.

Artificial hatching is another approach, but it requires a prepared container with matched water, temperature control and gentle aeration. Moving a clutch into an unheated bowl of fresh tap water creates more problems than it solves. Decide on the method before spawning whenever possible.

What to do when eggs turn white

A few white eggs do not mean every egg has failed. Observe whether other eggs continue developing. Parents may remove unsuccessful eggs themselves. When artificially incubating, an accessible dead egg can be removed carefully with a small pipette or similar tool, without scraping or crushing neighboring eggs.

No treatment can fertilize an unfertilized egg or restore a dead embryo. Avoid adding medication to the display aquarium just because a few eggs changed color. If an egg treatment is appropriate for a separate incubation setup, follow that specific product’s instructions and compatibility warnings; generic “drops per tank” recipes are unreliable.

Why does the whole clutch keep failing?

Keep a short record for each spawn: laying time, temperature, ammonia and nitrite results, when eggs become opaque, and whether any embryo development occurred. This is more useful than changing several things after every unsuccessful attempt.

  • No development across repeated clutches: confirm whether the fish are a male–female pair. Guarding behavior is insufficient to establish sex or fertility.
  • Development starts and then stops: examine water conditions, temperature changes, handling and circulation.
  • Eggs disappear: check for relocated wigglers before concluding that parents or tankmates ate them.
  • Repeated failure despite stable care: review hardness and breeding conditions with an experienced breeder. Avoid abrupt pH changes or adding softening chemicals without a plan.

For comparison with another egg-laying fish, see our guide to Corydoras egg development and hatching. Do not apply its timing directly to angelfish; species and temperature matter.

After hatching: prepare for fry care

Wait for free swimming and readiness to feed rather than scattering food over attached wigglers. Offer appropriately tiny food in small amounts, watch that the fry can eat it, and remove leftovers. Plan for frequent water-quality checks and enough grow-out space as the fish increase in size.

Routine adult emergency food substitutes are not a fry-feeding plan. Obtain suitable fry food ahead of time, and arrange space or homes for juveniles before deliberately raising a large batch.

Can white eggs still hatch?

Truly opaque white eggs that have stopped developing generally will not hatch. The caution is identifying them correctly: a pale but translucent egg under glare is not necessarily dead. Look for progression over time and avoid discarding the whole clutch based only on color.

How Many GloFish in a 5-Gallon Tank? Species-by-Species Advice

How many glofish in a 5-gallon tank

For GloFish danios, skirt tetras, tiger barbs, corys, rainbow sharks or angelfish, our recommendation for a 5-gallon tank is zero. Their swimming space, social needs or adult size call for a larger aquarium. Buying fewer schooling fish does not solve the space problem.

GloFish is a brand covering different fish, not one species with one stocking rule. A single domestic betta is a separate small-aquarium option; two female bettas are not a safe five-gallon plan. Identify the fish before buying the tank.

Five-gallon suitability by fish type

  • Zebra danios: no. These active schooling fish need a group and room to swim.
  • Skirt tetras, including long-fin forms: no. A suitable group needs more space than five gallons provides.
  • Tiger barbs: no. Their activity and fin-nipping behavior make cramped groups a poor choice.
  • GloFish corys: no. Plan around their group and usable bottom area, not a single “cleanup fish.”
  • Rainbow sharks: no. Research adult size, bottom territory and compatibility before choosing a much larger tank.
  • Angelfish: no. The brand’s own angelfish guide specifies at least 29 gallons for one, with larger options preferred.

The brand now includes fluorescent corys and angelfish as well as the older familiar groups. Do not rely on an old four-species list when planning a purchase.

Why the inch-per-gallon rule fails here

A fish’s length does not describe its swimming behavior, social requirements, body mass or territory. Two small danios may fit physically in a five-gallon aquarium, but they would lack both a proper group and adequate swimming room. A powerful filter cannot create either.

Tank shape matters too. A long footprint provides different space from a narrow, tall container with the same gallon rating. Gravel and decorations also reduce the actual water volume. Choose the species and group first, then an aquarium that supports them as adults.

A practical upgrade for danios or skirt tetras

For a beginner planning one small group of zebra danios or skirt tetras, we recommend considering a 20-gallon long aquarium with six of the same species as a conservative starting plan. This is our planning recommendation, not a universal biological minimum or permission to add six of every type. More fish or additional species require a fresh assessment.

Aqueon’s danio care guide emphasizes a long aquarium, a group of six or more and a secure lid. OATA’s tetra guidance likewise makes group housing and species-specific requirements central to care.

Do not apply this starter plan to rainbow sharks or angelfish. Tiger barbs also need careful consideration of group size and tankmates: OATA notes their potential for fin nipping. Avoid treating a mixed-color display package as a complete stocking plan.

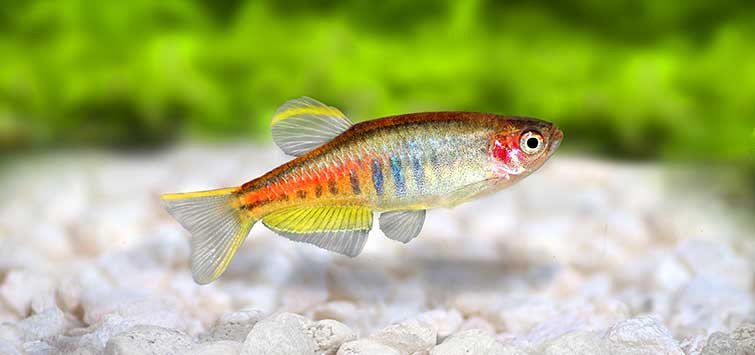
Fluorescent zebra danio
Color does not change a zebra danio’s need for companions and swimming space.

What about one betta in five gallons?

A single domestic betta can be considered for a properly equipped five-gallon aquarium, with a larger tank preferable where practical. The RSPCA recommends about 5.3 US gallons (20 liters) or more where possible, suitable heating and gentle filtration.

Keep one betta, not a pair or a female “sorority,” in this small setup. Sex alone does not remove aggression risk. If you encounter a fluorescent betta, its basic care remains betta care; an older product listing does not establish present availability. See our female and male betta guide for compatibility considerations.

If you already have GloFish in a five-gallon tank

  1. Identify the species and count the fish. Color names alone are not enough.
  2. Do not add more fish to complete a school in the undersized tank. Arrange suitable larger housing first, or discuss a return or responsible rehoming with the seller.
  3. Monitor water quality while making the change. Check ammonia and nitrite, use conditioned replacement water when necessary and avoid overfeeding.
  4. Prepare the replacement aquarium properly. A new filter is not instantly cycled. Preserve established biological media where appropriate and continue testing after the move.

Our filtration guide explains waste processing. If fish are gasping, use the oxygenation guide and seek help for persistent distress. Extra bubbles do not make overcrowding acceptable.

Do GloFish need ultraviolet lights?

No special ultraviolet lamp is required to display them. The GloFish website describes white and blue LED lighting; blue visible light is not the same thing as ultraviolet radiation. Use aquarium lighting as directed and provide a regular dark period. Choose plant-appropriate lighting if keeping live plants.

The fluorescent appearance is an inherited trait, not a reason to change the fish’s basic husbandry. Decorative lights and glowing ornaments should come after appropriate housing, filtration and water testing.

Choose equipment after choosing the fish

A kit’s label does not guarantee suitability for every fish pictured on its box. Compare its actual dimensions, filter, heater requirements and lid with your intended inhabitants. There is no need for a particular branded food or ornament simply to answer the stocking question. Start with the aquarium basics hub and build the setup around the animals.

This is a research-based stocking guide. Tank recommendations reflect cautious beginner planning, not personal product testing.

Betta Fish Tank Setup: A Step-by-Step Beginner Guide

Betta Fish Tank Setup

A good betta fish tank setup starts with a heated, gently filtered aquarium of at least 5 gallons, a secure lid, and a completed fishless cycle. A 10-gallon rectangular tank is an easier long-term choice when you have room: it provides more space for plants, resting places and stable water conditions.

Plan this setup for one domestic Betta splendens. A small cup, decorative vase or unheated bowl is not an appropriate permanent home. Buy and prepare the equipment before bringing the fish home whenever possible.

Betta tank setup checklist

Item What to look for
Aquarium and stand At least 5 gallons; preferably 10, with a level, manufacturer-approved supporting surface
Lid Secure cover with equipment gaps protected and an air space above the water
Heater and thermometer Thermostatically controlled heater sized for the tank and room; a separate thermometer to verify temperature
Filter Gentle, adjustable flow and reusable biological media; protect the intake
Water conditioner A product labeled to treat chlorine and chloramine, dosed according to its instructions
Water tests Ammonia, nitrite, nitrate and pH; make sure ammonia is included rather than assuming every test strip covers it
Habitat and lighting Smooth substrate, safe cover, resting places near the surface and a timed day/night light cycle
Maintenance supplies Dedicated bucket, small siphon, aquarium-safe cleaning tools and suitable betta food

1. Choose a tank with usable swimming space

A rectangular aquarium is straightforward to furnish and maintain. Check usable water volume after substrate and decorations rather than relying only on the number printed on the box. Leave room for the fish to swim around cover instead of filling every inch with ornaments.

Aquarium Co-Op’s betta setup guide identifies 5 gallons as a starting size and recommends gentle filtration and tropical warmth. A kit is convenient only if its tank and equipment actually meet those needs; “betta” on the packaging is not enough.

2. Position and prepare the aquarium

Choose a stable location away from direct sunlight, heating vents and cold drafts. Use a support designed for the filled tank’s weight and follow the manufacturer’s base-support requirements. Do not add a foam pad underneath every aquarium by default; different designs have different requirements.

Inspect the tank and equipment before filling. Rinse a new aquarium with plain water and use a clean, aquarium-only cloth if needed. Keep household soap and cleaning sprays away. Rinse substrate as directed by its manufacturer; some planted substrates should not be rinsed.

Position electrical cables with drip loops and follow each appliance’s installation instructions. Keep connections dry and accessible for maintenance.

3. Set up gentle filtration and steady heat

An air-driven sponge filter is a simple option. A small internal or hang-on-back filter can also work if its current is gentle and its intake is protected. Watch the fish after introduction: it should be able to rest and swim normally without continually fighting the flow.

Run the filter continuously. Its biological media provide surfaces for microorganisms that process waste. For more detail, see why bettas need filtration.

A practical temperature target is 78–80°F, checked with a separate thermometer. Size the heater for both water volume and how far the room temperature falls below the target. Allow it to acclimate to the water before switching it on, following its instructions, and unplug it before a water change exposes it.

A lamp is not a reliable substitute for a heater. See our betta warmth and heater-failure guide for temporary situations. Aquarium Co-Op’s betta care guidance also explains why typical room temperatures can be too cold.

4. Add cover without blocking the surface

Use smooth decorations with openings large enough that the fish cannot become trapped. Soft artificial plants or suitable live plants provide sheltered places to explore. Check ornaments for rough seams, narrow holes and sharp points before adding them.

Anubias or Java fern can be useful beginner plants; keep their thick rhizomes above the substrate. A broad leaf or aquarium-safe resting platform near the surface helps a long-finned fish rest without a long climb. Leave a clear route to the surface and open patches among floating plants.

Bettas use surface air as well as their gills. Keep an air gap beneath the lid and do not make the enclosure airtight. The RSPCA’s betta welfare guidance emphasizes surface access, cover and a lid that prevents jumping.

5. Fill with treated water and cycle before adding fish

Treat tap water for chlorine and chloramine using the conditioner’s label directions. Leaving water out overnight is not a dependable way to remove chloramine. Special bottled “betta water” is not a substitute for understanding your source water, and plain distilled water should not be used as the complete long-term water supply without appropriate remineralization.

A tank is not cycled simply because the filter has been running for a few days. Establishing biological filtration requires an ammonia source and testing. Follow a complete fishless method, such as DrTim’s explanation of fishless cycling, with the instructions for the specific ammonia product used.

Keep the heater and filter operating, record ammonia and nitrite results, and verify the method’s completion criteria before adding the betta. Do not add cycling ammonia once fish are present. Reduce accumulated nitrate with appropriately conditioned water before introduction. The RSPCA recommends fishless cycling when preparing a new aquarium.

If you already have the betta

Do not leave it indefinitely in a tiny shop cup while waiting for a perfect setup. Use the best available heated, conditioned and gently filtered aquarium, and recognize that an uncycled tank needs active management. Test ammonia and nitrite daily initially, feed modestly, and use temperature-matched, conditioned partial water changes as needed to keep both at zero on the test. Seek experienced help if readings persist or the fish is distressed.

6. Introduce the betta carefully

Confirm the temperature and water tests before opening the transport container. Dim the light and follow the supplier’s acclimation instructions, accounting for the journey and the difference between the two water supplies. Long-shipped fish should not automatically undergo a prolonged open-bag acclimation.

Transfer the fish gently with a suitable net or container, avoiding delicate fin damage, and keep transport water out of the aquarium as far as practical. Secure the lid and allow a quiet settling period. Observe breathing, swimming and access to resting areas.

7. Establish a simple maintenance routine

  • Daily: check temperature, filter flow and the fish’s behavior. Offer a modest amount of complete betta food and remove leftovers. Portion sizes depend on pellet size and the fish; do not use a universal pellet count.
  • Weekly: test the water and begin with a partial change of around 20–25%, adjusting frequency and volume to the tank’s results. Use conditioned replacement water close to the aquarium’s temperature.
  • When flow falls: gently clean reusable filter media in removed aquarium water. Preserve established biological media instead of discarding everything on a monthly schedule.
  • As plants grow: trim to preserve swimming space and surface access. Start with about 6–8 hours of aquarium lighting daily and adjust for plant health and algae, leaving a dark night period.

Keep the fish in its aquarium for ordinary partial water changes when you can work safely around it. Avoid dismantling and scrubbing the whole habitat as a routine cleaning method. Evaporation top-ups do not replace water changes.

Bloodworms and similar foods can provide variety but should not replace a complete staple diet. See our guide to feeding bettas bloodworms.

Does a betta need tankmates?

No. One betta in a furnished aquarium is a sensible beginner plan. Do not add another male, a male–female pair, or a female “sorority” to this setup. Other fish require additional space, appropriate groups and a backup plan if aggression occurs.

Shrimp may be hunted even when described as compatible. Read our betta and shrimp compatibility guide before trying them. Tankmates should meet their own needs, not serve as decorations or a replacement for cleaning.

Final check before bringing your betta home

The tank should be cycled, heated, covered and gently filtered, with safe resting places and clear surface access. Have food, conditioner and tests ready, and know who can help if the fish becomes ill. If you notice persistent clamped fins, labored breathing or loss of appetite, check water and temperature first and consult our betta health guide for next steps.

How to Tell if a Molly Fish Is Pregnant: Signs and Care

How to Tell if a Molly Fish Is Pregnant: Signs and Care

A gradually enlarging belly in a mature female that has been with a male is a useful clue that a molly is pregnant. A dark patch near the rear of the abdomen may also be visible. No single outward sign confirms pregnancy or tells you the exact day she will give birth. Check the fish’s sex, recent history, body shape, and overall health together.

Check that your molly is female

Look at the anal fin underneath the fish, behind the belly. An adult female normally has a fan-shaped anal fin; a mature male has a narrow, rod-shaped reproductive fin called a gonopodium. Color and size alone are less dependable ways to tell them apart. Aqueon’s livebearer guide explains this difference and how these fish give birth to swimming young rather than laying eggs.

A female bought recently may already have mated at the store or breeder. Mollies can store sperm, so the absence of a male in your aquarium does not rule out a later pregnancy. This is documented for sailfin mollies in the University of Florida’s research review of the species (PDF, pages 3–4).

Pregnancy clues—and their limits

What you notice How to interpret it
Belly grows gradually over several weeks Supports pregnancy in an otherwise healthy female with a mating history; swelling has other possible causes.
Darker area toward the rear of the belly A gravid spot can be visible on lighter fish. Pigmentation can hide it on black mollies.
Belly looks more squared near the rear May occur late in pregnancy, but is not a reliable countdown to delivery.
Hiding, reduced appetite, or unusual stillness Check water quality and health. These behaviors are not proof of labor.

Compare photographs taken from the same angle several days apart without catching or handling the fish. Balloon mollies already have a rounded body shape, making a belly-only judgment especially unreliable. Never squeeze the abdomen to check for babies.

How long are mollies pregnant?

Expect several weeks, not a precise deadline. Published estimates vary with the molly species and conditions: the Florida review reports about three to four weeks for sailfin mollies, while Aquarium Co-Op’s aquarium molly guide gives a broader 30–60-day breeding timeframe. A purchase date is not a known fertilization date.

Do not raise the temperature or make abrupt water changes to try to trigger birth. Maintain the fish’s normal, stable conditions. A female becoming distressed needs a health and water-quality check, not a revised due date.

When a swollen belly needs attention

Raised scales, sores, rapid breathing, loss of balance, or persistent refusal to eat should not be dismissed as pregnancy. Test ammonia and nitrite, check the temperature and filter, and observe whether other fish are affected. Seek an aquatic veterinarian’s advice for swelling accompanied by illness or worsening symptoms. Do not start medication solely because a fish looks round.

For a fish resting abnormally or struggling to swim, our bottom-resting fish troubleshooting guide helps organize the initial checks.

Should you separate a pregnant molly?

Choose your fry-raising plan before delivery. In a planted community aquarium, dense cover offers newborns hiding places, but adults—including their mother—may eat them. This approach does not guarantee that every baby survives.

If you want to raise more fry, prepare a separate, fully cycled nursery with gentle filtration and water conditions matching the main tank. A bare container of aquarium water is not a cycled nursery. Protect filter intakes so small fish cannot be drawn in.

Avoid repeatedly chasing a heavily pregnant fish or keeping her confined in a tiny breeding trap for days while guessing her due date. If you cannot provide suitable separate housing, improve cover in the existing aquarium and plan proper grow-out space rather than improvising an unfiltered bowl.

What to do when the babies arrive

Molly fry can take suitably fine food from birth. Offer small portions of finely crushed appropriate fish food or fry food; newly hatched brine shrimp are another option. Feed little and often, remove leftovers, and monitor water quality closely. Extra feeding can quickly overwhelm a small nursery.

In a separate breeding tank, remove the mother once delivery is finished and she can be moved without unnecessary disturbance. Use the fry’s actual size and the mouths of potential tankmates to judge when they can safely join a larger aquarium—not a fixed four- or eight-week rule. See our molly fry care guide for the next stage.

Plan for more than one brood

Decide where growing juveniles will live before trying to save a whole brood. Do not release unwanted aquarium fish outdoors. Arrange suitable homes and discuss sex separation with an experienced fishkeeper; females with a previous mating history may still produce young afterward.

For long-term housing and water requirements, continue with our molly fish care guide.

Best Fish for a 20-Gallon Tank: 3 Practical Stocking Plans

Best Fish for a 20-Gallon Tank: 3 Practical Stocking Plans

Ember tetras, pygmy corydoras, honey gouramis, and male guppies are useful starting points for a 20-gallon freshwater aquarium. They are alternatives to choose between, not a shopping list to combine. Match adult size, social needs, water chemistry, and temperament before deciding how many fish to buy.

Below are three modest stocking plans. Choose one, establish the aquarium first, and leave room to respond if a fish is bullied or the tank needs more maintenance than expected.

20-gallon long vs. 20-gallon high

Both hold a nominal 20 US gallons, but their swimming space differs. Aqueon’s standard 20 long measures 30¼ × 12½ × 12¾ inches; its 20 high measures 24¼ × 12½ × 16¾ inches (length × width × height). Other models vary; check the actual footprint. These measurements come from Aqueon’s aquarium dimensions chart (PDF).

For the small community fish discussed here, the long version provides a longer swimming route and more floor area. A taller tank does not compensate for insufficient swimming length, and substrate and decorations reduce the water volume in either shape.

Three separate stocking plans

Plan Fish Conditions and layout
Small centerpiece community 1 honey gourami + 10 ember tetras About 76–78°F; planted cover, gentle flow, and open swimming space. Soft to moderately hard water suited to both species.
Small schooling community 10 ember tetras + 8 pygmy corydoras About 75–77°F; preferably a 20 long, with smooth substrate, plants, and accessible feeding areas.
Hard-water livebearer tank 6 male guppies About 76–78°F; suitably hard, alkaline water, planted sight breaks, and monitoring for chasing.

These are suggested starting designs, not universal maximum capacities or guaranteed compatible groups. They assume an established filter, appropriate food, and regular maintenance. Do not merge the plans or automatically add another bottom-dwelling group. Check the conditions in which your supplier keeps the fish and confirm that your tap water suits the chosen species.

Why these fish work

Ember tetras: one coordinated group

These small orange fish reach about 0.8 inch and suit peaceful planted aquariums. Keep a group rather than scattering two or three individuals among several tetra species. Ten gives you a useful shoal while leaving space for one compatible addition in the plans above. Choose food small enough for their mouths. Aquarium Co-Op’s ember tetra guide describes their social needs and preference for gentle filtration.

Honey gourami: a modest centerpiece

Confirm the scientific name, Trichogaster chuna. A honey gourami is not a dwarf gourami or the larger thick-lipped gourami sometimes sold under similar color names. One avoids the extra complications of keeping a breeding pair in a small community. Provide cover without blocking surface access, and watch feeding to make sure the fish is not intimidated. See the honey gourami care guide for identification and behavior.

Pygmy corydoras: social fish, not cleaners

Pygmy corydoras stay around an inch long and should live with their own kind. They also swim above the bottom, so do not assume they occupy otherwise unused space. Offer suitable small sinking foods directly; leftovers are not a complete feeding plan. A group of eight is a practical choice here, with quiet tankmates and places to rest. Aquarium Co-Op’s pygmy cory guide covers their group size and feeding needs.

Male guppies: a different water-chemistry option

Guppies are a better starting choice when your water is naturally hard and alkaline. An all-male group avoids deliberately adding breeding females, although males can still chase one another. Ask the seller to confirm their sex and have a separation plan for persistent bullying. Do not continually add fish to distract an aggressor. Read the guppy care guide and our guppy temperature guide before setting up.

How many fish can a 20-gallon tank hold?

There is no dependable single number. The inch-per-gallon rule overlooks body mass, activity, territorial behavior, social grouping, and adult growth. Twenty tiny fish and twenty stocky fish place very different demands on the same aquarium.

Use a complete stocking plan, not spare gallons, to decide what belongs. More filtration can help process waste but cannot create territory or swimming space. Stable test results also do not prove that a crowded or incompatible group has enough room.

Choices that need a different plan

  • Bettas: a 20-gallon aquarium can provide good space for one, but compatibility varies by individual. Do not add one to the gourami plan or assume it will tolerate small fish and shrimp.
  • Mollies and swordtails: do not substitute them for guppies without checking the exact variety, adult size, activity, and breeding needs. Larger varieties need more room; see our molly guide.
  • Goldfish and common plecos: leave these out of the small tropical communities above. Buying a juvenile does not solve its eventual housing requirements.
  • Unspecified “cichlids” or “barbs”: those labels cover very different fish. Identify the species before making any compatibility decision.

Prepare the aquarium before buying fish

Cycle the filter using a fishless method with a controlled ammonia source and testing. Simply running an empty tank for a few weeks does not demonstrate that it can process fish waste. Confirm completion of the chosen cycling method, including ammonia and nitrite returning to zero, before stocking. The RSPCA aquarium environment guide explains why this matters.

Use a suitable heater, thermometer, filter, and secure lid. Add fish in planned stages while preserving each species’ social group, and test after additions. Keep an established alternative available if fish must be separated; an uncycled bowl is not a useful backup.

Keep the plan manageable

Feed measured portions and check that every species eats. Inspect the equipment and fish daily. Use water tests and the tank’s condition to guide regular partial water changes; condition replacement tap water and avoid abrupt temperature changes. Fish, snails, and shrimp do not replace this work.

Give the aquarium a consistent day/night schedule rather than leaving the light on continuously. Adjust lighting to the plants and algae response. If maintenance becomes difficult, address feeding, filtration, and stocking before buying a supposed cleanup fish.

Start with one of the three plans, learn how that group behaves, and allow the aquarium to settle. An attractive 20-gallon tank does not need a specimen of every fish on the store’s small-fish shelf.

Amano Shrimp Care: Tank Setup, Feeding and Breeding

Amano Shrimp

Amano shrimp (Caridina multidentata) are freshwater grazers that need a mature aquarium, appropriate food, and peaceful tankmates. They can help with soft algae, but they do not remove the need for water changes or solve the cause of an algae outbreak. Their transparent bodies and busy feeding behavior make them interesting animals in their own right.

Amano shrimp care at a glance

Requirement Practical starting point
Adult size About 1.5–2 inches; females usually grow larger
Aquarium Established 10-gallon or larger tank with covered openings
Temperature 68–80°F; keep conditions stable and suitable for all inhabitants
Water pH around 6.5–7.5; measurable mineral hardness, not untreated pure RO water
Food Natural grazing plus small portions of suitable sinking food
Breeding Adults live in freshwater; larvae require a separate saline rearing stage

The size and water ranges above follow Fluval’s Amano shrimp profile (PDF). They are care guidelines, not targets to reach by abruptly changing your aquarium.

Identification and buying

Amanos have translucent grayish bodies with a row of dark markings along each side. Males tend to show dots; females often have more elongated marks. Older labels may use the name Caridina japonica. Similar-looking shrimp are sold under broad common names, so ask for the scientific name when buying.

Choose active shrimp that are grazing or moving normally. Ask whether they are captive-bred or collected, how long the store has held them, and what water they are in. A bargain price is less useful than healthy animals and clear acclimation advice. Do not select a fixed male-to-female ratio unless you have a specific breeding project.

Set up a mature, escape-resistant aquarium

A 10-gallon tank is a useful minimum starting size for this guide; more space helps when adding fish. Start with a modest group, such as four to six, in an appropriately maintained tank rather than applying a rigid shrimp-per-gallon formula. Food supply, cover, and existing inhabitants matter.

Use established biological filtration and confirm that ammonia and nitrite are undetectable. Waiting six weeks is not a substitute for testing. Shrimp benefit from a tank that has developed grazing surfaces as well as a functioning filter. Aqueon’s freshwater shrimp guide recommends mature aquariums and protected filter intakes.

Add plants, wood, and sheltered spaces. Fit a sponge guard to an exposed intake and close gaps around hoses and cables without blocking ventilation. Good surface movement supports oxygen exchange; a powerful extra pump is not automatically necessary. Use a heater if the room cannot maintain suitable conditions.

Water changes, minerals, and acclimation

Condition replacement tap water for chlorine and chloramine and match temperature closely. Make regular partial water changes, guided by tests and feeding, rather than allowing waste to build up between major cleanouts. Keep a record of pH and general hardness (GH) so you can recognize a change.

Do not add crushed coral or mineral supplements simply because a shrimp is hiding. Test first: additives can change more than one water parameter. If using reverse-osmosis water, prepare and verify an appropriately remineralized supply before use.

Ask the supplier for acclimation instructions suited to the shipping method and water difference. Avoid sudden changes and prolonged exposure to deteriorating transport water. Check every medication’s label for invertebrate safety; copper-based fish treatments can be dangerous to shrimp. Treat fish separately when a product is unsuitable for the shrimp aquarium.

Feed the shrimp, not just the algae

Offer small amounts of sinking shrimp food and observe whether all animals can reach it. An occasional small piece of softened vegetable can provide variety; remove leftovers before they foul the water. Spread food between a few locations if large shrimp monopolize a pellet.

Amanos graze biofilm and some filamentous algae, but results vary with the algae present and other food available. Do not starve them to make them clean. Manually remove troublesome growth and review lighting, feeding, and plant health. Eating waste food still produces shrimp waste.

Molting: what is normal?

An empty, translucent shell can be a shed exoskeleton. Hiding afterward is normal while the new shell hardens. Leave an obvious empty molt for the shrimp to graze, but do not assume every pale, motionless shape is a shell. Check for tissue inside and look for the living shrimp before deciding.

If several shrimp become inactive, try to climb out, or die close together, promptly check ammonia, nitrite, temperature, aeration, and anything recently added to the water. Repeated losses or failed molts need investigation; adding minerals blindly may make conditions worse.

Tankmates: peaceful does not always mean safe

Small fish such as ember tetras may share suitable water conditions with adult Amanos. Avoid fish large enough to swallow them and species that hunt crustaceans. Newly molted shrimp are especially vulnerable. Bettas vary individually: planted cover reduces exposure but does not guarantee safety. See our betta and shrimp compatibility guide.

A shrimp-only aquarium removes fish predation risk. If mixing Amanos with blue velvet shrimp, make sure the smaller shrimp also get food.

Why eggs do not produce a freshwater colony

A female may carry eggs beneath her abdomen and release tiny larvae. Unlike cherry shrimp, Amanos do not normally complete this life cycle in an ordinary freshwater aquarium. Aquarium Co-Op’s Amano guide explains the larvae’s need for highly brackish or salt water.

Do not salt the community tank or move the adult female into seawater. Successful rearing needs a separate planned system, measured salinity, suitable microscopic food, and a managed return to freshwater after development. It is a specialist project, not a quick change to normal care. For most keepers, enjoying healthy adults is a better starting goal than attempting to raise every batch of eggs.