Betta Fish Diseases: Symptoms, First Steps, and Treatment

Betta Fish Diseases: Symptoms, First Steps, and Treatment

A sick betta needs a water-quality check and a careful assessment before you choose a medicine. Clamped fins, appetite loss, white marks, swelling, or unusual swimming can have several causes. A symptom chart helps organize observations; it cannot reliably diagnose an infection from appearance alone.

This guide covers common betta health problems, immediate care priorities, and when to contact a veterinarian who treats fish. It does not assume every illness is contagious or that one remedy treats every cause.

First steps when your betta looks sick

  1. Check for an emergency. Severe breathing difficulty, inability to reach the surface, collapse, active bleeding, rapidly worsening sores, or marked swelling with raised scales needs prompt veterinary attention.
  2. Test before adding medication. Record ammonia, nitrite, nitrate, pH, and the actual water temperature. Ammonia and nitrite should be undetectable in an established aquarium. Check the heater and filter rather than relying on their indicator lights.
  3. Address an environmental problem. If tests show contamination, use appropriately conditioned, temperature-matched replacement water and retest. Do not abruptly alter pH. If a neglected aquarium has very low pH and high ammonia, seek help with a controlled correction rather than a sudden chemistry change.
  4. Keep conditions stable. A practical routine target for a domestic betta is about 78–80°F, with gentle filtration and easy surface access. Do not turn up the heater as a general treatment for illness.
  5. Record the history. Note when signs began, recent additions, cleaning, food changes, and every product already used. Take clear side and overhead photographs without repeatedly netting the fish.

Water problems can resemble infection and can occur alongside it. The Merck Veterinary Manual’s environmental disease guidance explains why water analysis belongs at the start of a fish-health investigation. Our betta ammonia guide and test kit comparison provide related practical checks.
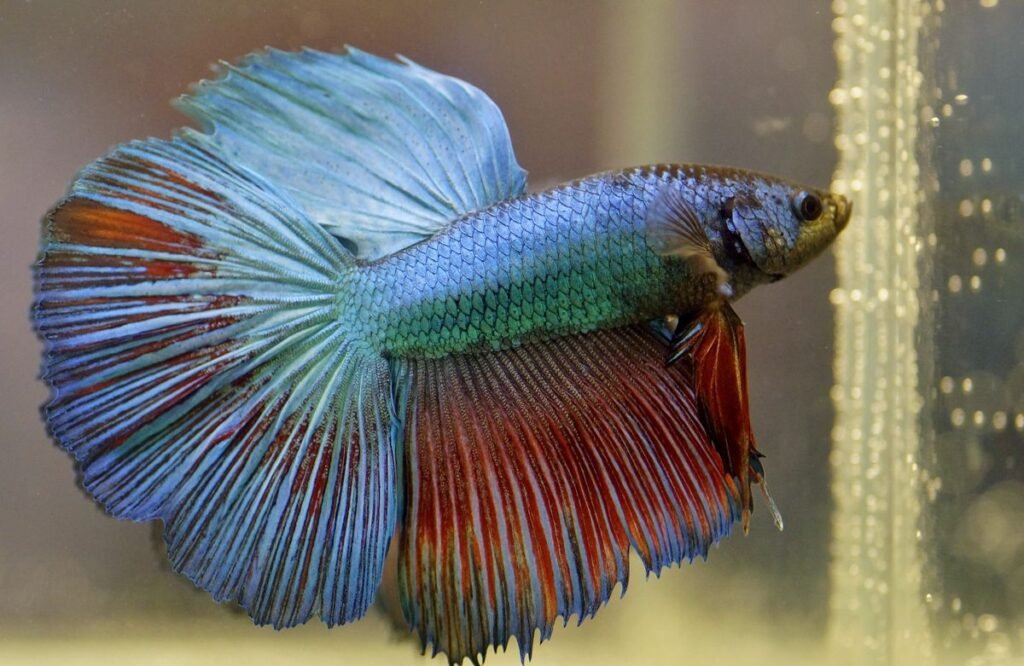
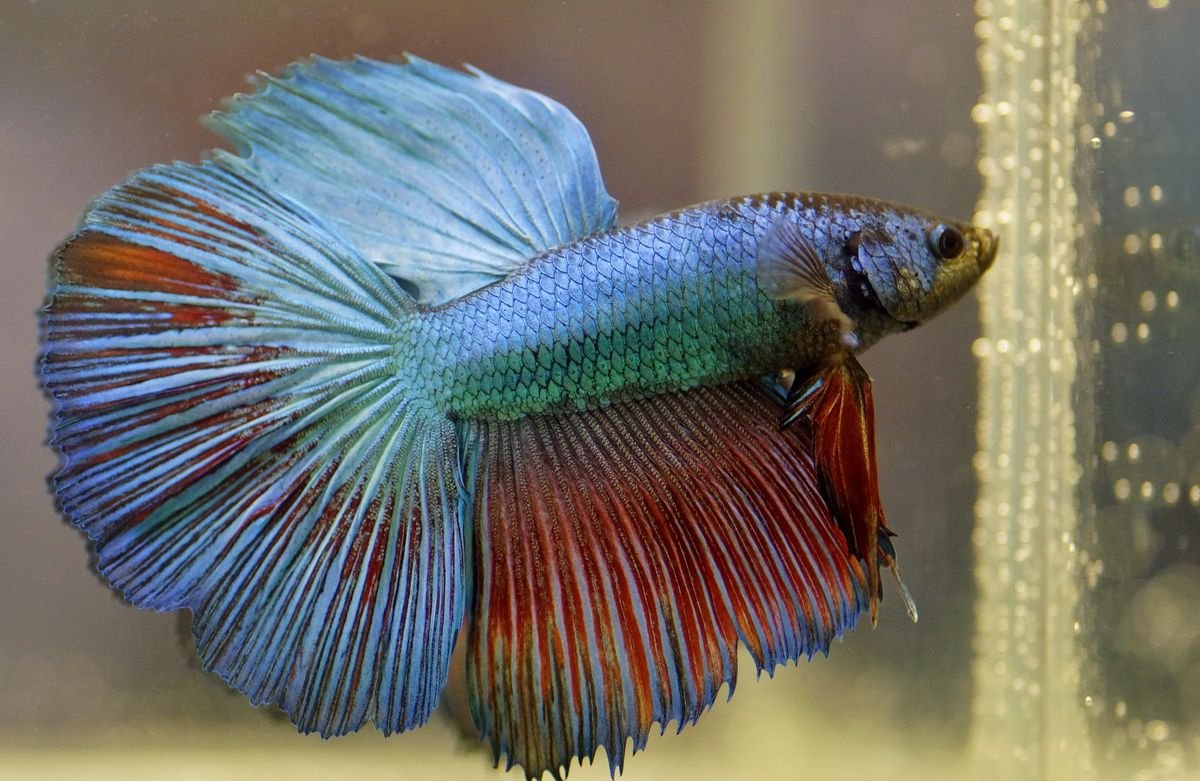
Blue and red long-finned betta swimming in an aquarium
Compare changes with your own fish’s normal appearance and behavior. A general betta photograph is not a disease diagnosis.

Betta symptoms: what they can mean

Sign Possibilities to investigate Priority
Rapid breathing or persistent gasping Water-quality trouble, low oxygen, or gill disease Check water and equipment immediately.
Receding, inflamed fin edges Fin infection or damage Check injury sources and progression.
Small white spots Ich or another skin problem Seek prompt identification.
Fine dusty coating with scratching Velvet or another irritant Check breathing and obtain diagnosis.
Cotton-like patches or mouth lesions Water mold or bacterial disease Do not assume “fungus.”
Swelling with raised scales Fluid accumulation called dropsy Urgent veterinary assessment.
Cloudy or enlarged eye Injury or disease Examine water conditions and seek help if persistent.
Floating sideways or sinking Buoyancy problem with several possible causes Support surface access and investigate.

Fin rot versus a torn fin

A split after snagging on decor is not automatically fin rot. Compare photographs over time: continued tissue loss, inflamed edges, or damage extending toward the body is more concerning than a stable tear. Remove sharp decorations and address fin-nipping tank mates.

Fish veterinarian Jessie Sanders describes fin rot as an active infection, rather than a label for every imperfect fin. Correcting the environment is essential, but an advancing infection may need targeted treatment. Do not trim the fins yourself or promise that every damaged fin will return to its previous shape.

Ich and velvet require different identification

Ich: white-spot disease

Freshwater ich is caused by Ichthyophthirius multifiliis. Salt-grain-like spots can suggest it, but gill infections may occur without visible body spots. Other conditions can resemble ich, so microscopy provides confirmation.

UF/IFAS explains the ich life cycle: stages on the fish and in the environment are protected, while the free-swimming stage is vulnerable to treatment. This is why a single dose or the disappearance of spots does not necessarily finish the job. Follow a suitable treatment’s complete directions and get advice about all exposed fish and the aquarium, not just the visibly affected betta.

Velvet: a fine coating, not ordinary iridescence

Freshwater velvet involves Piscinoodinium, a parasitic dinoflagellate that affects skin and gills. A published freshwater outbreak investigation illustrates the importance of identifying this parasite. A betta’s normal metallic color alone is not proof of velvet. A new dusty appearance together with scratching, clamped fins, or breathing problems warrants prompt assessment. Do not rely on darkness, salt, or heat alone as a cure.

White growths, swelling, and eye problems

Columnaris is bacterial, despite names such as “mouth fungus.” Cotton-like growth can also involve water molds such as Saprolegnia. Similar appearances need different treatment decisions.

Dropsy is a sign, not a single disease. A swollen body with raised scales can indicate serious fluid-balance failure. It is neither proof of one bacterial infection nor something a branded “revive” product can be promised to cure.

Popeye and cloudy eyes also have multiple causes. Injury, infection, and other disorders are possibilities. The Merck Veterinary Manual’s fish disease overview describes these overlapping presentations. Rapid progression, lost appetite, or several affected areas increases the need for professional assessment.

Buoyancy problems, appetite loss, and lumps

“Swim bladder disease” is often used loosely for a fish that floats, sinks, or rolls. It does not establish the underlying cause. Check water, temperature, recent feeding, and injury history. Our sideways-swimming guide helps organize those observations.

Do not assume cooked peas, a prolonged fast, or a salt bath will solve every case. A betta that cannot reach the surface needs prompt help and a safe resting place close to it, without being trapped or exposed to strong current.

Likewise, weight loss or stringy feces does not identify a particular parasite, and a lump does not automatically mean cancer or a viral infection. Photograph changes and have a persistent or growing lesion examined. Do not puncture lumps or attempt parasite removal with forceps at home.

Hospital tanks and medication: avoid making things worse

A separate hospital tank can protect tank mates and make treatment easier, but an unheated, uncycled bowl can add a new problem. Use a covered aquarium with stable temperature, gentle aeration or filtration, safe resting cover, and frequent water tests. For a betta living alone, ask whether treatment in its existing aquarium is preferable to moving it.

Keep hospital equipment separate. Moving one sick fish does not eliminate parasites or other pathogens already present in the original aquarium. The treatment plan must account for exposed animals and environmental stages where relevant.

UF/IFAS guidance on ornamental-fish antibiotics emphasizes diagnosis, reducing stress, and choosing a drug that works against the responsible bacteria. Some treatments can also harm the biological filter.

  • Choose treatment for the identified problem; antibiotics do not treat every parasite, virus, or water-quality issue.
  • Use the exact product’s current instructions and the actual water volume in US gallons. Similar names can have different ingredients and concentrations.
  • Check compatibility with plants, shrimp, snails, and other fish before treating a shared tank.
  • Follow directions about filtration, carbon, aeration, water changes, and treatment duration.
  • Do not combine medications or add copper, salt, or other chemicals by guesswork. Ask a veterinarian or the manufacturer about compatibility.
  • If the fish worsens, seek help instead of stacking another remedy on top.

Prevention and a useful first-aid kit

Keep a reliable thermometer, water tests, a chlorine/chloramine conditioner, a dedicated bucket and siphon, and a prepared plan for temporary housing. These are more useful starting supplies than a collection of medicines chosen without a diagnosis.

Condition new tap water correctly. Standing or boiling water is not a dependable substitute for treating chloramine. Our water conditioner guide explains product selection and dosing.

Quarantine new fish separately for at least 30 days, with a longer period when advised for a specific risk. The Merck guide to aquarium fish management recommends separate equipment and established biological filtration for quarantine. A clear-looking fish is not necessarily free of infection.

Maintain regular partial water changes, remove uneaten food, protect the filter’s biological media, and feed an appropriate varied diet. Good care reduces risk; it cannot guarantee that a betta will never become ill.

What to send a fish veterinarian

Provide tank size, setup age, tank mates, water-test numbers, temperature, symptom timing, photos or a short swimming video, recent purchases, and all treatments used. Ask about transport before taking the fish to the clinic. This information is more useful than arriving with a guessed diagnosis from a photograph.

Best Aquascaping Plants: 9 Choices for Every Skill Level

Best Aquascaping Plants: 9 Choices for Every Skill Level

Aquascaping plants do more than make an aquarium look natural. They define the foreground, soften hardscape, create depth, shelter fish and shrimp, and use nutrients that might otherwise feed algae. The best choices are not simply the most colorful plants—they are the plants that suit your aquarium’s light, substrate, carbon dioxide (CO2) supply, and maintenance routine.

This guide compares nine reliable plants for layouts ranging from low-tech beginner tanks to carefully trimmed, CO2-injected aquascapes. Start with a simple planting plan, choose a few species that share similar needs, and give them time to establish.

Nature-style planted aquarium with layered aquatic plants and hardscape
A successful aquascape uses plants of different heights and textures to create depth.

Quick comparison of the best aquascaping plants

Plant Best position Light CO2 Difficulty
Anubias barteri ‘Petite’ Hardscape / foreground Low Not required Easy
Cryptocoryne wendtii Midground Low–medium Not required Easy
Monte Carlo Foreground carpet Medium–high Strongly recommended Moderate
Java moss Hardscape / foreground Low–medium Not required Easy
Hydrocotyle tripartita Foreground / midground Medium Helpful Moderate
Java fern ‘Trident’ Hardscape / midground Low–medium Not required Easy
Hygrophila pinnatifida Hardscape / midground Medium Helpful Moderate
Staurogyne repens Foreground / midground Medium Helpful Moderate
Bucephalandra Hardscape Low–medium Not required Easy–moderate

1. Anubias barteri ‘Petite’

Anubias ‘Petite’ is one of the most dependable plants for a low-tech aquascape. Its compact, dark-green leaves work well near the front of the tank, between stones, or on driftwood. It grows slowly, so it needs little trimming, but slow growth also means old leaves can collect algae when lighting is excessive.

Attach the plant to rock or wood with thread or a small amount of aquarium-safe cyanoacrylate gel. Keep its thick rhizome above the substrate; burying the rhizome can cause it to rot. The plant tolerates low light and does not require added CO2. Kew recognizes Anubias barteri as a species native to tropical western and west-central Africa.

Compact Anubias Petite growing on aquarium hardscape
Anubias ‘Petite’ adds durable, slow-growing foliage to shaded hardscape.

2. Cryptocoryne wendtii

Cryptocoryne wendtii is a versatile rooted plant for the midground. Depending on the variety and growing conditions, its leaves may be green, bronze, brown, or reddish. It performs well in low-to-medium light and usually grows without injected CO2 once its roots are established.

Plant individual crowns a few inches apart in a nutrient-rich substrate or use root tabs in inert gravel or sand. Newly moved crypts sometimes shed their old leaves—a temporary response known as “crypt melt.” Leave healthy roots and crowns in place; fresh submerged leaves often follow. The species is native to Sri Lanka according to Kew’s Plants of the World Online.

Cryptocoryne wendtii planted in the aquarium midground
Cryptocoryne wendtii provides a natural transition between low foreground plants and taller stems.

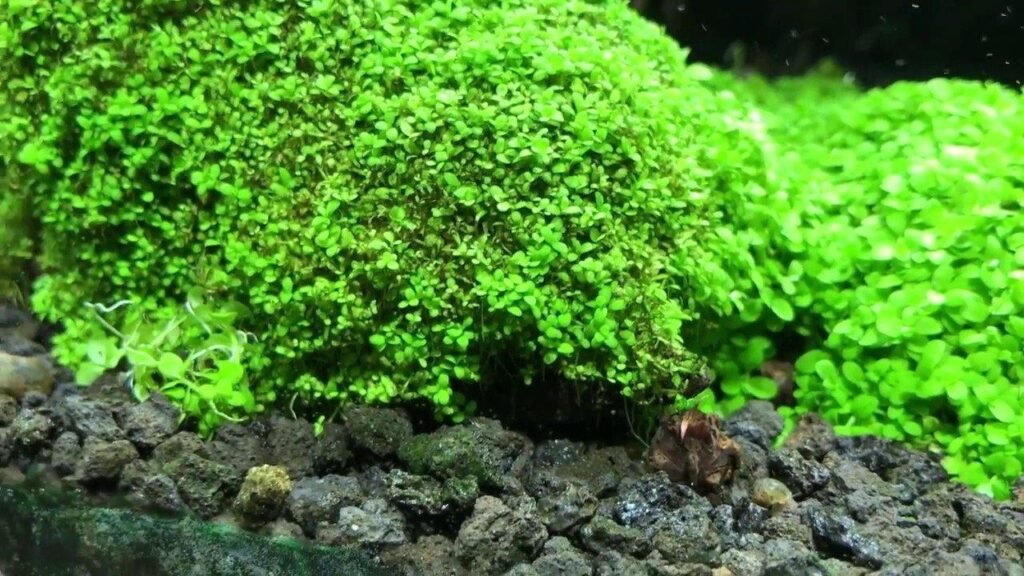
3. Monte Carlo (Micranthemum tweediei)

Monte Carlo is a small-leaved carpeting plant that can form a bright green lawn across the foreground. It is more forgiving than some demanding carpet plants, but a dense, low carpet is most reliable with medium-to-high light, stable nutrients, and injected CO2. Without CO2 it may grow more slowly and vertically instead of spreading tightly.

Divide the pot into small plugs and plant them about an inch apart with tweezers. Regular trimming encourages horizontal growth and prevents the upper layer from shading or lifting the growth underneath. A dry-start method can help the plugs root before the tank is filled, but high humidity and careful mold control are essential.

Monte Carlo carpeting plant across an aquascape foreground
Monte Carlo can create a dense foreground carpet when light, nutrients, and CO2 are balanced.

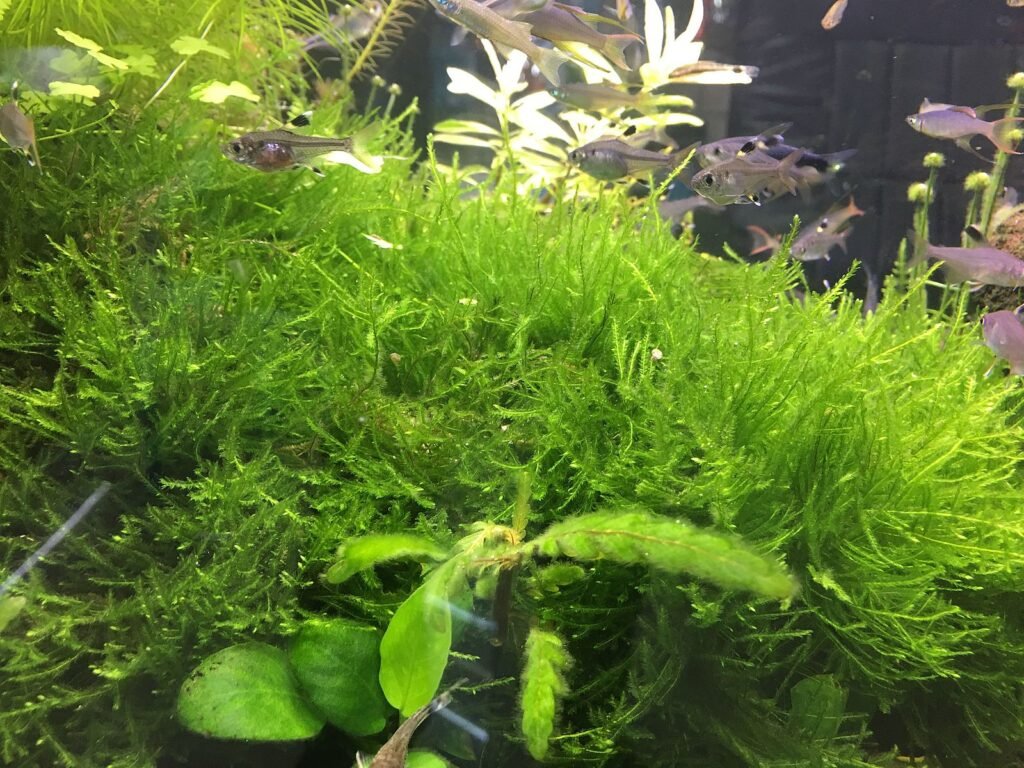
4. Java moss

Java moss is useful wherever an aquascape needs fine texture. Tie or glue a thin layer to wood, stone, or stainless-steel mesh. It tolerates low light and does not require CO2, making it a practical choice for shrimp tanks and beginner layouts.

Avoid attaching thick clumps: the shaded interior can trap debris and deteriorate. Trim regularly and siphon loose fragments so the moss keeps a compact shape. Gentle-to-moderate flow helps prevent waste from settling in it.

Java moss attached to aquarium hardscape
Use a thin, regularly trimmed layer of Java moss for clean texture and shelter.

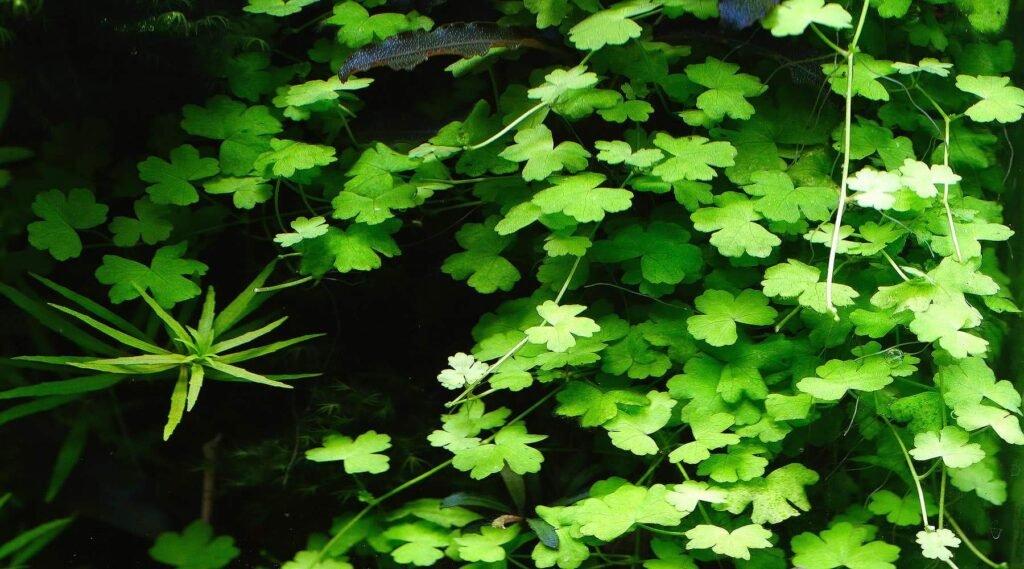
5. Hydrocotyle tripartita

Hydrocotyle tripartita has small, clover-like leaves and a lively growth pattern. It can be allowed to creep through the foreground, cascade over rocks, or form a loose midground mound. Moderate light and consistent fertilization support compact growth; CO2 is helpful when you want a dense, controlled shape.

Pin short runners into the substrate or tuck them around hardscape, then trim and replant the healthiest tips. Without regular pruning it can climb upward and shade slower plants.

Hydrocotyle tripartita with small clover-shaped leaves
Hydrocotyle tripartita can creep, cascade, or form a bright midground mound.

6. Java fern ‘Trident’

Java fern ‘Trident’ is a narrow, branching-leaved form of Microsorum pteropus. It adds height and movement without the visual weight of broader Java fern varieties. Like Anubias, it is an epiphyte: attach it to wood or rock and do not bury the rhizome.

Low-to-medium light is adequate, and CO2 is optional. Remove damaged older leaves at the rhizome. Small plantlets may form on mature leaves; once they develop roots, they can be detached and mounted elsewhere.

Narrow branching leaves of Java fern Trident
Java fern ‘Trident’ brings fine, arching texture to wood and stone.

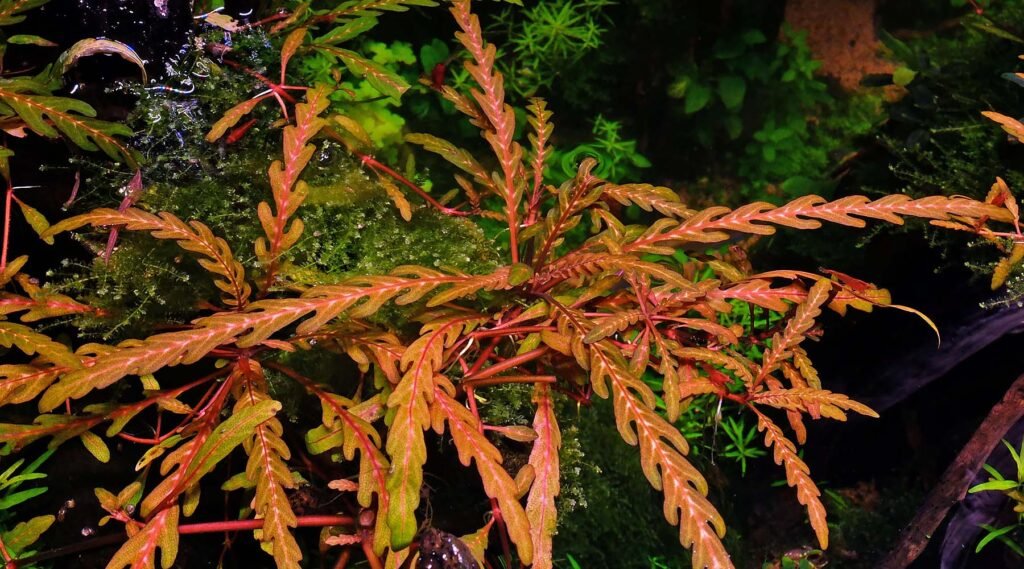
7. Hygrophila pinnatifida

Hygrophila pinnatifida stands out for its deeply divided leaves and warm brown-to-reddish tones under stronger light. It can root in substrate or attach to porous hardscape, sending out runners and side shoots. Use it as a focal accent rather than letting it spread everywhere.

Moderate light, balanced fertilization, and good circulation are important. Added CO2 promotes compact growth and stronger coloration. Pinching the growing tips encourages branching. For a taller, easier background option from the same genus, see our guide to Hygrophila corymbosa.

Hygrophila pinnatifida with divided brown-green leaves
Hygrophila pinnatifida makes an effective textured accent on aquarium hardscape.

8. Staurogyne repens

Staurogyne repens is a compact stem plant that bridges the foreground and midground. Its upright stems and broader green leaves contrast nicely with carpeting plants and mosses. Plant individual stems with space between them, then trim the tops to encourage low, bushy side growth.

It can survive without injected CO2, but moderate light and CO2 generally produce a fuller, more compact group. Do not allow taller plants to shade it heavily, and keep nutrients stable rather than chasing rapid growth with excessive light.

Staurogyne repens growing as a compact foreground bush
Staurogyne repens creates a strong transition between a carpet and taller midground plants.

9. Bucephalandra

Bucephalandra species and cultivars are slow-growing rhizome plants prized for their varied leaf shapes, subtle colors, and iridescent surfaces. They are ideal for adding detail to shaded rock and wood. Attach the rhizome above the substrate, just as you would with Anubias or Java fern.

Low-to-medium light is usually sufficient. CO2 is not essential, although stable CO2 and nutrients can improve growth. Because Bucephalandra grows slowly, keep lighting conservative and remove algae before it becomes established on older leaves.

Bucephalandra attached to aquarium hardscape
Slow-growing Bucephalandra adds fine detail and subtle color to hardscape.

How to plan an aquascape that grows well

Assign each plant a role

Choose low plants for the foreground, medium plants for the visual transition, and taller stems or rosettes for the background. Epiphytes belong on rock and wood. Repeating a limited number of species usually looks calmer and more intentional than planting one of everything.

Build around a focal point

Place the main rock, wood feature, or open swimming area slightly off-center—near a rule-of-thirds line is an easy starting point. Let smaller pieces and plant groups support that focal point. Leave some open space so the layout has contrast and does not become a solid wall of foliage.

Match the substrate to the roots

Root feeders such as Cryptocoryne and Staurogyne benefit from aquasoil or periodic root tabs. Epiphytes take much of their nutrition from the water column and must keep their rhizomes exposed. Wash inert sand or gravel before use, but do not rinse active aquasoil unless its manufacturer instructs you to.

Balance light, CO2, and nutrients

More light increases plant demand for CO2 and nutrients. It also increases algae risk when the other inputs are unstable. Begin with a moderate photoperiod—often six to eight hours daily—and adjust gradually. A timer keeps it consistent. If you inject CO2, use equipment designed for aquariums and maintain a stable level during the lighting period; never sacrifice fish safety for faster plant growth.

Planting and first-month care

  1. Inspect and clean plants. Remove damaged leaves, rock wool, gel, and dead roots. Quarantine when practical, especially if the plants came from tanks containing fish or snails.
  2. Plant by growth habit. Separate rooted plants into small portions, mount rhizomes above the substrate, and attach moss in a thin layer.
  3. Cycle the aquarium. Plants do not eliminate the need to establish biological filtration or monitor ammonia and nitrite before adding livestock.
  4. Keep the first weeks stable. Perform regular partial water changes, remove melting leaves, and avoid repeatedly uprooting plants that are trying to establish.
  5. Trim with a plan. Cut fast plants before they shade slow ones. Replant healthy tops where needed and remove excess growth from the aquarium.

Avoid packets sold as “aquarium carpet seeds.” Many contain terrestrial or semi-aquatic plants that germinate quickly and then decay after prolonged submersion. Buy correctly identified aquatic plants from a reputable aquarium supplier instead.

Frequently asked questions

Can I create an aquascape without CO2 injection?

Yes. Anubias, Cryptocoryne, Java moss, Java fern, and many Bucephalandra varieties can make an attractive low-tech layout. Use modest lighting, choose slower-growing plants, and accept that growth will be more gradual.

How many plant species should a beginner use?

Three to five well-matched species are enough for a convincing first layout. For example, combine Monte Carlo or a low Cryptocoryne in front, Cryptocoryne wendtii in the midground, Java fern on wood, and one taller background plant. Repetition creates unity and makes maintenance easier.

Why are my new aquarium plants melting?

Some nursery-grown plants were raised above water and must replace their old leaves with submerged growth. Transport stress, unstable CO2, damaged roots, or sudden changes in water conditions can also cause leaf loss. Remove decaying material, keep conditions stable, and watch the crown or rhizome for healthy new growth.

Final recommendation

For an easy first aquascape, begin with Anubias ‘Petite,’ Cryptocoryne wendtii, Java moss, and Java fern ‘Trident.’ Add Monte Carlo, Hydrocotyle tripartita, Hygrophila pinnatifida, or Staurogyne repens when you are ready to manage stronger light, more frequent trimming, and possibly injected CO2. The best planted aquarium is not the one with the longest plant list—it is the one whose plants share compatible needs and can be maintained consistently.

Alternanthera Reineckii Mini: Planting and Care Guide

Alternanthera Reineckii Mini: Planting and Care Guide

Alternanthera reineckii ‘Mini’ is a compact red stem plant that works well as a foreground accent or a low midground group. It needs more attention than Java fern or Anubias, but a consistent routine matters more than buying the brightest light or adding extra iron.

This guide explains how to plant it, balance light and nutrients, trim a dense group, and work out why new growth is struggling.

Alternanthera reineckii Mini at a glance

  • Plant type: cultivated variety of a rooted stem plant.
  • Typical trimmed height: about 2–4 inches; shoots can grow taller without pruning.
  • Placement: foreground in larger tanks, or midground in small aquariums.
  • Light: moderate to strong light reaching the leaves.
  • CO2: supplementation improves growth and appearance, especially under stronger lighting.
  • Difficulty: best for someone comfortable managing a planted aquarium.

Tropica’s cultivar profile describes its compact habit and suitability for trimming into a low red-violet group. It is a stem plant, so a tidy “carpet” takes pruning and replanting rather than simply spreading like a lawn.

Compact red Alternanthera foliage contrasting with green aquarium plants
A small red plant group can provide contrast without filling the entire foreground.

Water conditions and choosing a location

Dennerle lists a temperature range of about 72–82°F, pH 5–8, and soft to hard water for this cultivar. These are broad grower ranges, not instructions to push your aquarium to either extreme. Choose stable conditions that also suit your fish and shrimp. See the Dennerle plant profile for its cultivation specifications.

Place the group where taller plants, floating plants, and hardscape will not block its light. Leave room around it for trimming and siphoning. Avoid a spot where digging fish repeatedly uproot new stems or a filter outlet flattens them.

How to plant it

  1. Prepare the plants. Rinse tissue-culture growing medium from the roots and divide the clump into manageable portions. For potted plants, carefully remove the pot, packing material, and any weights or rings. Discard clearly rotten tissue.
  2. Separate the stems. Plant individual established stems or small tissue-culture portions with a little space between them. Packing the entire cup into one hole shades the center and makes maintenance harder.
  3. Anchor the roots. Use tweezers if helpful, inserting the roots and lower bare stem into the substrate. Keep the leaves above it rather than burying a leafy clump.
  4. Leave the group to establish. Replant only stems that float loose. Repeatedly pulling them up to inspect the roots delays establishment.

Tropica’s planting guide explains preparation for different plant forms. In a new aquarium, planting before completely filling the tank can make placement easier; keep exposed plants moist while working.

Substrate and fertilizer

Aquarium soil is a convenient option, but a fertile layer covered with a thick cap is not a universal requirement. Follow the instructions for the particular substrate: some aquarium soils are designed to be used on their own. Sand or fine gravel can also anchor plants, but an inert substrate does not provide a lasting nutrient supply by itself. Our planted-tank substrate guide explains the main choices.

Use aquarium plant fertilizer according to its label, taking account of nutrients supplied by the substrate, fish food, and source water. Root fertilizer can supplement an inert or depleted substrate; keep it buried and follow its placement directions. Avoid combining several products at full dose without checking what each contains.

There is no useful universal schedule that calls for daily potassium, alternate-day iron, and a separate dose of every other nutrient. Record what you add and judge the response of new growth over time. Red leaves do not mean the plant needs an unlimited iron supply, and starving the aquarium of nitrogen to chase color can weaken plants.

Lighting and CO2: balance them together

Choose an adjustable planted-aquarium light with suitable coverage. A fixture’s wattage alone does not tell you how much usable light reaches this plant; tank depth, mounting height, shading, and fixture design all matter. There is no basis for prescribing a 175-, 250-, or 400-watt LED simply from tank depth, and pink lamps are not mandatory. See our aquarium plant lighting guide.

For a newly planted setup, a timer set to roughly six hours is a sensible starting point. Increase the duration gradually only if plant growth and algae control justify it. Tropica uses this approach in its aquarium startup guide. Longer lighting cannot compensate for missing nutrients or inadequate carbon availability.

Without injected CO2, keep expectations modest: growth may be slower and the group less compact. Do not compensate by running intense light all day. If you use a CO2 system, adjust it cautiously, maintain surface gas exchange, and watch livestock. Fish gasping or becoming distressed calls for stopping the injection and increasing aeration while checking water conditions. A bubble count is not a universal safe dose for every aquarium.

Trimming and propagation

Once stems are rooted and growing, trim the tallest shoots just above a healthy leaf node, leaving healthy foliage on the base. Replant sound tops to expand the group, removing any leaves that would be buried. Side shoots on the remaining stems help fill out the planting. This follows the stem-plant method in Tropica’s trimming guidance.

Thin crowded areas so light can reach lower leaves. Small, regular trims are easier to manage than letting the group become an overgrown mound and cutting everything back at once. Collect loose cuttings before they drift into the filter.

Troubleshooting poor growth

  • Older leaves deteriorate after planting: plants grown above water may shed older foliage while adapting. Remove decaying leaves and look for firm stems and healthy new growth. Continuing stem rot is not something to ignore as normal “melt.”
  • Long stems with sparse lower leaves: check shading and crowding before increasing light. Prune and replant healthy tops if the bases have become bare.
  • Pale, damaged, or distorted new leaves: review fertilization, source water, and CO2 consistency. Appearance alone cannot reliably identify one missing nutrient.
  • Algae coats the leaves: remove what you can gently, check the lighting schedule, and maintain the filter and water-change routine. Change one factor at a time instead of adding more light and fertilizer together.
  • Plants keep floating: check planting depth and disturbance from fish. Use smaller portions anchored carefully rather than burying more leaves.

A simple ongoing routine

Check equipment and livestock daily. During regular water changes, remove dead leaves, clear debris around the planting, trim as needed, and record fertilizer doses. Treat replacement tap water for chlorine and chloramine. Newly installed nutrient-rich soils may require extra water changes and testing according to their manufacturer’s startup directions.

For a lower-maintenance red accent or a different growth habit, compare the options in our red aquarium plants guide. Choose the plant that fits the conditions you can maintain consistently.

40-Gallon Breeder Tank: Dimensions, Setup, and Stocking

A 40-gallon breeder tank is a wide, relatively shallow aquarium with a nominal footprint of 36 by 18 inches. The extra front-to-back space makes it useful for planted layouts, carefully chosen community fish, and some breeding projects. “Breeder” describes the tank’s proportions; it does not mean every fish can breed or live comfortably in it.

Before buying, check the exact outside dimensions, the stand requirements, and the adult size of your intended fish. A 40-gallon breeder is different from a narrower 40-gallon aquarium.

40-gallon breeder dimensions and filled weight

The familiar nominal size is 36 inches long × 18 inches wide × 16 inches high. Frames and manufacturing differences change the actual measurements, so do not buy a tightly fitting cabinet or lid from that shorthand alone.

For example, Aquarium Masters lists its AM11040 breeder at 36.5 × 18.25 × 16.88 inches, with an empty weight of 52.8 pounds. Other brands and versions differ. Measure the specific aquarium, including its frame, and confirm the lid opening separately.

Forty US gallons of freshwater weigh approximately 334 pounds. Add the glass, substrate, rocks, equipment, and any water held outside the display. A complete setup can weigh well over 400 pounds. Water displaced by decorations reduces the actual water volume, but that is not a reason to use an undersized stand.

Use a purpose-built aquarium stand approved for the tank’s footprint and total load. Follow the aquarium manufacturer’s support instructions, keep it level, and leave no unsupported overhang. Do not assume an ordinary dresser is suitable or add foam beneath a framed aquarium unless its manufacturer calls for it.

Current tank options worth comparing

These are product options based on published specifications, not hands-on test results. Check the exact model, local availability, shipping condition, and what is included before ordering.

  • Aqueon Standard Glass 40 Breeder: a conventional framed glass option for a separately chosen filter, light, and lid. It remains listed by US retailers including Petco. Use Aqueon’s product information and the seller’s exact dimensions to confirm fit; do not confuse it with another 40-gallon shape.
  • Aquarium Masters 40 Breeder, AM11040: a manufacturer-listed alternative with the dimensions above. Ask a local dealer about availability. The manufacturer also lists a separate non-tempered version, AM11043; these are distinct model numbers.

The earlier comparison included two SeaClear aquariums measuring 36 × 15 × 16 inches. They may suit other projects, but their narrower footprint does not make them equivalent replacements for an 18-inch-wide breeder. Compare the actual shape, not just the gallon label.

Never assume a glass panel can be drilled because someone drilled another tank of the same advertised size. Confirm the construction of the exact tank and panel with its manufacturer. Tempered glass cannot be drilled safely.

Equipment checklist

  • Filter: choose capacity and media space for the intended livestock. A hang-on-back or canister filter can suit a community setup; an air-driven sponge filter is useful around small fry. Protect exposed intakes and make sure water moves through the tank without exhausting the fish.
  • Heater and thermometer: tropical fish usually need stable heating. Size the heater using the manufacturer’s guide and the difference between room temperature and target water temperature. Check the thermometer rather than trusting the dial alone.
  • Lid: allow room for equipment while closing escape gaps. Match the actual frame and openings, not merely a “36-inch” label.
  • Light and timer: choose light for the plants or corals you will keep. A fish-only tank does not need an intense plant or reef fixture.
  • Water-care supplies: conditioner for chlorine and chloramine, ammonia/nitrite/nitrate tests, a thermometer, siphon, and dedicated aquarium buckets.
  • Safe installation: use drip loops and appropriate electrical protection. Keep plugs and power strips away from water and follow each device’s immersion instructions.

Allow space behind the stand for the filter and hoses, and above it for opening the lid. Place the aquarium away from direct sun, drafts, and busy routes where it could be struck.

Set up and cycle before adding fish

  1. Inspect the tank and stand, then install them according to the manufacturer’s instructions. Arrange stable hardscape and suitable substrate before filling.
  2. Fill with conditioned water, start the filter, and establish the temperature required by your planned livestock. Check for leaks and proper circulation.
  3. Use a fishless cycling method with an aquarium-specific ammonia source and follow that product’s dosing instructions. Do not add household cleaners or dose ammonia into a tank containing animals.
  4. Test ammonia, nitrite, and pH during cycling, and track nitrate as the system develops. Wait until the filter can process the method’s prescribed ammonia dose and both ammonia and nitrite return to zero before stocking.
  5. Change water as needed to bring nitrate into a suitable range, confirm temperature and water parameters, and introduce compatible fish gradually while continuing to test.

Clear water does not prove that a tank is cycled. The aim is to establish biological filtration that processes waste, not simply to wait for dust to settle. DrTim’s fishless cycling instructions illustrate why dosing and test results must be considered together; its doses apply to its own products, not every ammonia solution.

Stocking ideas for a 40-gallon breeder

Start with a theme and research each species’ adult size, temperature, hardness, social needs, and temperament. There is no reliable “one inch of fish per gallon” rule. A wider footprint provides useful room, but it does not overcome incompatible water needs or aggression.

  • Small-fish community: one suitably sized school of small tetras or rasboras can be the focus, with a compatible group of smaller bottom-dwelling fish if the substrate, temperature, and total stocking allow it. Plan group sizes before adding a centerpiece fish.
  • Livebearer aquarium: guppies can suit an appropriately maintained setup with suitable water hardness. Plan for rapid population growth if keeping both sexes; a breeder tank is not unlimited nursery space. Our guppy and molly guide discusses identification and responsible fry care.
  • Planted species-focused tank: choose one small species and build the layout around its needs, leaving open swimming areas and access for cleaning.
  • Breeding project: select the species first. Egg protection, gentle filtration, appropriate first foods, and separate grow-out space may matter more than the tank’s label.

Do not buy an adult Oscar, a common pleco, or a group of large cichlids for this tank on the assumption that extra filtration will make them fit. The old recommendation of an Oscar or six discus/angelfish was not a responsible general stocking plan. Large fish need species-specific housing with adequate adult swimming space and territory; Aqueon’s large-fish size chart shows how far some outgrow ordinary community aquariums.

Plants and layout

The broad base gives you room to arrange wood, rocks, and plants while leaving a swimming lane. Anubias and Java fern can be attached to hardscape with their rhizomes exposed. Rooted plants need an appropriate substrate and nutrient supply. Check mature plant size so a large sword does not crowd the whole aquarium.

For a compact red accent, see our Alternanthera reineckii Mini care guide. It needs more attention to light and nutrients than the easiest shade-tolerant plants. For attachment methods, read which aquarium glue is suitable for plants.

Can you use it for saltwater?

Yes, with a marine-specific plan. You will need suitable saltwater preparation, reliable salinity measurement, temperature control, biological filtration, and circulation suited to the animals. Coral lighting requirements depend on the corals; a freshwater plant light is not automatically a suitable reef light.

A protein skimmer can help with waste export, but it is not an automatic requirement for every possible 40-gallon setup. Likewise, strong direct flow is not appropriate for every animal. Choose livestock and equipment together, and leave room in the budget for testing and ongoing maintenance.

Water changes and ongoing care

As a starting routine for a moderately stocked freshwater aquarium, consider a weekly partial water change of about 25%, then adjust to test results, feeding, and livestock needs. In a tank actually holding 40 gallons, that is 10 gallons; substrate and decorations usually reduce the water volume.

Condition replacement water, match temperature reasonably closely, remove accumulated waste, and service the filter without replacing all biological media at once. Evaporation top-offs do not remove nitrate or other dissolved waste. For saltwater, match salinity during water changes and replace evaporation with appropriate freshwater, not more saltwater.

There is no universal rule forbidding changes larger than 30%. Water quality problems can require more, with care to avoid abrupt temperature or chemistry differences. More water volume buffers some changes, but a 40-gallon tank still needs testing, maintenance, and sensible stocking.

Can a Turtle Live in a 10-Gallon Tank? Housing and Upgrade Guide

Can a Turtle Live in a 10-Gallon Tank? Housing and Upgrade Guide

A 10-gallon tank is not a suitable long-term home for a red-eared slider or the other commonly kept aquatic turtles discussed here. A tiny hatchling fitting inside it does not make it a sound adult-housing plan. Buy for the species’ expected adult needs, including swimming space and a dry basking area.

If you already have a turtle in a ten-gallon aquarium, use this guide to plan an upgrade. Do not rely on a promise that the tank will last a year: growth, species, health and the layout determine when housing becomes inadequate.

Why ten gallons is misleading

The capacity printed on an aquarium assumes a full container. A turtle setup may hold substantially less water because it needs escape clearance and a dry area. Rocks and equipment also take up space. The useful swimming footprint matters as much as the nominal volume.

A large filter cannot create swimming room, and a small floating dock is not automatically a usable basking platform. Before buying a kit, ask whether an adult turtle could turn, swim, surface and climb out comfortably in the completed layout.

How much space should you plan for?

VCA’s aquatic turtle housing guidance, using red-eared sliders as its example, describes 10 gallons of water per inch of shell length as one planning guideline, alongside adequate swimming dimensions and a dry basking zone. This refers to water volume, not simply the aquarium’s label.

Under that guideline, a turtle with a 6-inch shell suggests roughly 60 gallons of water before allowing for the rest of the enclosure. It is a planning example, not a guarantee that every six-inch turtle belongs in the same setup. Confirm species, adult size and swimming ability with a reptile veterinarian.

MedVet’s aquatic turtle guide gives a 40–55-gallon enclosure example for a five-inch turtle. Both references illustrate why a ten-gallon starter tank should not be treated as a lasting solution.

Identify the turtle before deciding water depth

Red-eared sliders are not interchangeable with every turtle sold as a pet. Species differ in swimming ability, preferred habitat and adult size. A box turtle or tortoise needs a different housing approach altogether.

Do not automatically fill a deeper tank to the top when moving a weak, sick or unfamiliar turtle. Get species-specific guidance, provide secure access to the surface and avoid gaps where the animal could become trapped. An enclosure should prevent escape without blocking necessary ventilation.

What the replacement enclosure needs

  • Usable swimming space: sufficient length, width and appropriate depth for the individual.
  • A stable dry basking area: the turtle must be able to climb out and dry completely.
  • Suitable heat and UVB: these serve different functions; a decorative LED does not replace either.
  • Effective filtration: chosen for the actual water volume and the turtle’s waste load.
  • Safe construction: a support rated for the filled enclosure, secured equipment and no swallowable gravel or unstable rock piles.

Plan the whole enclosure before buying accessories. A cheap kit is not a saving if its tank, dock and lighting all need replacing immediately.

Heating and lighting: measure, don’t guess

MedVet lists adult aquatic-turtle water temperatures of about 75–80°F and a basking area around 85–90°F in its general guide. Treat these as reference points to discuss for the species and age you keep, not universal settings for every turtle. Measure water and basking temperatures separately.

Use reptile UVB equipment with positioning and replacement intervals appropriate to the product and animal. Ordinary glass between a UVB lamp and the turtle interferes with useful exposure. Follow the lamp’s distance, fixture and screen guidance rather than assuming one bulb strength or one mounting distance fits every enclosure. Provide a normal dark period instead of decorative colored lighting all night.

If your turtle is currently in a ten-gallon tank

  1. Confirm its identity and shell length. Arrange a reptile veterinary visit if the species or health is uncertain.
  2. Assess the immediate setup. Check water quality, measured temperatures, basking access and whether the turtle can move safely.
  3. Arrange appropriate larger housing promptly. A purpose-built enclosure or a suitable water-safe stock tank may be an option when a glass aquarium is impractical.
  4. Prepare equipment before moving the turtle. Check the filter, temperature controls, dry area and escape prevention.
  5. Seek responsible rehoming help if necessary. Contact a reptile rescue or veterinarian rather than releasing the animal outdoors.

Temporary medical or emergency housing should follow the veterinarian’s instructions. It is not an exception that makes a ten-gallon tank a recommended purchase for permanent care.

Keep water clean without destroying the filter

Remove uneaten food and waste promptly, test the water and adjust partial water changes to the actual conditions. Prepare replacement water appropriately and avoid abrupt temperature changes. A filter reduces the maintenance burden but does not eliminate it.

Do not routinely discard all biological filter media or scrub an occupied setup with household soap. Preserve established media during normal servicing and follow equipment instructions. Disinfection after disease requires a separate plan. Our filtration explanation covers the shared principle of biological waste processing; it is not a turtle-specific stocking formula. The rock-cleaning guide explains gentle routine cleaning and why unknown materials deserve caution.

US turtle ownership and hygiene

The FDA states that turtles with shells under four inches cannot be sold as pets in the United States. A tiny animal offered for sale is not evidence that a tiny aquarium is appropriate.

Healthy-looking turtles can carry Salmonella. Wash hands after contact with the turtle, its water or equipment; keep turtle supplies out of food-preparation areas and use dedicated cleaning equipment. Follow the FDA’s advice on protecting young children and other people at greater risk.

Choose the habitat before the turtle

Budget for adult housing, ongoing electricity, filtration, UVB replacement, food and veterinary care. Ten gallons may be useful for other aquarium projects, but it should not dictate which turtle you bring home. For general water and equipment concepts, see our aquarium basics hub, alongside a species-specific reptile care plan.

This research-based guide focuses on housing decisions. It does not claim personal testing of turtle kits or replace an examination of an unwell turtle.

Alternatives to Fish Food: Safe Options When You Run Out

Alternatives to Fish Food: Safe Options When You Run Out

If you run out of fish food, first check what your species normally eats. A small serving of an appropriate alternative can bridge a short gap, but kitchen scraps are not a balanced replacement for aquarium food. For many healthy adult fish, missing a single meal is preferable to adding an unsuitable food or a large amount of waste.

That is not a fasting plan for fry, sick or underweight fish, or species that need frequent feeding. Obtain suitable food promptly, and keep the advice below specific to the fish you actually own.

What can you feed fish instead of fish food?

Start with another suitable aquarium food if you have one: properly sized pellets, flakes, or an appropriate frozen food. Check its intended species, condition, and storage instructions. A different brand with the right nutritional purpose is usually a more predictable choice than an improvised recipe.

  • Plant-eating fish and suitable omnivores: a small piece of washed zucchini or cucumber, or a little softened leafy vegetable, may be accepted. This does not make vegetables a complete diet for every pleco or community fish.
  • Fish that eat animal foods: an appropriate aquarium frozen food, such as suitably sized brine shrimp or mysis, is a useful option. Thaw only the portion needed and follow the package directions.
  • Larger fish accustomed to seafood: a small, boneless piece of plain, unseasoned fish or shrimp can be an occasional option. Cut it to a size the fish can swallow comfortably; do not assume it suits tiny fish or provides a complete diet.
  • Fry and specialist feeders: obtain the correct small live or prepared food. Adult-fish kitchen substitutes are not a dependable nursery feeding plan.

Aqueon’s guide to running out of fish food includes vegetable options. Use them selectively: broad labels such as “herbivore” or “carnivore” are only a starting point, not proof that every item is appropriate.

Prepare a small portion and watch it being eaten

  1. Choose a plain ingredient. Avoid seasoning, oil, butter, brine, dressing, and sauces. Wash vegetables thoroughly and remove hard parts that the fish cannot manage.
  2. Soften firm vegetables if necessary. Briefly blanch or steam them in plain water, then cool completely. The goal is a manageable texture, not a large portion of vegetable puree.
  3. Offer less than you think you need. Start with a tiny piece or a few small particles and observe whether the fish actually eats them. A universal number of peas or percentage of body weight is not practical across different species and foods.
  4. Remove leftovers. Siphon loose particles after the feeding. Check clipped vegetables frequently and remove them before they soften, break apart, or deteriorate; do not leave a forgotten piece in the tank overnight.

Do not keep adding different foods because the first one was ignored. Refusal may mean the food is unsuitable, the fish is stressed, or water conditions need attention. Uneaten food creates a second problem without solving the first.

Foods to leave out of the aquarium

  • Bread, crackers, cereal, pastries, and other processed snack foods.
  • Seasoned leftovers, fried foods, deli meats, sausages, and food packed in sauce or brine.
  • Beef, pork, chicken, and pet foods intended for cats or dogs as general aquarium substitutes.
  • Moldy, rancid, expired, or improperly stored feed.
  • Wild-caught insects, worms, or small fish from places with unknown pesticide exposure or disease risk.

Do not make bread a fish-food substitute. Its poor nutritional fit and potential to foul the water are sufficient reasons to avoid it; dramatic claims that it inevitably expands inside a fish are unnecessary. Fruit, rice, oatmeal, and egg mixtures are also not useful default emergency choices for an unspecified aquarium. There are more predictable options.

Match the diet to the fish

A community aquarium may need more than one food and more than one delivery method. Surface feeders can intercept food before bottom dwellers receive any. Feed the bottom fish deliberately rather than expecting them to live on scraps. The Merck Veterinary Manual’s nutrition guidance emphasizes species differences, suitable particle size, and targeted feeding.

Bettas: choose food formulated for bettas or suitable small animal foods. Vegetables are not a replacement for their normal diet. Our betta food guide discusses suitable everyday choices.

Goldfish: use a balanced goldfish food as the foundation. A vegetable supplement is not a complete replacement, and peas are not a universal treatment for buoyancy problems.

Plecos and other catfish: identify the species. Some need much more animal material than others, and “algae eater” does not mean a fish can survive indefinitely on whatever grows on the glass.

Mixed tropical tanks: compare the foods with each inhabitant’s needs, not just the picture on the container. Our tropical fish food guide is a starting point for choosing a regular staple.

Can homemade fish food replace a complete diet?

A homemade mixture can be useful in a carefully planned feeding program, but combining seafood, vegetables, and gelatin does not prove that it supplies all required nutrients in suitable proportions. The old recipe on this page lacked ingredient quantities and a nutritional basis, so it was not a reliable complete diet.

For routine feeding, use a suitable formulated staple and add appropriate variety. If you want homemade food to provide most of the diet, obtain species-specific help from an aquatic veterinarian or nutrition specialist. Do not add human vitamin supplements by guesswork. The Merck overview of fish nutrition explains why requirements differ and why food left dissolving in water is a problem.

Frozen food, live food, and storage

Frozen fish food is not shelf-stable. Keep it frozen as directed, thaw only what you will use, and discard a thawed portion rather than repeatedly thawing and refreezing it. Freeze-dried food is a different product and follows different storage directions.

Buy live foods from a dependable culture source instead of collecting random organisms outdoors. Live food is not automatically safer or more nutritious simply because it is alive. Keep dry feed tightly closed, cool, and dry; replace it if its smell, appearance, or storage history raises concerns.

What if you will be away?

Do not turn a one-meal shortage into a rule that all fish can safely go a week without food. Age, body condition, species, and temperature affect feeding needs. Make a plan for the actual animals before traveling.

A knowledgeable sitter can use individually measured portions. If you choose an automatic feeder, test its portions and reliability well before leaving, using the food it will dispense. Ask someone to check equipment and livestock too. Aqueon’s travel preparation guide recommends portioning meals to reduce feeding mistakes.

If an alternative food clouds the water

Remove the remaining food, check that the filter is working, and test ammonia and nitrite. Change water as needed with conditioned, temperature-appropriate replacement water. Keep aeration adequate, especially if fish breathe rapidly or gather at the surface. See our guide to improving aquarium oxygenation.

Return to the appropriate regular diet as soon as possible. The useful emergency solution is a small, species-appropriate meal and clean water—not a longer list of human foods to experiment with.

Tiger Shovelnose Catfish: Adult Size and Care Requirements

Tiger Shovelnose Catfish: Adult Size and Care Requirements

A tiger shovelnose catfish is a large predatory catfish for a specialist enclosure, not a typical home community aquarium. The small striped juvenile in a store can become several feet long. Its eventual swimming space, filtration, and long-term care need to be arranged before purchase.

The name is also less precise than it sounds. Several related fish are sold under shovelnose names, so confirm the scientific identification rather than relying on a shop label. This guide explains the shared care challenges and where species-specific information matters.

Which fish is a tiger shovelnose?

These South American catfish belong to the genus Pseudoplatystoma. Older aquarium descriptions often use P. fasciatum broadly, but it should not be treated as the identity of every striped shovelnose. A taxonomic revision by Buitrago-Suárez and Burr distinguished eight species using features including markings and anatomy.

Ask the seller for the scientific name and source of the fish. A juvenile photograph alone may not settle its identity, and a fish sold as a hybrid needs a separate assessment. Do not assume that a hybrid will remain smaller or be easier to house.

Striped shovelnose catfish with a broad flattened head and long barbels
The flattened head, long barbels, and bold markings are distinctive, but a common name is not a confirmed species identification.

Adult size, growth, and lifespan

Plan for a fish measured in feet, not inches. As one species-specific example, FishBase lists Pseudoplatystoma tigrinum at a maximum reported total length of about 51 inches and a reported age of 18 years. These are records for that species, not a promise of the size or lifespan of every fish sold under the common name.

There is no dependable universal growth schedule such as “12 inches every two years.” Identity, age, feeding, water quality, and health affect growth. Nor is 30 inches a safe upper limit simply because a fish lives in captivity. Restricting food or keeping it cramped is not a humane way to control size.

Make the adult housing available before the juvenile needs it. A future upgrade that depends on moving house, finding money, or donating the fish is not a reliable care plan.

Tank size: why 150–180 gallons is not an adult plan

The previous version of this guide promoted 150- and 170-gallon aquariums and described 180 gallons as an adult minimum. Those recommendations understated the problem. Aqueon’s large-fish care chart, for example, lists 1,000 gallons for tiger shovelnose catfish. Treat that as an indication of scale, not a guarantee that any enclosure holding 1,000 gallons is suitable.

Usable length and width matter as much as volume. The fish must be able to turn without bending around obstacles, swim normally, and rest without being crowded by tankmates. A tall, narrow tank can hold substantial water and still have an unsuitable footprint.

An adult setup may require a purpose-built indoor pond or custom aquarium, with structural support, safe electrical installation, dependable filtration, and access for maintenance. Have an experienced large-fish keeper or aquatic professional assess the actual enclosure and species. This is far beyond a standard breeder-tank setup.

Layout, filtration, and water quality

  • Keep swimming space open. Secure any large wood or smooth rocks so they cannot shift. Avoid narrow gaps, sharp edges, and decorations that reduce turning room.
  • Provide appropriate shelter. A juvenile needs a retreat large enough to enter and leave safely. Reassess openings as it grows.
  • Use a secure cover. Allow for ventilation and equipment while preventing escape. Plan maintenance so the fish is not repeatedly startled or cornered.
  • Build filtration around the waste load. Large meals produce substantial waste. Biological filtration, mechanical waste removal, circulation, and oxygenation all need attention; a filter’s advertised gallon rating is not the whole design.
  • Prepare for power loss. Have a practical backup-aeration plan for the enclosure. Our aquarium oxygenation guide explains why surface exchange and circulation matter.

Fully cycle the system before adding the fish. Test ammonia and nitrite, aiming for zero, and track nitrate and pH rather than waiting for the water to look dirty. Set water-change frequency from the measured waste load and source-water conditions. Condition replacement water for chlorine and chloramine and avoid abrupt temperature changes.

For P. tigrinum, FishBase reports tropical conditions around 72–79°F and pH 6.2–7.2. Confirm suitable conditions for the identified species and its current acclimation instead of treating one range as universal. General hardness and carbonate hardness are different measurements; do not substitute a KH number for a species’ general-hardness requirement.

What should a tiger shovelnose eat?

These are predators, not algae cleaners. Provide a species-appropriate carnivore diet in pieces the fish can handle, and watch that it swallows the food. Do not use a permanently swollen abdomen as the target for a good meal.

A suitable formulated sinking food can provide a practical nutritional foundation when accepted. Hikari Sinking Carnivore Pellets remains a current manufacturer-listed product for smaller carnivorous bottom feeders. Its roughly 0.14–0.16-inch pellets may suit a smaller fish, but the product is not a blanket recommendation for every adult shovelnose. Choose feed size and portions for the individual. This is a specification-based example, not a claim of personal testing.

Appropriate seafood or cultured aquatic foods can add variety, but a diet of one fillet or shrimp alone is not automatically nutritionally complete. Avoid routine feeder-fish purchases and random wild-caught foods as a shortcut. For temporary feeding gaps, see our fish-food alternatives guide.

Adjust meal size and frequency to age, condition, temperature, and the food used. Juveniles and large adults should not automatically receive the same schedule. Offer food where the catfish can find it, remove leftovers, and use long feeding tools rather than fingers near its mouth.

Tankmates: predation is the main risk

A fish does not need to chase a tankmate all day to eat it. Anything small enough to be swallowed is at risk, including fish that seemed safe while the catfish was younger. Similar length alone does not establish compatibility; body shape, mouth size, behavior, and available space also matter.

Do not use a generic list of arowanas, pacu, redtail catfish, and large cichlids as a shopping list. Those animals can add enormous space and waste requirements of their own. Territorial conflict and feeding competition are further concerns.

A single-specimen setup avoids many compatibility problems, although it does not reduce the need for adequate housing. Mixed collections belong in a carefully designed specialist system with a way to separate animals promptly. “Tough enough to take a few knocks” is not an acceptable welfare standard.

Health and handling

Rapid breathing, loss of appetite, damaged barbels, skin lesions, or repeated collisions call for investigation. Check temperature, oxygenation, ammonia, and nitrite first, then seek an aquatic veterinarian when signs persist or are severe. Clean water supports health, but it does not rule out parasites, infection, injury, or nutritional problems. The Merck fish-health overview covers these different causes.

Do not add medication by guesswork or assume every treatment is suitable for a large catfish. Accurate water volume matters for dosing. For transport or major handling, arrange experienced help and equipment that can support the whole fish; a small household net is not an adult transport plan.

Breeding and rehoming

Do not expect routine spawning in a home aquarium, or assume that making a pond muddy reproduces river breeding conditions. Research and aquaculture work on these fish does not translate into a simple home-breeding recipe. Sex and maturity should not be assigned from a casual size comparison alone.

If your fish is outgrowing its enclosure, contact the original seller, experienced aquarium clubs, specialist rescues, or an aquatic veterinarian early. Ask a potential keeper about actual enclosure dimensions and care capacity. Public aquariums may be unable to accept it, so do not treat donation as guaranteed.

Never release it into a river, lake, canal, or outdoor waterway. The U.S. Fish and Wildlife Service’s rehoming guidance recommends responsible alternatives to releasing aquarium pets. Transfer the fish only after a suitable destination and safe transport are arranged.

For most home fishkeepers, choosing a genuinely smaller species is the better decision. A tiger shovelnose is impressive, but its adult needs should decide whether it belongs in your care.

Lemon Tetra Care: Tank Size, Schooling, Diet and Tank Mates

Lemon Tetra Care: Tank Size, Schooling, Diet and Tank Mates

Lemon tetras (Hyphessobrycon pulchripinnis) are peaceful, active schooling fish that suit a planted community aquarium. Their small size does not make them bowl fish: plan for a group of at least 8–10, a long swimming area, and a fully cycled tank.

For a straightforward home setup, we recommend a 20-gallon long aquarium or larger, with plants around the edges and open water through the middle. Choose tank mates only after checking their adult size, temperament, and water requirements.

Lemon tetra care at a glance

Care factor Practical guidance
Adult size Approximately 1.5–2 inches
Group At least 8–10 of the same species
Tank 20-gallon long or larger; prioritize swimming length
Temperature 74–79°F is a practical everyday target
Water Soft to moderately hard; roughly pH 6.0–7.5 and 2–12 dGH (about 36–215 ppm general hardness)
Water quality 0 ppm ammonia and nitrite; manage nitrate with maintenance
Diet Small complete tropical fish food with varied frozen or live supplements
Breeding Egg scatterer; adults may eat eggs and fry

These are husbandry targets, not instructions to change established water suddenly. Ask the seller about the conditions the fish are already accustomed to. Species references list a broader temperature range, but its extremes are not useful goals for routine care.

Appearance, origin, and lifespan

Lemon tetras have a translucent yellow body, yellow-and-black fin markings, and red coloration in the upper part of the eye. Juveniles may be pale. Color depends on age, lighting, surroundings, diet, and condition; it is not a reliable diagnosis of health by itself.

Lemon tetra showing its yellow body and contrasting fin markings

The species comes from Brazil, although its precise distribution and the identity of some related regional forms remain uncertain. Avoid treating every yellow or orange tetra sold under a similar common name as the same fish. The Seriously Fish species account explains those identification questions.

Plan for a commitment of several years. Around five years is a reasonable planning estimate rather than a guaranteed average; individual aquarists have reported specimens living seven years or longer.

Tank size and setup

A long tank provides more useful swimming space than a tall tank of similar volume. Our 20-gallon-long recommendation is a starting point for a modest single-species group, not permission to add an unlimited community. Move up in size when adding other schools or larger bottom dwellers.

  • Plant the back and sides while leaving a clear swimming lane.
  • Provide shaded areas with plants or carefully arranged wood.
  • Use a secure lid and a filter that circulates water without forcing the fish to fight a strong jet.
  • Keep the heater and thermometer accessible so you can check actual temperature.

A 40-gallon breeder aquarium offers more room for planting and a planned community. Whatever the tank size, leave access for cleaning and observe whether every fish can feed comfortably.

Water quality and maintenance

Cycle the aquarium before adding the group. Clear water can still contain harmful waste, so use a suitable aquarium test kit rather than judging safety by appearance. Test ammonia and nitrite after adding fish, after filter problems, and whenever behavior changes.

As an initial routine, change about 20–30% of the water weekly, then adjust to stocking, feeding, and test results. Match replacement water reasonably closely for temperature and chemistry, and treat tap water for chlorine or chloramine. Remove leftover food and accumulated debris without stripping the entire tank clean. Preserve biological filter media instead of replacing all of it at once.

Do not repeatedly add pH-adjusting chemicals to chase an exact number. If your source water is very different from the seller’s, make a long-term water plan before buying fish. A stable, suitable supply is more useful than a one-time reading.

Feeding lemon tetras

Offer a complete tropical flake or small pellet that the fish can swallow easily. Feed a modest portion once or twice daily, watching the group eat, and remove leftovers. Supplement with appropriately sized foods such as frozen daphnia or brine shrimp; treats should not replace a balanced staple.

Spread food across the feeding area if dominant fish take everything. A fish that repeatedly misses meals needs attention even when the rest of the group looks well fed. Aqueon’s tetra guide provides additional feeding and general housing advice.

Tank mates and schooling behavior

Keep lemon tetras with their own species rather than counting unrelated tetras as substitutes for a group. Small, peaceful rasboras, compatible tetras, and appropriately housed small catfish can be considered when the aquarium has enough space for each species’ social group.

Avoid predatory fish, persistent fin nippers, and combinations with incompatible temperature needs. Tiny shrimp may be eaten, so a breeding shrimp colony is not a risk-free pairing. Long-finned or unusually timid fish also need careful observation.

Short displays and chases between males can occur. Repeated injury, a fish trapped in a corner, or exclusion from food requires intervention. Check space, cover, group size, and the behavior of other inhabitants rather than assuming every chase is harmless.

Breeding and raising fry

Lemon tetras scatter eggs and do not provide parental care. For intentional breeding, prepare a separate, cycled spawning setup with gentle filtration and fine plants or a spawning mop. Protect the eggs from the adults and remove the adults after spawning.

Prepare suitable tiny fry foods before attempting a spawn. Newly free-swimming fry need much smaller food than the adults; cultured infusoria can be useful initially, with larger foods introduced as the fry grow. Do not assume crushed adult pellets will be small enough. The FishProfiles firsthand breeding account describes egg predation and early feeding challenges.

There is no guaranteed daily egg count or fixed hatch schedule for every aquarium. A swollen abdomen alone does not establish that a female is carrying eggs; our guide to eggs versus bloating in tetras explains why behavior and other symptoms matter.

Health checks and common questions

Why are my lemon tetras pale or hiding?

New surroundings, bright lighting, a small group, bullying, and illness are possible explanations. Check temperature and water tests first, then feeding, breathing, fins, and social behavior. Persistent deterioration calls for help from an aquatic veterinarian; color alone is not a reason to medicate.

Can they live in a 5- or 10-gallon tank?

We do not recommend those sizes for a permanent lemon tetra group. Choose a longer aquarium that accommodates their activity and social needs.

Are they suitable for beginners?

Yes, for a beginner who has cycled the aquarium, can maintain suitable water, and will keep a proper group. Quarantine new arrivals separately before mixing them with established fish. Keep a record of purchases, test results, water changes, and unusual behavior so problems are easier to trace.

Chili Rasbora Care: Tank Size, Water, Feeding and Tank Mates

Chili Rasbora Care: Tank Size, Water, Feeding and Tank Mates

Chili rasboras (Boraras brigittae), also called mosquito rasboras, are tiny red schooling fish with very small mouths. Their care depends less on buying elaborate equipment than on providing stable water, gentle filtration, enough companions, and food they can actually eat.

For most home fishkeepers, we recommend a mature, planted 10-gallon aquarium or larger with a group of at least 8–12. Smaller specialist setups exist, but a 10-gallon tank gives more room for a group and more margin for routine maintenance.

Chili rasbora care at a glance

Care factor Practical guidance
Scientific name Boraras brigittae
Adult size About 3/4 inch
Group size At least 8–12 of the same species
Recommended starting tank 10 gallons or larger, established and planted
Temperature 74–80°F is a useful everyday target
Water preference Soft, acidic to neutral water; ask about the supplier’s conditions
Filter Gentle flow; protect exposed intakes
Food Fine complete food plus suitably tiny live or frozen foods
Temperament Peaceful; vulnerable to predators and food competition

Identification and natural habitat

Chili rasboras originate from southwestern Borneo, where they inhabit shaded freshwater habitats associated with peat-swamp forests. They were described by Vogt in 1978; claims that they were first discovered in 1991 are incorrect.

Look for a slender body with red coloration and a dark lateral marking. Males are often more intensely colored, while mature females may look fuller. Color alone is not enough to identify every fish: related Boraras species are sometimes mixed or mislabeled in the trade. Ask the seller for the scientific name rather than relying only on “dwarf rasbora.”

Chili rasbora with a red body and dark lateral marking

The Seriously Fish species account discusses their distribution and similar-looking species. Their forest habitat explains the preference for shelter and subdued light, but a home aquarium does not need to reproduce every extreme wild-water measurement.

Tank size and group size

Use a group-based stocking plan, not a fixed number of fish per gallon. Tank dimensions, filtration, plants, feeding, and other inhabitants all affect the result. Start with one group and watch water quality before adding more animals.

A species-focused 10-gallon setup is easier to plan than a crowded miniature community. If you want other schooling fish or bottom dwellers, choose a larger aquarium so each species can have its own suitable group. A lone chili rasbora or a pair does not replace a school.

Setting up a stable planted aquarium

  • Establish the filter first. Do not use these fish to cycle a brand-new tank. Confirm that the system can process waste before stocking it.
  • Provide shelter. Arrange plants at different heights, with shaded spaces and small open areas for feeding.
  • Protect the intake. A sponge filter is one option; cover a power filter’s intake with a suitable prefilter sponge and check it for clogging.
  • Keep flow gentle. Fish should be able to hover and feed without being swept across the aquarium.
  • Control temperature. Use a thermometer and, where needed, a thermostatic heater. Avoid direct sun as a heating method.

Begin with plants that fit the available light and maintenance routine rather than adding equipment simply because a tank is planted. Our low-light aquarium plant guide can help you compare planting options. Leave access to the filter, heater, and substrate for maintenance.

Water parameters: stability before extreme numbers

A practical planning range is around pH 6.0–7.0 and 1–10 dGH, approximately 18–179 ppm general hardness. These are not sharp survival boundaries. Aquarium Co-Op reports keeping chili rasboras in a broader range, while species references emphasize their soft-water origins. The source and acclimation history of your fish matter.

Test your tap water before buying. If it is much harder or more alkaline than the supplier’s water, discuss a sustainable plan with an experienced fishkeeper. Do not suddenly force an established tank to a lower pH with chemicals. GH measures general hardness; KH describes buffering capacity. They are different tests, and deliberately driving KH to zero can make management more difficult.

Use dechlorinated replacement water with reasonably matched temperature and chemistry. For a lightly stocked tank, a modest weekly partial water change is a useful starting routine; adjust its size and frequency using tests and the amount of waste. Small fish still need maintenance.

Ammonia and nitrite should read 0 ppm. Test promptly if fish gasp, stop eating, or act unusually, and correct a water-quality problem before assuming an infection. This aquarium water-testing guide explains the different readings. Keep records so you can recognize changes rather than relying on a single result.

Feeding tiny mouths successfully

Choose a complete food fine enough for the fish to swallow. Finely crushed tropical flakes or an appropriately sized micro food can form the staple, with small live or frozen foods providing variety. Suitable options include baby brine shrimp, microworms, or tiny frozen cyclops; check particle size rather than assuming any package marked “small fish” will work.

Offer small portions once or twice daily and watch individual fish take food. Spread it over a sheltered feeding area so the whole group gets access. Food drifting past the fish or accumulating below them is a sign to adjust its size, quantity, or delivery—not simply add more.

If other fish take every meal first, change the feeding arrangement or separate incompatible competitors. A planted tank may support tiny natural food organisms, but it should not be assumed to feed an adult group without supplemental food.

Choosing tank mates

Chili rasboras are safest with similarly small, peaceful animals that thrive in the same conditions. In a sufficiently large aquarium, carefully selected small tetras or dwarf catfish may be options. Account for the tank mates’ group sizes and activity levels as well as their adult lengths.

Avoid fish large enough to swallow them, persistent chasers, and fast feeders that prevent them eating. Bettas vary individually, so this is not a dependable beginner pairing. A calm-looking large fish can still regard a chili rasbora as food.

Adult dwarf shrimp can be compatible, although tiny shrimplets may be eaten. Check the shrimp’s water needs separately; very soft, acidic conditions do not suit every shrimp or snail. See our freshwater shrimp guide before planning a mixed setup.

Breeding chili rasboras

These fish scatter eggs and do not guard their offspring. A mature, densely planted tank may produce occasional fry, but adults can eat eggs and young. For a planned attempt, prepare a separate stable setup with gentle filtration, fine vegetation or a spawning mop, and a way to keep adults away from eggs.

Prepare microscopic fry food cultures before spawning. Feed only once fry are free-swimming and ready to eat; newly hatched fry initially rely on their yolk reserves. Larger foods can be introduced as their mouths develop. Raising fry successfully is more demanding than simply seeing eggs, so avoid relying on a promised egg count or rigid day-by-day schedule.

Common problems and buying checklist

Why are my chili rasboras pale?

Juvenile coloration, transport, lighting, and stress can all affect appearance. Look at appetite, breathing, fins, and behavior alongside color. A pale fish is not automatically sick, and a bright fish is not proof that water is safe.

Are chili rasboras beginner fish?

They can suit a prepared beginner with an established aquarium, but are a poor choice for an uncycled bowl or an unstable first setup. Tiny food and close observation are important.

How long do they live?

Plan for several years of care. Published hobby estimates vary, so a precise average or guaranteed maximum would be misleading. Purchase healthy fish and maintain consistent care rather than treating a lifespan figure as a promise.

Before buying, confirm the species, group size, supplier’s water conditions, and foods being accepted. Quarantine arrivals separately before adding them to an established community. Do not add medication solely because the fish are small or newly purchased; persistent symptoms need an appropriate diagnosis, ideally with an aquatic veterinarian’s help.

Frogspawn Coral Care: Placement, Lighting, Feeding and Health

Frogspawn Coral Care: Placement, Lighting, Feeding and Health

Frogspawn coral is a large-polyp stony (LPS) coral valued for its rounded, branching tentacle tips and movement in the current. It belongs in an established saltwater reef aquarium with stable chemistry, appropriate reef lighting, and room for its tentacles to expand without touching neighbors.

For a first specimen, a healthy aquacultured branching frag is usually a more manageable choice than a large wall colony. Start with the seller’s lighting and water information, then make changes gradually. “Hardy” does not mean tolerant of sudden salinity changes, torn tissue, or an uncycled aquarium.

Branching versus wall frogspawn

The name frogspawn is used for more than one coral. Fimbriaphyllia divisa has a continuous wall-like skeleton, while Fimbriaphyllia paradivisa forms separate skeletal branches. Older labels commonly use Euphyllia. The World Register of Marine Species recognizes Fimbriaphyllia divisa as the accepted name.

This distinction matters for handling and propagation: a separate branch can sometimes be divided through exposed skeleton, whereas cutting a wall colony involves much greater risk to continuous living tissue. Ask the seller which form you are buying and whether the frag has healed.

Frogspawn coral with expanded fleshy tentacles

Practical water and placement targets

Factor Starting guidance
Temperature About 76–80°F; keep daily changes small
Salinity About 35 ppt, roughly specific gravity 1.026 at reef temperatures
Alkalinity A stable target around 8–9 dKH
Calcium About 400–450 ppm
Magnesium About 1,250–1,400 ppm
pH Approximately 7.8–8.3; assess daily trends
Light Moderate, with gradual acclimation
Flow Broad, indirect movement; no concentrated jet against flesh
Space Clearance for full expansion, sweepers, and future growth

These are practical reefkeeping targets, not a prescription to rapidly correct every small deviation. Compare them with your salt mix and supplier’s system. Bulk Reef Supply’s water-testing guidance emphasizes holding a consistent target instead of allowing large fluctuations within a nominally acceptable range.

Test alkalinity often enough to establish consumption, especially after adding stony corals. Dose only from measured demand and the product instructions. Keep a dated log of tests, water changes, and additions so an equipment problem or dosing error can be traced.

Replace evaporation with fresh RO/DI water, not additional saltwater. Use properly mixed saltwater for water changes and verify its salinity before adding it. An automatic top-off system can help maintain water level, but still needs inspection and a safe reservoir arrangement.

Lighting and water movement

Do not place a new frag high under powerful lights simply to make its colors brighter. Ask what light level it came from. If that information is unavailable, a moderate location around 75–150 PAR is a cautious starting range, with observation and gradual adjustment. PAR is measured at the coral; a fixture’s percentage setting is not a transferable light measurement.

Watch for sustained retraction, paling, or tissue damage after a lighting change. None identifies the cause by itself: check water chemistry, flow, and nearby animals too. Tidal Gardens’ frogspawn care guide discusses lighting and circulation.

The tentacles should move rather than remain pinned against the skeleton. Redirect or diffuse a pump outlet if flow is one-sided and forceful. Leave enough circulation to prevent debris collecting around the colony. Our aquarium wavemaker guide explains adjustable circulation options; the highest flow rating is not automatically the best choice.

Placement and coral neighbors

Choose a stable mounting point that keeps living tissue clear of sharp rock edges and prevents the coral from falling. Handle the plug or skeleton rather than squeezing the inflated head. Allow the coral to retract before moving it, and minimize handling.

Leave several inches of open space in every direction initially, then watch tentacle reach after dark and as the coral grows. A fixed gap is not a guarantee: water movement can carry sweeper tentacles toward a neighbor. Increase the distance if any contact occurs.

Do not assume frogspawn, hammer, and torch corals are safe touching because shops group them together. Compatibility varies, and torches can injure neighboring colonies. Clownfish may also irritate or damage a frogspawn by repeatedly pushing into it; the coral is not a substitute anemone that must accept hosting.

Does frogspawn need target feeding?

Photosynthetic symbionts supply much of the coral’s energy. Direct feeding can be optional in a suitably maintained reef; it should not compensate for unsuitable light or poor water quality. Tidal Gardens notes that frogspawn may respond weakly to direct feeding.

If you try feeding, offer a very small amount of fine coral food or suitably small thawed marine food and observe whether it is retained. Do not force large pieces into the mouth or repeatedly feed a retracted, deteriorating colony. Remove uneaten food and stop if feeding increases waste without an obvious response.

Monitor nitrate and phosphate instead of assuming either dirty water or zero nutrients is ideal. Changes to feeding and nutrient export should be gradual and evaluated alongside the whole reef.

Retraction, tissue loss, and brown jelly

Brief retraction can follow disturbance. Persistent collapse, exposed fresh skeleton, receding tissue, or brown disintegrating material warrants prompt investigation. Brown jelly is a descriptive warning sign, not something that can be diagnosed from water quality alone.

  1. Check temperature, calibrated salinity, alkalinity, and recent dosing or maintenance changes.
  2. Look for direct pump damage, stinging neighbors, fish picking, and visible pests.
  3. If tissue is rapidly breaking down, seek experienced coral-health help promptly and isolate the affected colony in a suitable stable reef quarantine system if available.
  4. Avoid blowing decaying tissue around the display or repeatedly moving the colony between unsuitable containers.

Tidal Gardens’ troubleshooting guide explains aggression, pests, and rapid tissue deterioration. A coral dip is not a universal cure and may not eliminate eggs or all hidden pests. Use only a product suitable for the purpose, follow its label, and do not improvise antibiotic or peroxide doses.

Propagation: what beginners should avoid

Do not cut fleshy polyps with household scissors. Fragging requires knowing exactly where living tissue ends, using appropriate equipment, and working with a healthy colony. Branching frogspawn is generally easier to propagate than wall frogspawn; beginners should seek a demonstration from an experienced coral propagator before attempting either.

Polyp bailout, where living tissue separates from the skeleton, is a stress response—not a recommended reproduction method. Investigate the underlying conditions instead of deliberately trying to trigger it.

Buying and routine care checklist

  • Choose a specimen with intact tissue and ask to see it under ordinary lighting as well as blue light.
  • Confirm the growth form, healed-frag status, and seller’s husbandry conditions.
  • Plan inspection and quarantine before purchase; a quick dip alone does not guarantee a pest-free coral.
  • Check expansion, tissue edges, equipment, and water level daily; record chemistry trends on a regular schedule.
  • Allow space for growth and reassess neighbors rather than repeatedly relocating an established coral.

A small frag does not define a minimum tank volume by itself. The aquarium must support stable reef conditions and the adult colony’s spacing needs. Frogspawn can be rewarding for a careful newer reefkeeper, but it is not a low-maintenance decoration.