Choosing the correct substrate for your tank is important as it aids biological filtration, enhances the habitat for your cichlids, is beneficial to live plants and on top of this, adds to the beauty of your fish tank. In this article we jump into the lively debate and explore which is the best substrate for cichlid aquarium.
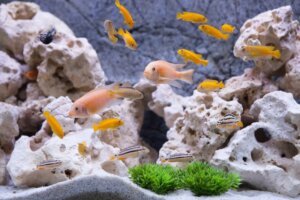
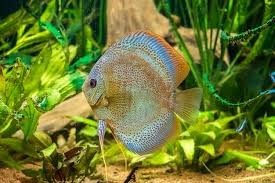
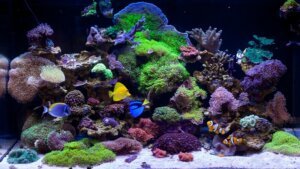
Cichlids are a popular choice with aquarium owners. There are more than 1,000 species of cichlids and they are found in most parts of the world.
It is the species found in the African lakes being considered the most beautiful. Cichlids can be just a few centimeters in size or up to 90cm.
They are popular, not just because of their looks, most of them are easy-going fish that are easy to keep and fun to watch.
They are low maintenance and – if kept in the right conditions- are long-living.
Best Substrate for Cichlid Aquarium
Natural vs. Artificial Substrates
The first question to answer is what is substrate? Substrate is aquarium gravel, sand or any other material poured in a layer on the tank’s bottom.
Substrate fulfils several roles with the important one being that beneficial bacteria live on the substrate and there the bacteria break down leftover food, fish waste and any plant debris and this helps to keep the water clean and the balance of good and bad bacteria in check.
Experimenting with different types of materials helps determine the best substrate for cichlid aquarium.
Natural substrates

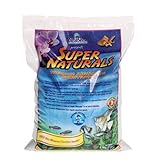
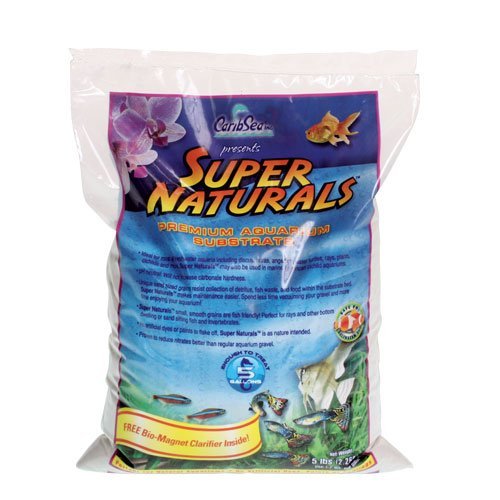
- Unsurpassed buffering capability - will keep you pH at 8.2
- 98% pure calcium carbonate
- Naturally renewable oolitic aragonite
- Sustainably sourced
- Phosphate free
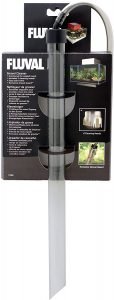
Prices pulled from the Amazon Product Advertising API on:
Product prices and availability are accurate as of the date/time indicated and are subject to change. Any price and availability information displayed on [relevant Amazon Site(s), as applicable] at the time of purchase will apply to the purchase of this product.
These are usually classified as ‘inert’ and ‘active’ and this refers to whether they change the chemistry of the water in the tank so that it supports plant life.
The changes that are made are usually positive because the natural substrate contains micronutrients. Some are designed to reduce the pH of a tank whilst others leech ammonia into the water which is beneficial for the plants.
Active substrates with aragonite help prevent pH swings in fish tanks, whilst one with peat will soften the tank water and one with vermiculate releases magnesium and potassium into the water which are both nutritional to plants.
Pebbles:
 The largest form of natural nitrates can also be made using artificial materials. Pebbles come in every size and color imaginable, and the natural ones are made of rock or quartz.
Pebbles look good but when they are in layers at the bottom of the tank there are large gaps between them, and these can easily trap leftover foods and fish waste which in time can build up and produce nitrates and these are toxic to cichlid (and other fish).
Live plants do not root very easily in pebbles either.
Gravel:
In reality, gravel is just really small-pebbles. Gravel is available in a variety of natural (and artificial) materials and each piece of gravel usually measures between 2-4mm.
The big advantage of choosing gravel is that the gaps between the gravel are small so it is much harder for food or fish waste to get trapped.
Food waste tends to just settle on top of the gravel so that it can be easily cleaned up using a tank vacuum.

- A specially fracted stable porous clay gravel
- Best suited to planted aquaria, but may be used in any freshwater aquarium environment
- Most effective when used alone as an integral substrate bed, but it may be mixed with other gravels
- Not chemically coated or treated and will not alter the pH of the water
- Good for the life of the aquarium and need not be replaced
Prices pulled from the Amazon Product Advertising API on:
Product prices and availability are accurate as of the date/time indicated and are subject to change. Any price and availability information displayed on [relevant Amazon Site(s), as applicable] at the time of purchase will apply to the purchase of this product.
Sand:
Natural sand is another popular type of substrate and comes in a variety of different types- just as it does on different beaches.
The grains of sand are available in different sizes from really fine to coarse and a selection of natural shades.
Aquarium Sand is a popular choice because it helps create the most natural environment for fish like the cichlid that has sand in its native home.
Sand is nice and easy to clean too as there is nowhere for uneaten food or animal waste to go except lie on top of the sand for easy removal.
Variations on sand substrates include crushed coral and crushed shells.
Aquarium soil:
This is specially formulated soil that means that it does not easily mix with tank water to become a muddy mess!
It is popular with those planting many plants in their aquarium as it is rich in nutrients which is good for the plants.
For those not wanting to plant many plants, other substrates are more suitable.
Having said that, some experts have a bottom substrate of soil so that their tank plants thrive and top this with a layer of natural sand.
Artificial substrate
There is a wide variety of artificial substrate available on the market, made from all different materials that does not affect the quality of the tank water.
Artificial pebbles, gravels, sands and soils can all be bought. Artificial pebbles for example, can be bought made from glass, beads and plastic.
Ceramic beads in a rainbow of colors are also available. Like all-natural substrate, those like the artificial beads and pebbles still form gaps where spare food and fish waste can easily accumulate.
And bare bottoms!
Some aquarium fans are adamant that there is no need to have a substrate and do not have any in their tank –this is usually referred to as a ‘bare bottom tank’.
This approach is not possible if you have fish like cichlid that like to dig in the substrate or others who scavenge for food.
The Best Substrate for Cichlids Aquarium
 If you have cichlids, it is important to understand their natural living conditions. Most of the African cichlids come from the African rift lakes.
The waters in these lakes have very high mineral content and a high pH level ranging from 7.7 – 9.3. The water is harder and slightly more alkaline.
If you do not mimic these conditions in your fish tank, your cichlids will lose their color, be unable to breed and be more prone to infection.
Aquarium Ivory Coast sand is a great choice of substrate if you have a fish tank with African cichlids. This is because this substrate contains various natural minerals that are found in their natural habitat and helps keep the tank water crystal clear.
The Ivory Coast black sand is an alternative which can make a dramatic contrast with your brightly colored fish. It is more like a fine gravel than sand but contains a water-purifying bacteria that helps to detox the water.
Many fish experts recommend using coral sand, crushed coral or crushed oyster shell too. These help to balance the pH of the tank water. They prefer hard and slightly alkaline water, and this will also enhance the colors of your fish.

- Aquatic
- Substrate & Gravel
- Freshwater Gravel & Sand
- 20Lb
Prices pulled from the Amazon Product Advertising API on:
Product prices and availability are accurate as of the date/time indicated and are subject to change. Any price and availability information displayed on [relevant Amazon Site(s), as applicable] at the time of purchase will apply to the purchase of this product.
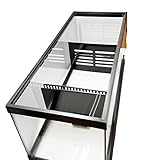
Considerations When Choosing Substrate
There are four important points to consider when choosing a substrate for your cichlid’s tank:
Size of particles
It is important to remember that uneaten food and fish waste and get trapped in the gaps between large particles/ pebbles and this will negatively impact the water quality of your tank as they decompose as the toxins build up.
It is important to consider what your cichlid wants too – they usually like to dig in sand.
Color
There are just so many different colors to choose from and whilst some are bright and whacky, others are totally naturally and enhance the beauty of the fish.
Darker colors can have the effect of making tanks and aquariums look smaller whilst light natural shades enhance their size. Some substrate looks dirty quickly, so this is another consideration.
Impact on the tank water
The African Cichlid is one of many fish species that needs certain water parameters – in this case a higher pH.
One way to achieve this is to add a substrate to the tank that will buffer the water.
Coral is a really good choice for cichlids as it does this successfully and coral sand combines the benefits of the coral on the pH and sand which is the cichlids’ favorite substrate.
Effect on the fish
What you choose as substrate will definitely impact your fish. Substrate with sharp edges can hurt fish.
Light-colored substrate can frighten fish– especially if teamed with bright lights.
To ensure you make a good choice, research the natural habitat and behavior of your cichlid and try to recreate it.
It is important to remember that you do not need to use just one type of substrate. If you need to use crushed coral for your tank but your cichlid much prefers sand, either invest in some coral sand – if you can find it- or mix crushed coral with sand for maximum benefit.
Some cichlid experts recommend using coral sand with aragonite. This is because aragonite is crystallized calcium carbonate which increases the hardness of water and its pH- both these are beneficial for healthy happy cichlids.

- Product quality and customer service have been our highest priority
- Manufactured by Caribbean
- Made in United States
Prices pulled from the Amazon Product Advertising API on:
Product prices and availability are accurate as of the date/time indicated and are subject to change. Any price and availability information displayed on [relevant Amazon Site(s), as applicable] at the time of purchase will apply to the purchase of this product.
Tips for Maintaining and Using Substrate
When choosing a substrate for your cichlids, sand is considered the best. This is because cichlids love to dig in the sand and move it around.
They do scavenge for food in the wild and do make nests in the sand for their eggs. When you are putting aquarium sand or coral sand into your tank, it is best to have the layer at a depth of 2.5 – 5 cm (1-2 inches).
When you are in the pet shop wondering how much to buy, the guide is one pound (450g) per gallon of water.
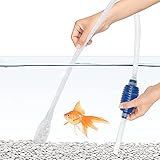
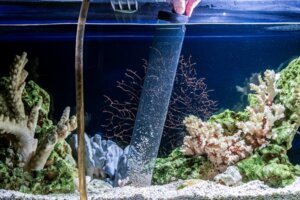
Regular maintenance of the best substrate for cichlid aquarium is crucial for sustaining a balanced ecosystem.
It is important to keep the tank environment well and to remove any food and fish waste from the tank promptly and not let it start to decompose.
You should regularly change the water in your tank once or twice a week – the frequency depends on how many fish and the size of tank.
Once a month, you need to clean all the algae from the tank walls using a sponge, clean the sand by stirring in water to release all the dirt particles and check and clean the filter and pump.
- It is a good idea to test your tank water weekly for nitrate levels and the pH. If your fish seem stressed test the water straight away to pinpoint the problem.
Final Thoughts – best substrate for cichlid aquarium
Selecting the best substrate for cichlid aquarium can significantly impact the health and behavior of the fish.
Choosing natural sand or coral sand for your fish tank will really enhance the environment for your cichlid as it will mimic their natural environment.
Keep the sand clean and healthy for your fish and regularly check the hardness of the water and its pH to ensure these are both within the ideal parameters for your cichlid.
Your fish will definitely enjoy having a substrate of sand or coral sand in their tank and you will have the fun of watching them digging in the sand and maybe even building a nest.
..


![Top [2021] 10 Best Fountain Pumps: Solar, Submersible Water Pumps](https://aquariumhunter.com/wp-content/uploads/2021/03/maxresdefault-2.jpg "Top [2023] 10 Best Fountain Pumps: Solar, Submersible Water Pumps")


 aquariums or fish


")


![[Updated] Best Aquarium Media Reactor in 2023 (REVIEWS)](https://aquariumhunter.com/wp-content/uploads/2021/07/best-aquarium-media-reactor.jpg "[Updated] Best Aquarium Media Reactor in 2023 (REVIEWS)")


 2023")


![[Updated] Top 10 Best Turtle Food (Review) in 2023](https://aquariumhunter.com/wp-content/uploads/2021/08/Best-Turtle-Food.jpg "[Updated] Top 10 Best Turtle Food (Review) in 2023")